> #define BLYNK_PRINT Serial


#include <WiFi.h>
#include <WiFiClient.h>
#include <BlynkSimpleEsp32.h>


// You should get Auth Token in the Blynk App.
// Go to the Project Settings (nut icon).
char auth[] = "DDxHNW5JNArQar0ZUpELNLR-JL0R5I9I";

// Your WiFi credentials.
// Set password to "" for open networks.
char ssid[] = "InwOpec";
char pass[] = "12345678";
char server[] = "oasiskit.com";
int port = 9443;

void setup()
{
  // Debug console
  Serial.begin(9600);

  //Blynk.begin(auth, ssid, pass);
  // You can also specify server:
  Blynk.begin(auth, ssid, pass, "oasiskit.com", 9443);
  //Blynk.begin(auth, ssid, pass, IPAddress(192,168,1,100), 8080);


}
  BLYNK_CONNECTED() {
  Serial.println("App Blynk con!");
}
void loop()
{
  Blynk.run();
  // You can inject your own code or combine it with other sketches.
  // Check other examples on how to communicate with Blynk. Remember
  // to avoid delay() function!
}

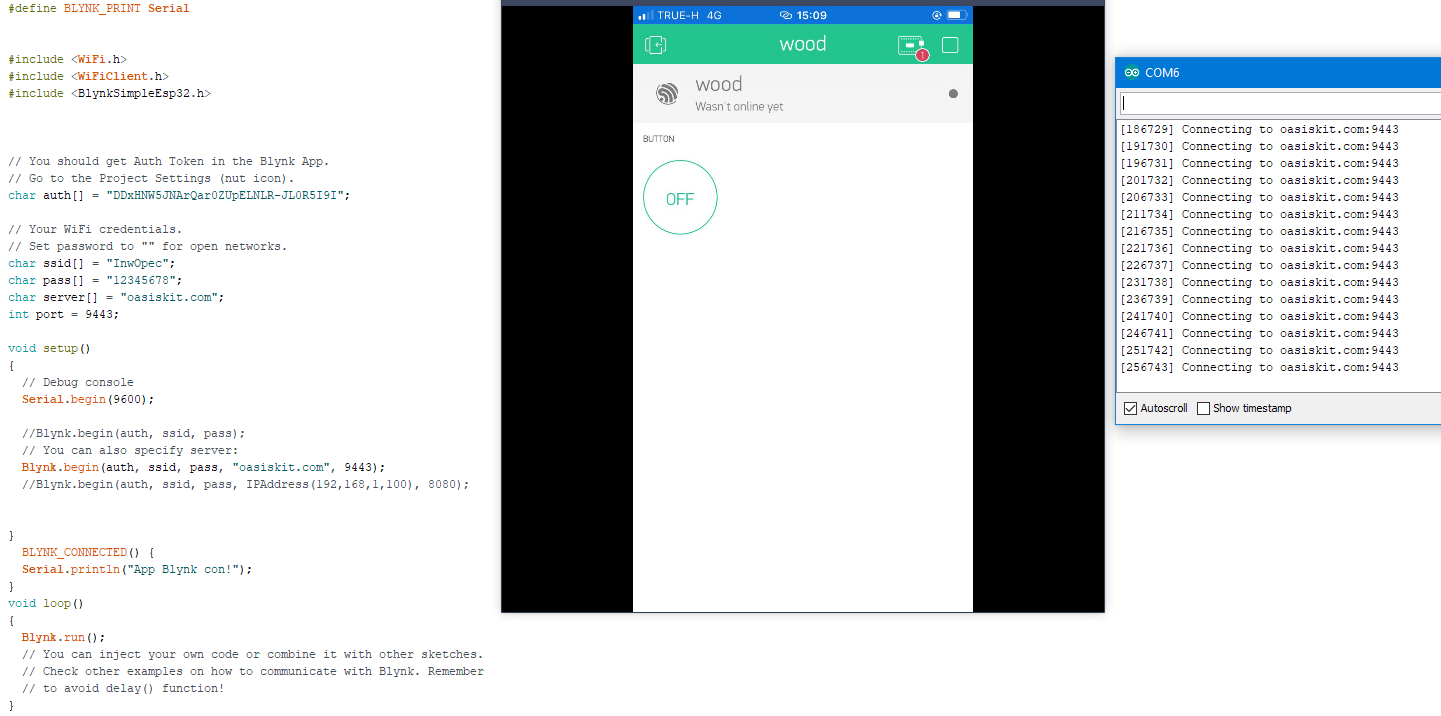
ลองเปลี่ยน 9443 เป็น 8080
1 Likes
ตามที่พี่ @chanthach บอกเลยครับ
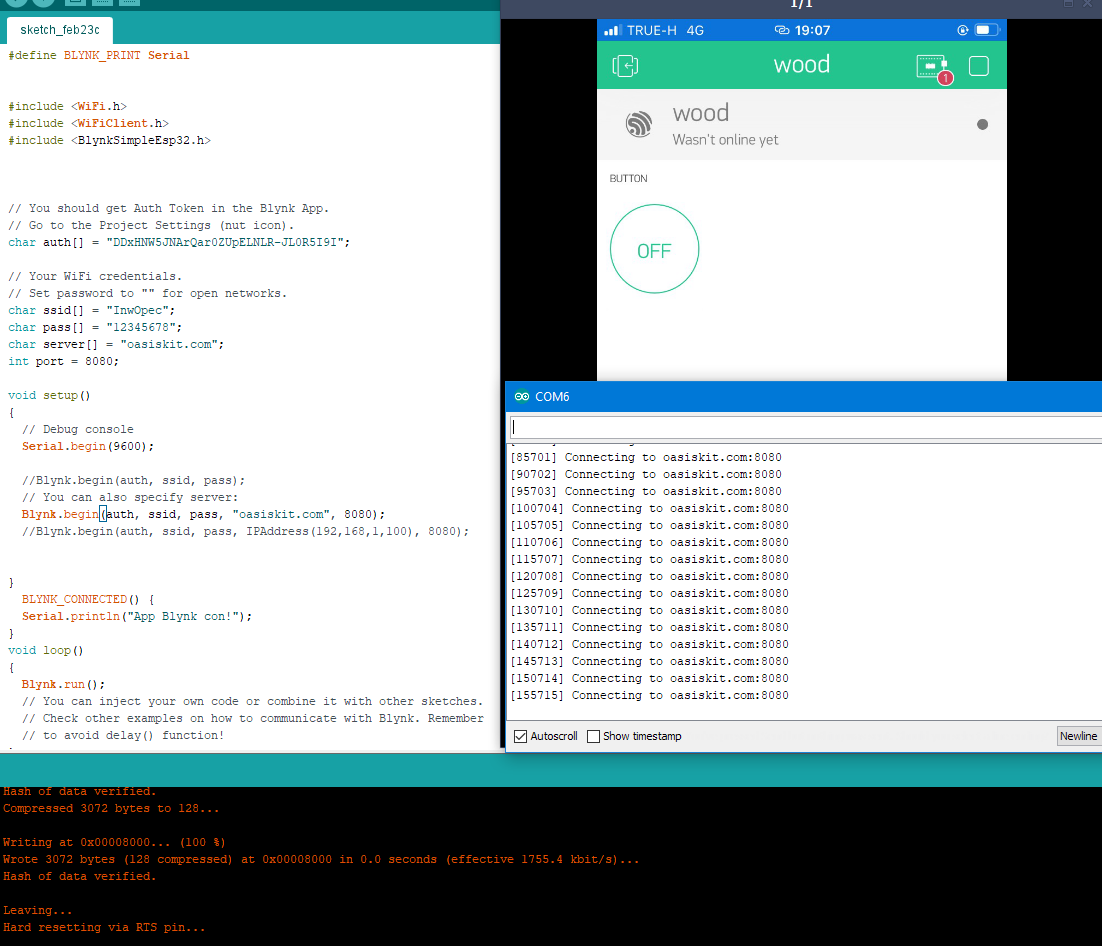
ขอบคุณครับ ผมเปลี่ยนแล้วครับ แต่ ในแอปก็ยังแสดงเป็น offline อยู่ครับ
#define BLYNK_PRINT Serial


#include <WiFi.h>
#include <WiFiClient.h>
#include <BlynkSimpleEsp32.h>


// You should get Auth Token in the Blynk App.
// Go to the Project Settings (nut icon).
char auth[] = "DDxHNW5JNArQar0ZUpELNLR-JL0R5I9I";

// Your WiFi credentials.
// Set password to "" for open networks.
char ssid[] = "InwOpec";
char pass[] = "12345678";
char server[] = "oasiskit.com";
int port = 8080;

void setup()
{
  // Debug console
  Serial.begin(9600);

  //Blynk.begin(auth, ssid, pass);
  // You can also specify server:
  Blynk.begin(auth, ssid, pass, "oasiskit.com", 8080);
  //Blynk.begin(auth, ssid, pass, IPAddress(192,168,1,100), 8080);


}
  BLYNK_CONNECTED() {
  Serial.println("App Blynk con!");
}
void loop()
{
  Blynk.run();
  // You can inject your own code or combine it with other sketches.
  // Check other examples on how to communicate with Blynk. Remember
  // to avoid delay() function!
}
Token app ถูกต้องแล้วใช่ไหมครับ
ใช่ครับ เดี๋ยวผมลองสร้างใหม่ อีกรอบครับ
ก็ยังเป็นเหมือนเดิมครับ ``` #define BLYNK_PRINT Serial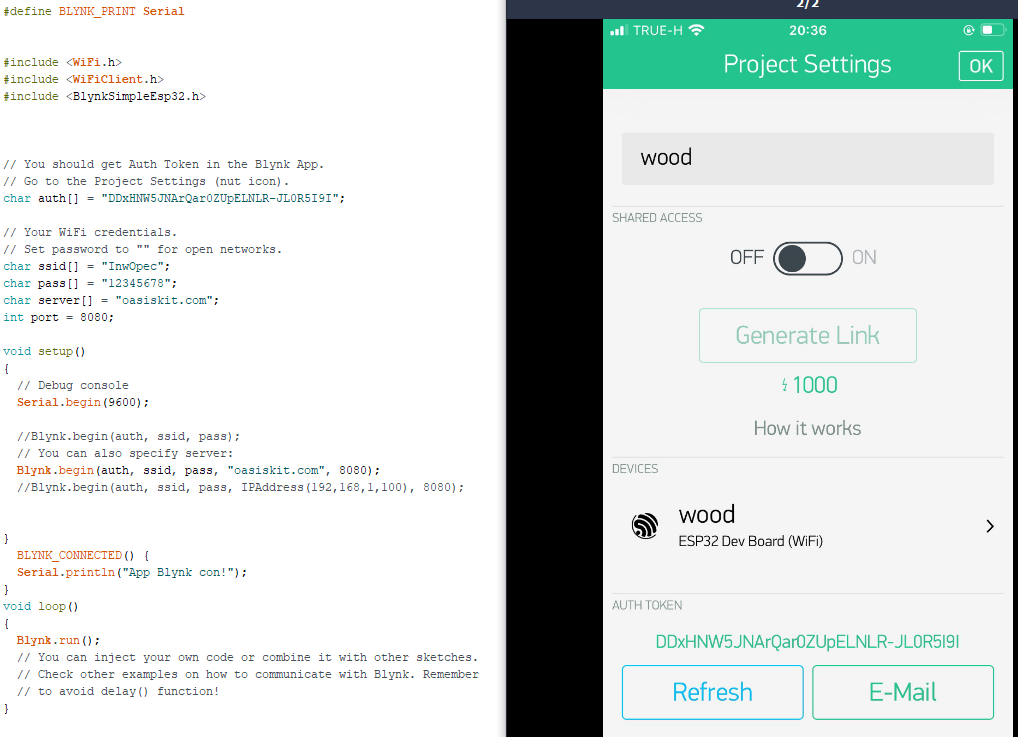
#include <WiFi.h>
#include <WiFiClient.h>
#include <BlynkSimpleEsp32.h>
// You should get Auth Token in the Blynk App.
// Go to the Project Settings (nut icon).
char auth = “2B9IliNVCHT3zgPdwKk8l5ob1Vtz3xNb”;
// Your WiFi credentials.
// Set password to “” for open networks.
char ssid = “InwOpec”;
char pass = “12345678”;
char server = “oasiskit.com”;
int port = 8080;
void setup()
{
// Debug console
Serial.begin(9600);
//Blynk.begin(auth, ssid, pass);
//You can also specify server:
Blynk.begin(auth, ssid, pass, “oasiskit.com”, 8080);
//Blynk.begin(auth, ssid, pass, IPAddress(192,168,1,100), 8080);
}
void loop()
{
Blynk.run();
// You can inject your own code or combine it with other sketches.
// Check other examples on how to communicate with Blynk. Remember
// to avoid delay() function!
}

</div>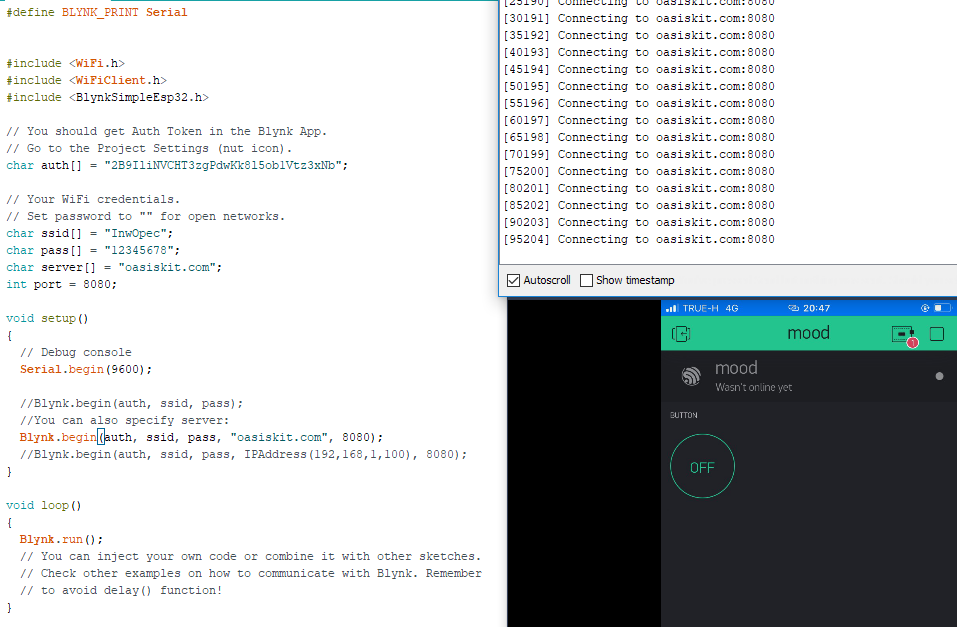
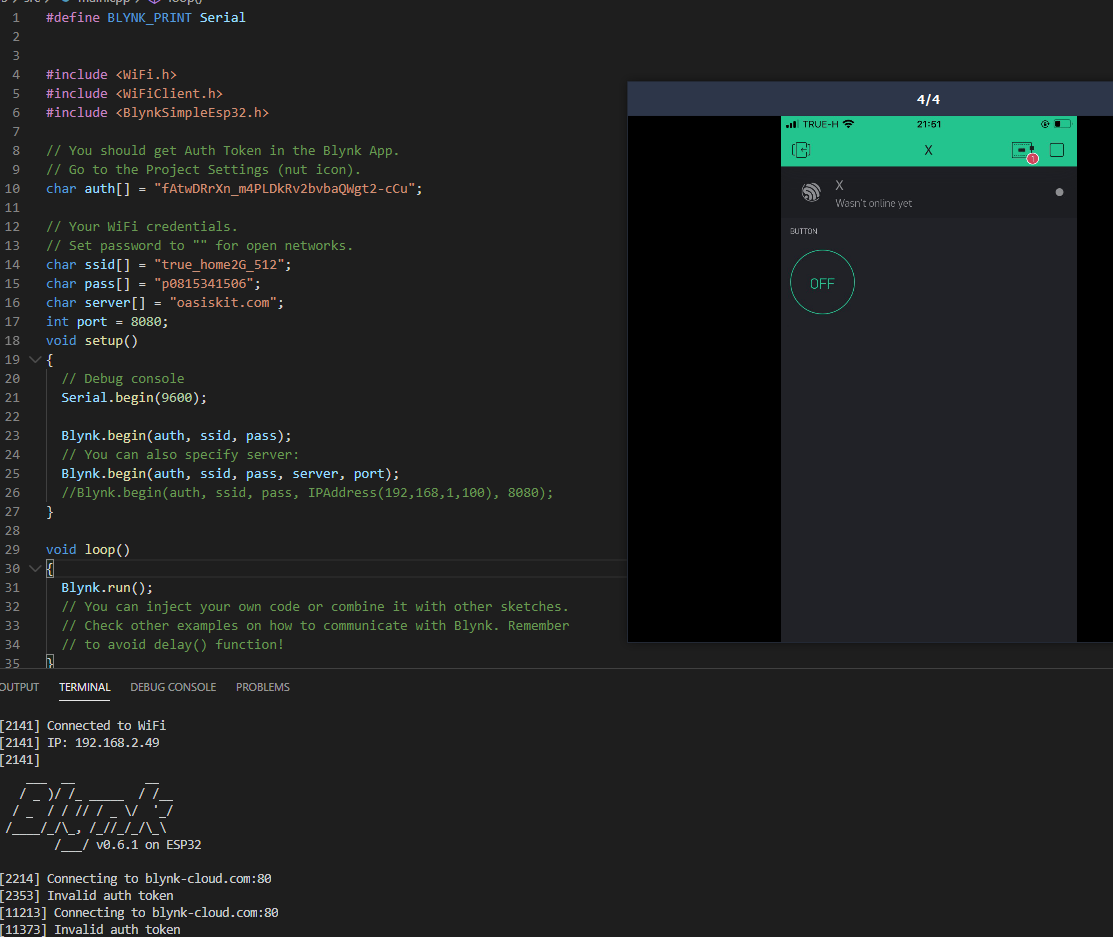
ผมลองเปลี่ยน wifi แล้วผลออกมาเป็น Invalid auth token
#define BLYNK_PRINT Serial


#include <WiFi.h>
#include <WiFiClient.h>
#include <BlynkSimpleEsp32.h>

// You should get Auth Token in the Blynk App.
// Go to the Project Settings (nut icon).
char auth[] = "fAtwDRrXn_m4PLDkRv2bvbaQWgt2-cCu";

// Your WiFi credentials.
// Set password to "" for open networks.
char ssid[] = "true_home2G_512";
char pass[] = "p0815341506";
char server[] = "oasiskit.com";
int port = 8080;
void setup()
{
  // Debug console
  Serial.begin(9600);

  Blynk.begin(auth, ssid, pass);
  // You can also specify server:
  Blynk.begin(auth, ssid, pass, server, port);
  //Blynk.begin(auth, ssid, pass, IPAddress(192,168,1,100), 8080);
}

void loop()
{
  Blynk.run();
  // You can inject your own code or combine it with other sketches.
  // Check other examples on how to communicate with Blynk. Remember
  // to avoid delay() function!
}
ผมลองเปลี่ยนไปใช้ของ sever blynk esp32 มันเชื่อมApp แล้ว
ผมยังไม่รู้ทำไมของ Blynk เอง มันถึงเชื่อมได้แต่ของเว็บเชื่อมไม่ได้
แต่ว่า ผมอยากใช้ที่สมัครกับเว็บมากกว่า
#include <Arduino.h>
#define BLYNK_PRINT Serial


#include <WiFi.h>
#include <WiFiClient.h>
#include <BlynkSimpleEsp32.h>

// You should get Auth Token in the Blynk App.
// Go to the Project Settings (nut icon).
char auth[] = "LNXE0AR4LTjYhh3SwTcxqypJOy9gZcV7";

// Your WiFi credentials.
// Set password to "" for open networks.
char ssid[] = "true_home2G_512";
char pass[] = "p0815341506";

void setup()
{
  // Debug console
  Serial.begin(9600);

  Blynk.begin(auth, ssid, pass);
  // You can also specify server:
  //Blynk.begin(auth, ssid, pass, "blynk-cloud.com", 80);
  //Blynk.begin(auth, ssid, pass, IPAddress(192,168,1,100), 8080);
}

void loop()
{
  Blynk.run();
  // You can inject your own code or combine it with other sketches.
  // Check other examples on how to communicate with Blynk. Remember
  // to avoid delay() function!
}
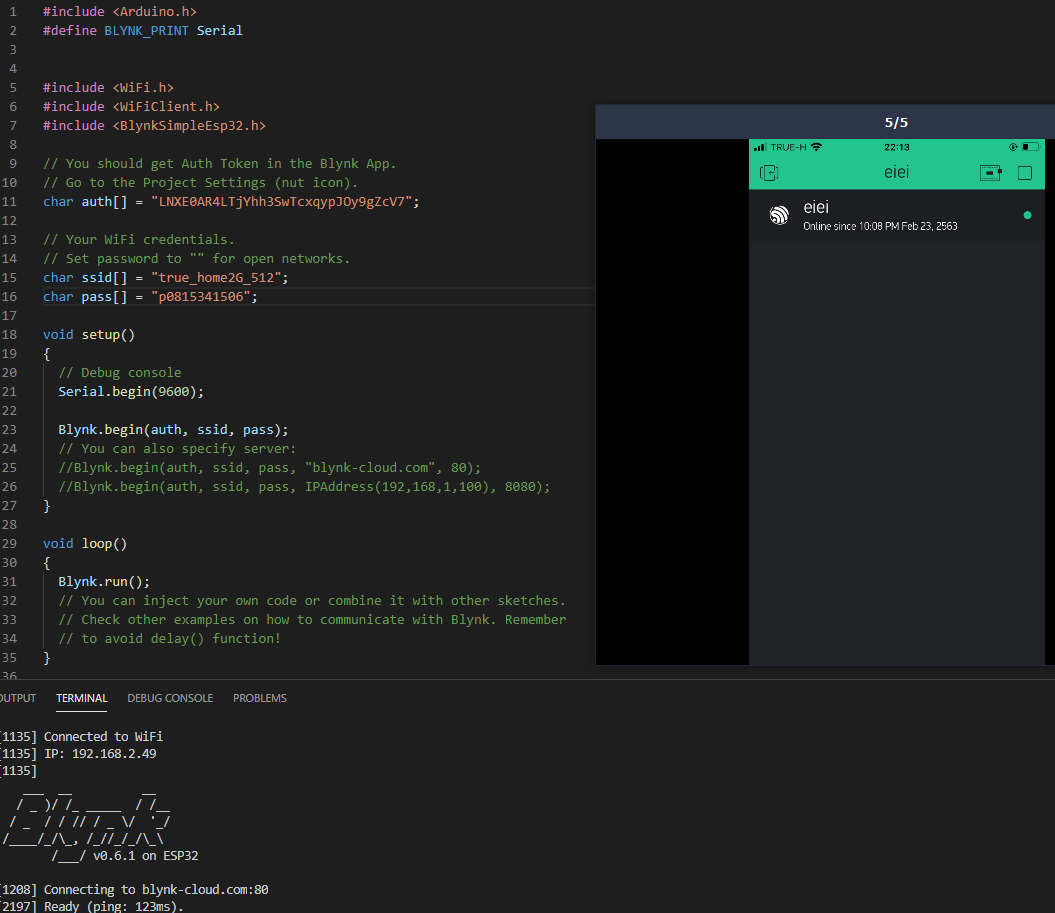
พี่ครับได้แล้วครับ ผม ก็งง ว่าทำไมมันได้ ผมเปลี่ยน Token และ Wifi ใหม่ก็ได้เฉยเลยครับ งง เหมือนกัน
แต่ก็ขอบคุณครับ สำหรับพี่ๆที่ให้คำแนะนำและก็กระทู้เก่าๆครับ
#include <Arduino.h>
#define BLYNK_PRINT Serial
#include <WiFi.h>
#include <WiFiClient.h>
#include <BlynkSimpleEsp32.h>

// You should get Auth Token in the Blynk App.
// Go to the Project Settings (nut icon).
char auth[] = "VnjpcyGBkyi1RlPoBC9WbIAMpA9ZN5PE";

// Your WiFi credentials.
// Set password to "" for open networks.
char ssid[] = "true_home2G_512";
char pass[] = "p0815341506";
char server[] = "oasiskit.com";
int port = 8080;

void setup()
{
  // Debug console
  Serial.begin(9600);

  //Blynk.begin(auth, ssid, pass);
  // You can also specify server:
  Blynk.begin(auth, ssid, pass, "oasiskit.com", 8080);
  //Blynk.begin(auth, ssid, pass, IPAddress(192,168,1,100), 8080);
}

void loop()
{
  Blynk.run();
  // You can inject your own code or combine it with other sketches.
  // Check other examples on how to communicate with Blynk. Remember
  // to avoid delay() function!
}
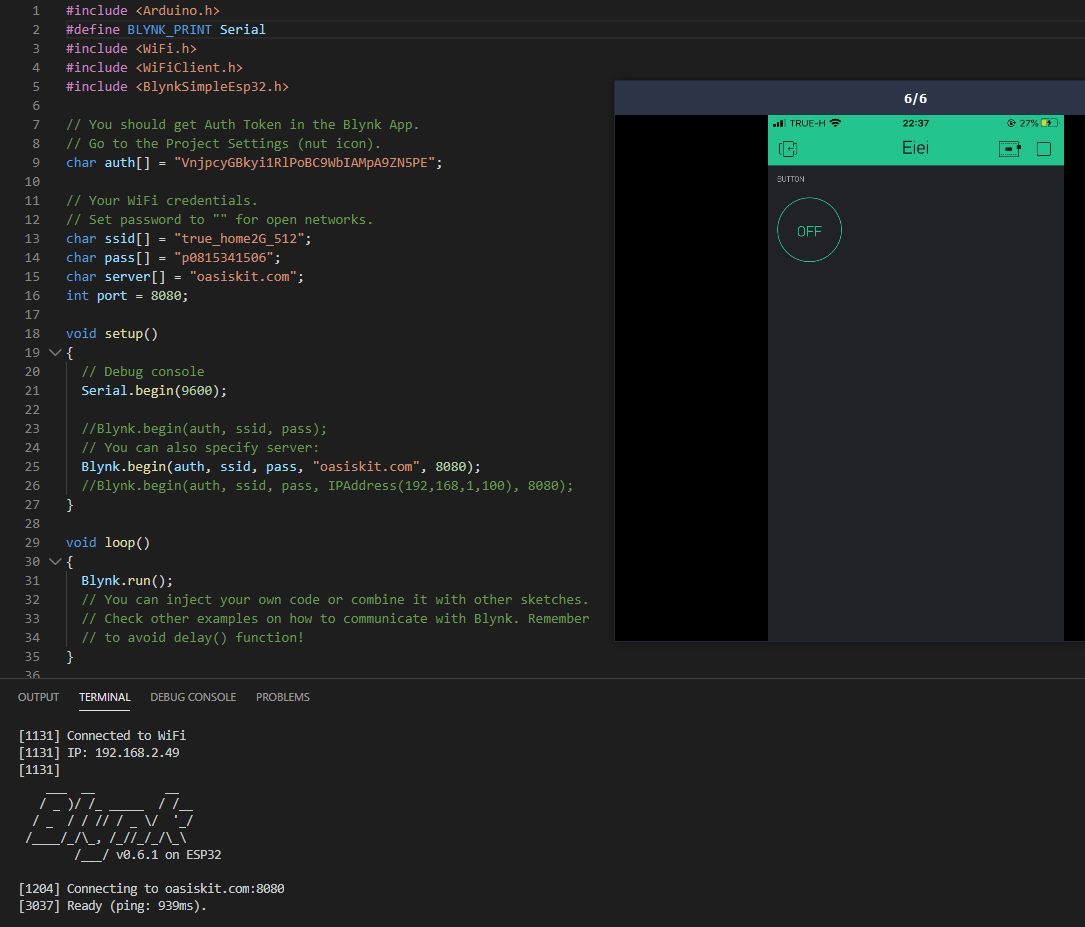
เช็คว่าในแอพมี energy เท่าไหร่
อันล่าสุดเชื่อมกับ Blynk ได้แล้วเป็นของที่สมัครกับเว็บครับ
มี Energy 9999800 ครับ ใช่ไปแล้ว 200
สรุปปิดประเด็นนี้ ได้แล้วใช่ไหมครับ
ใช่ครับ ปิดประเด็นแล้ว
1 Likes
