ว่างๆ เอา win10 มาดูกันก็ได้ครับเดียวช่วยเวอปัญหา
ขอบคุณครับ
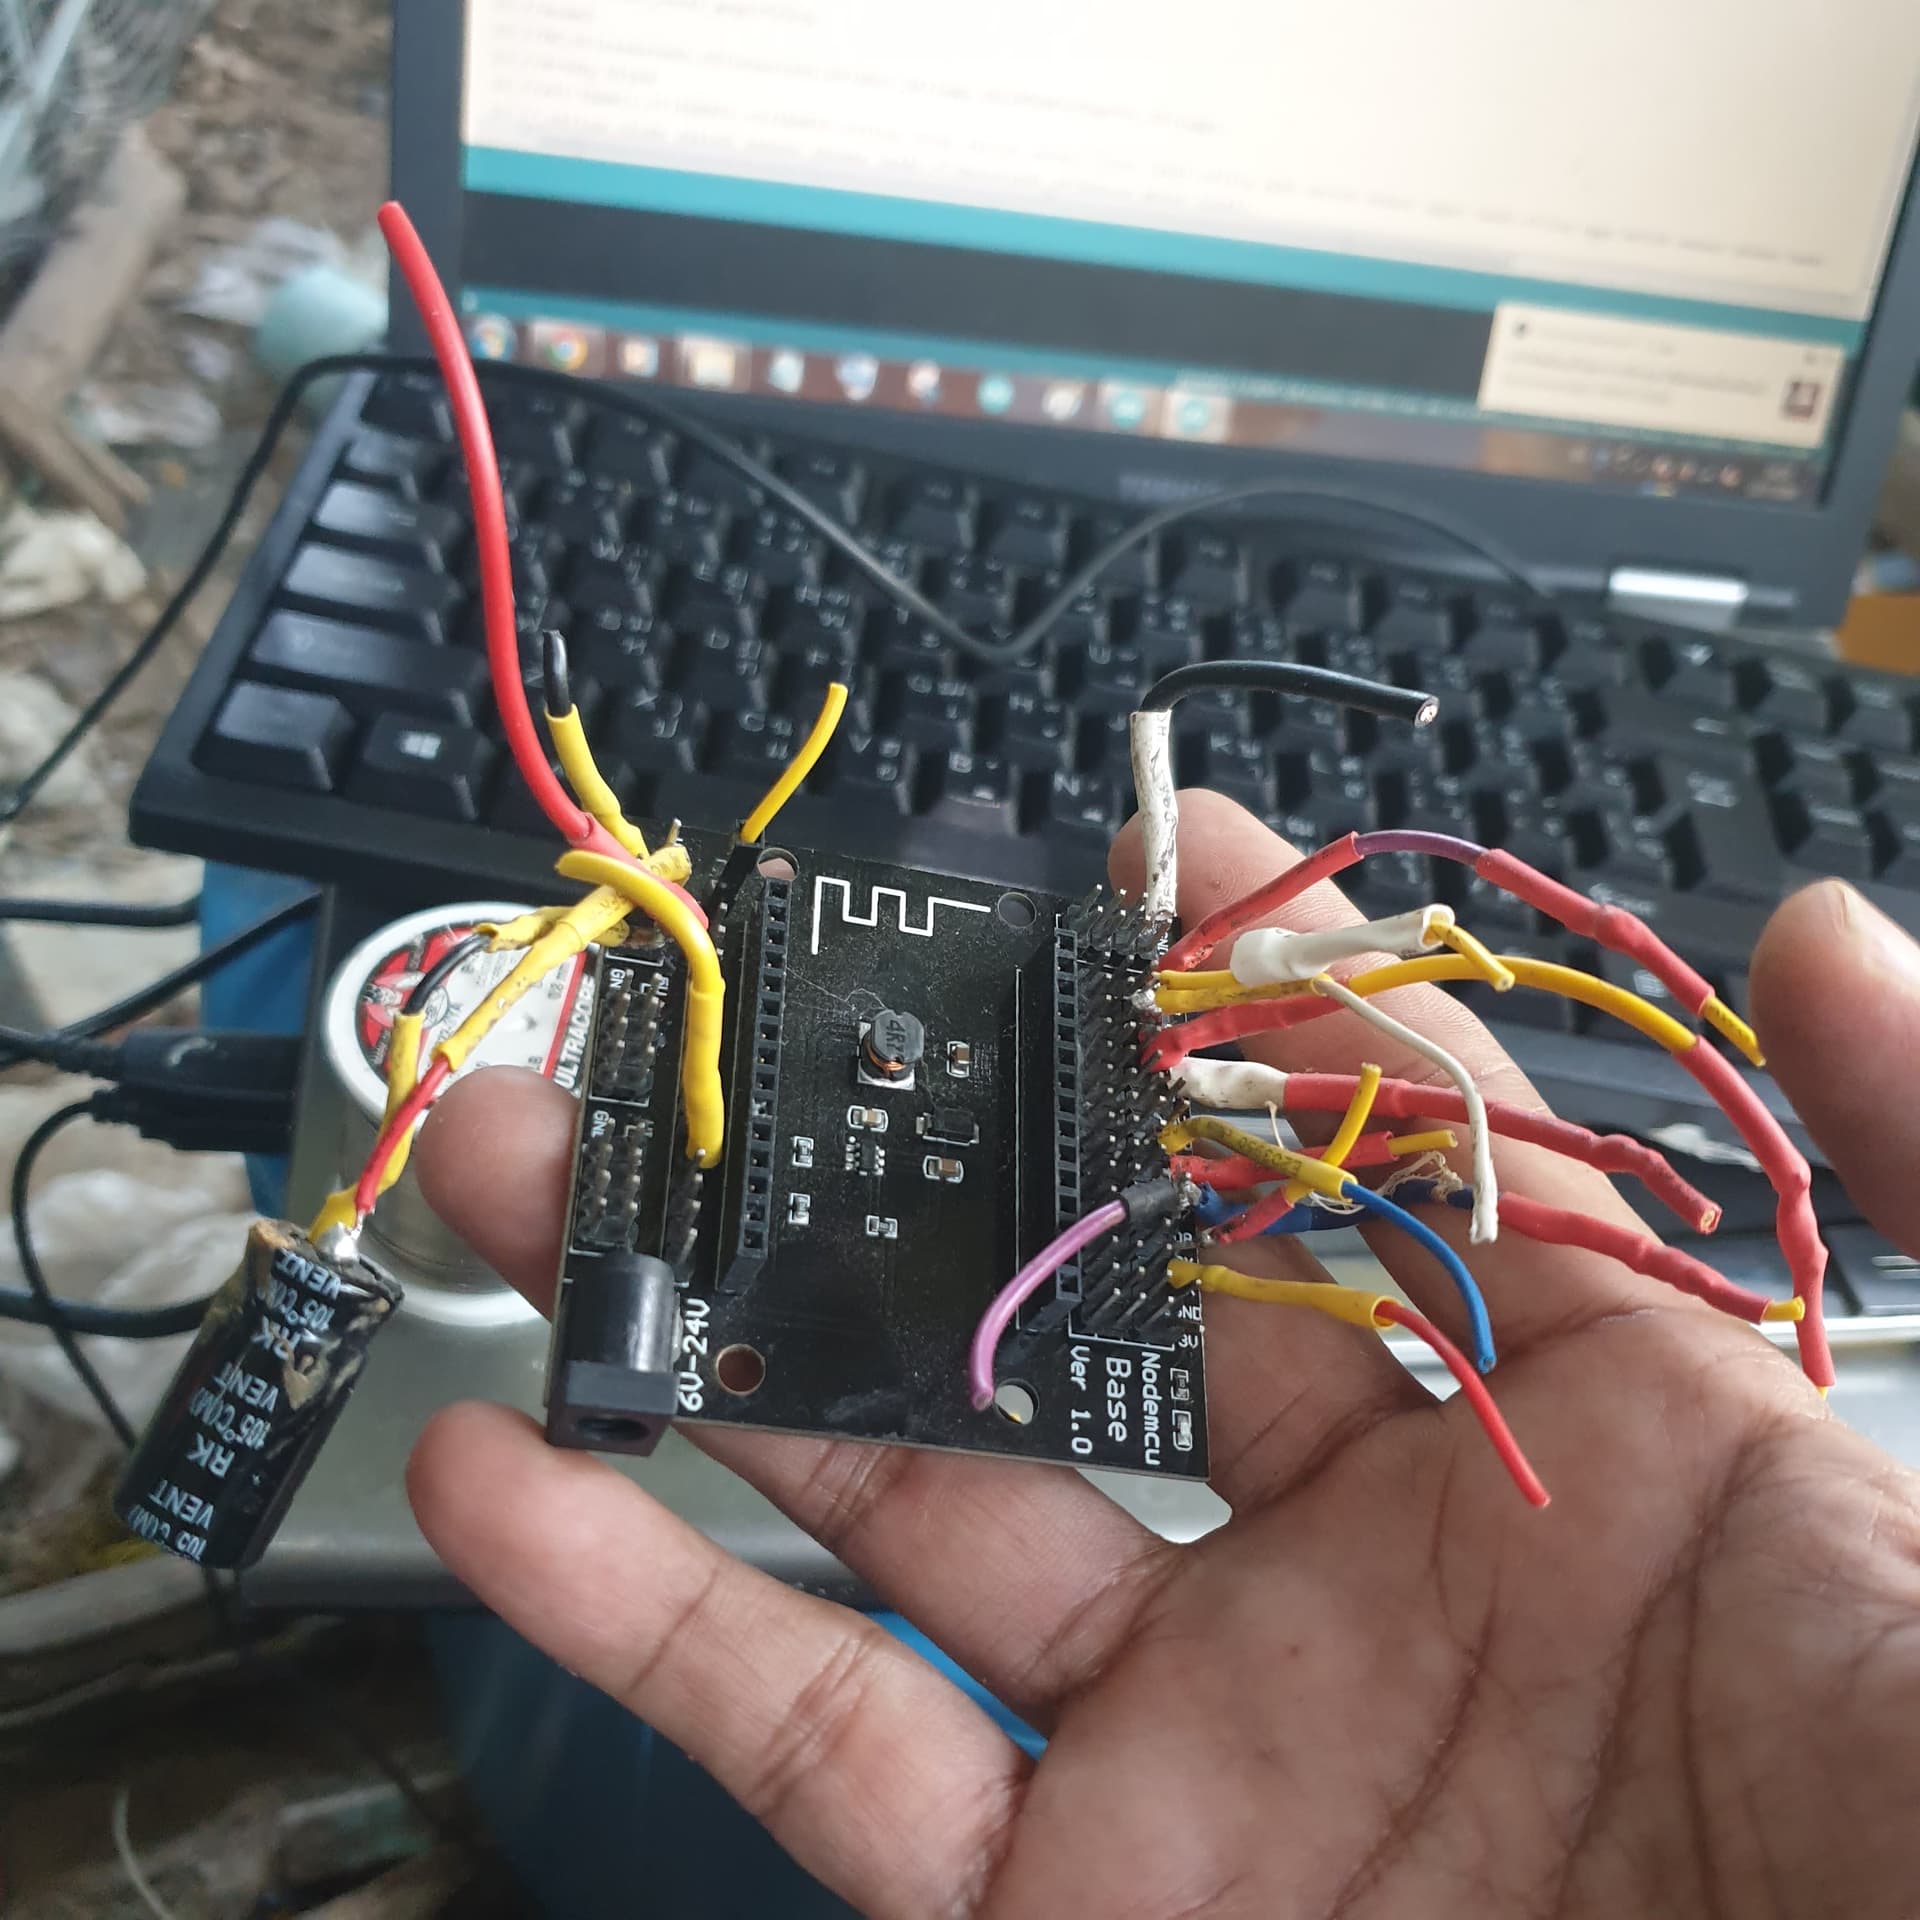
มีรูปค้างไว้ ตอน โน้ตบุคเสีย
อย่างที่บอกคราวก่อน ผมได้บัดกรีต่อสายทุกpinของnodemcu เพราะbaseน่าจะมีปัญหาครับ
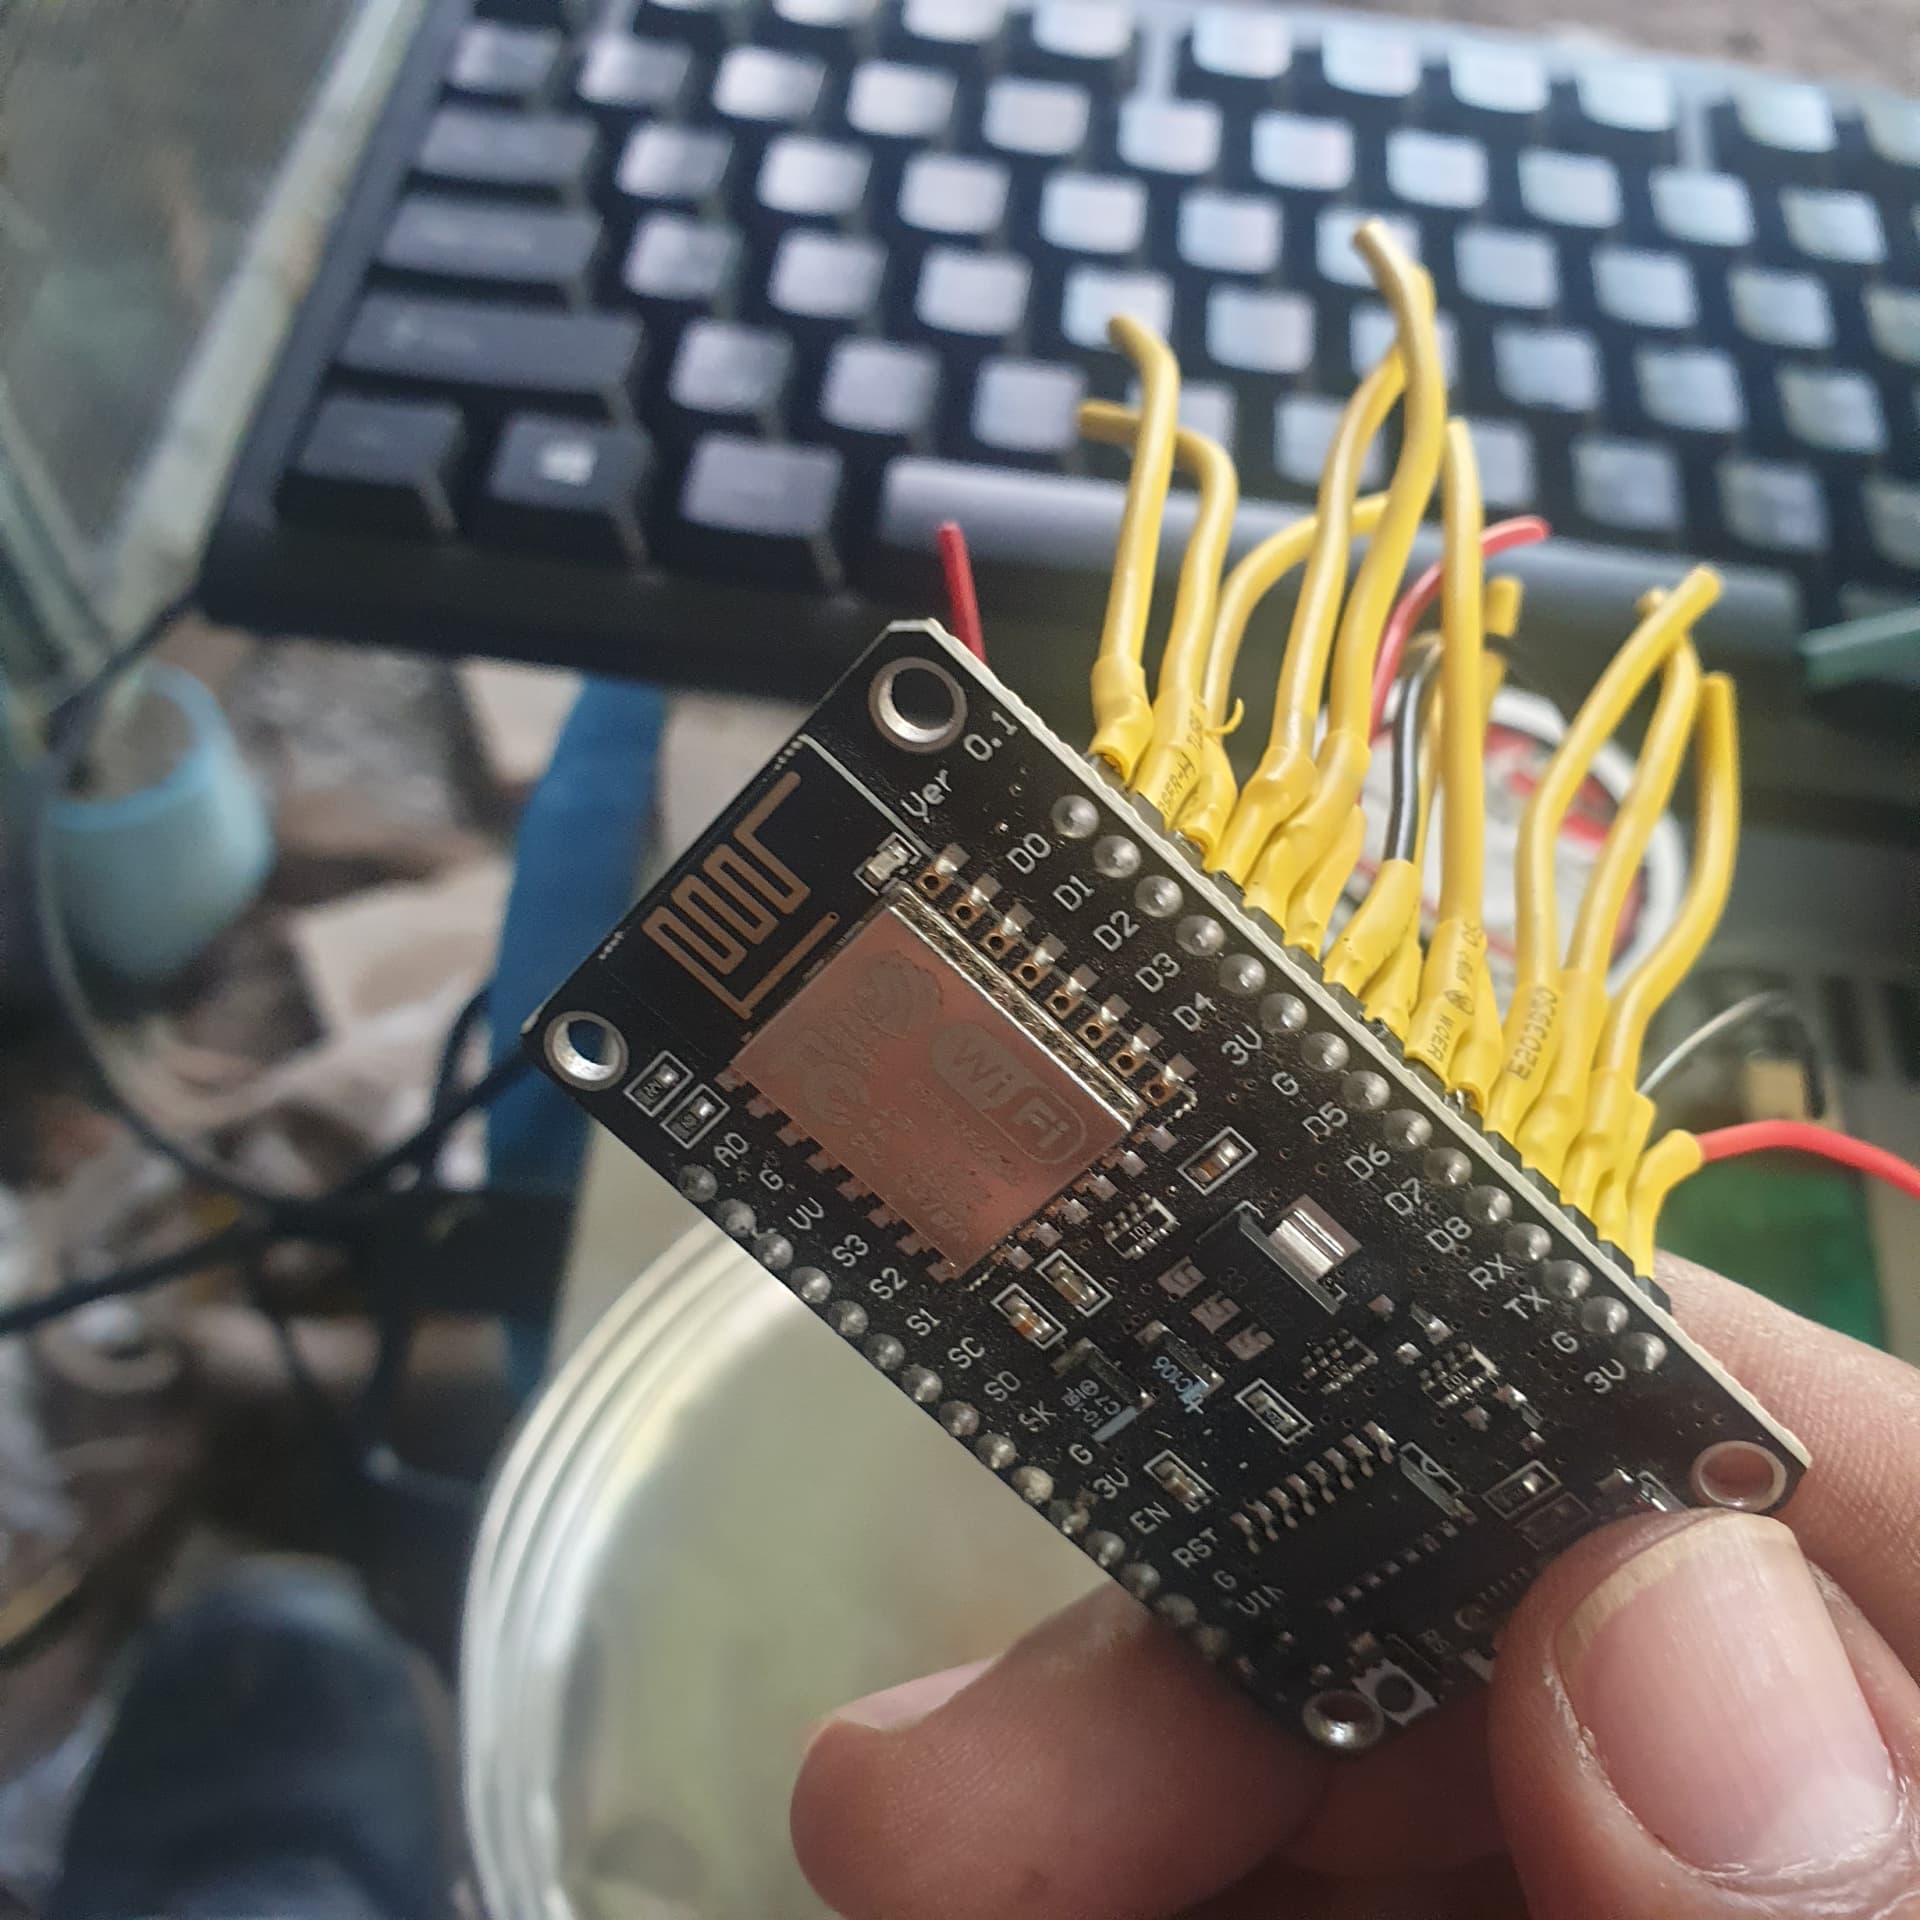
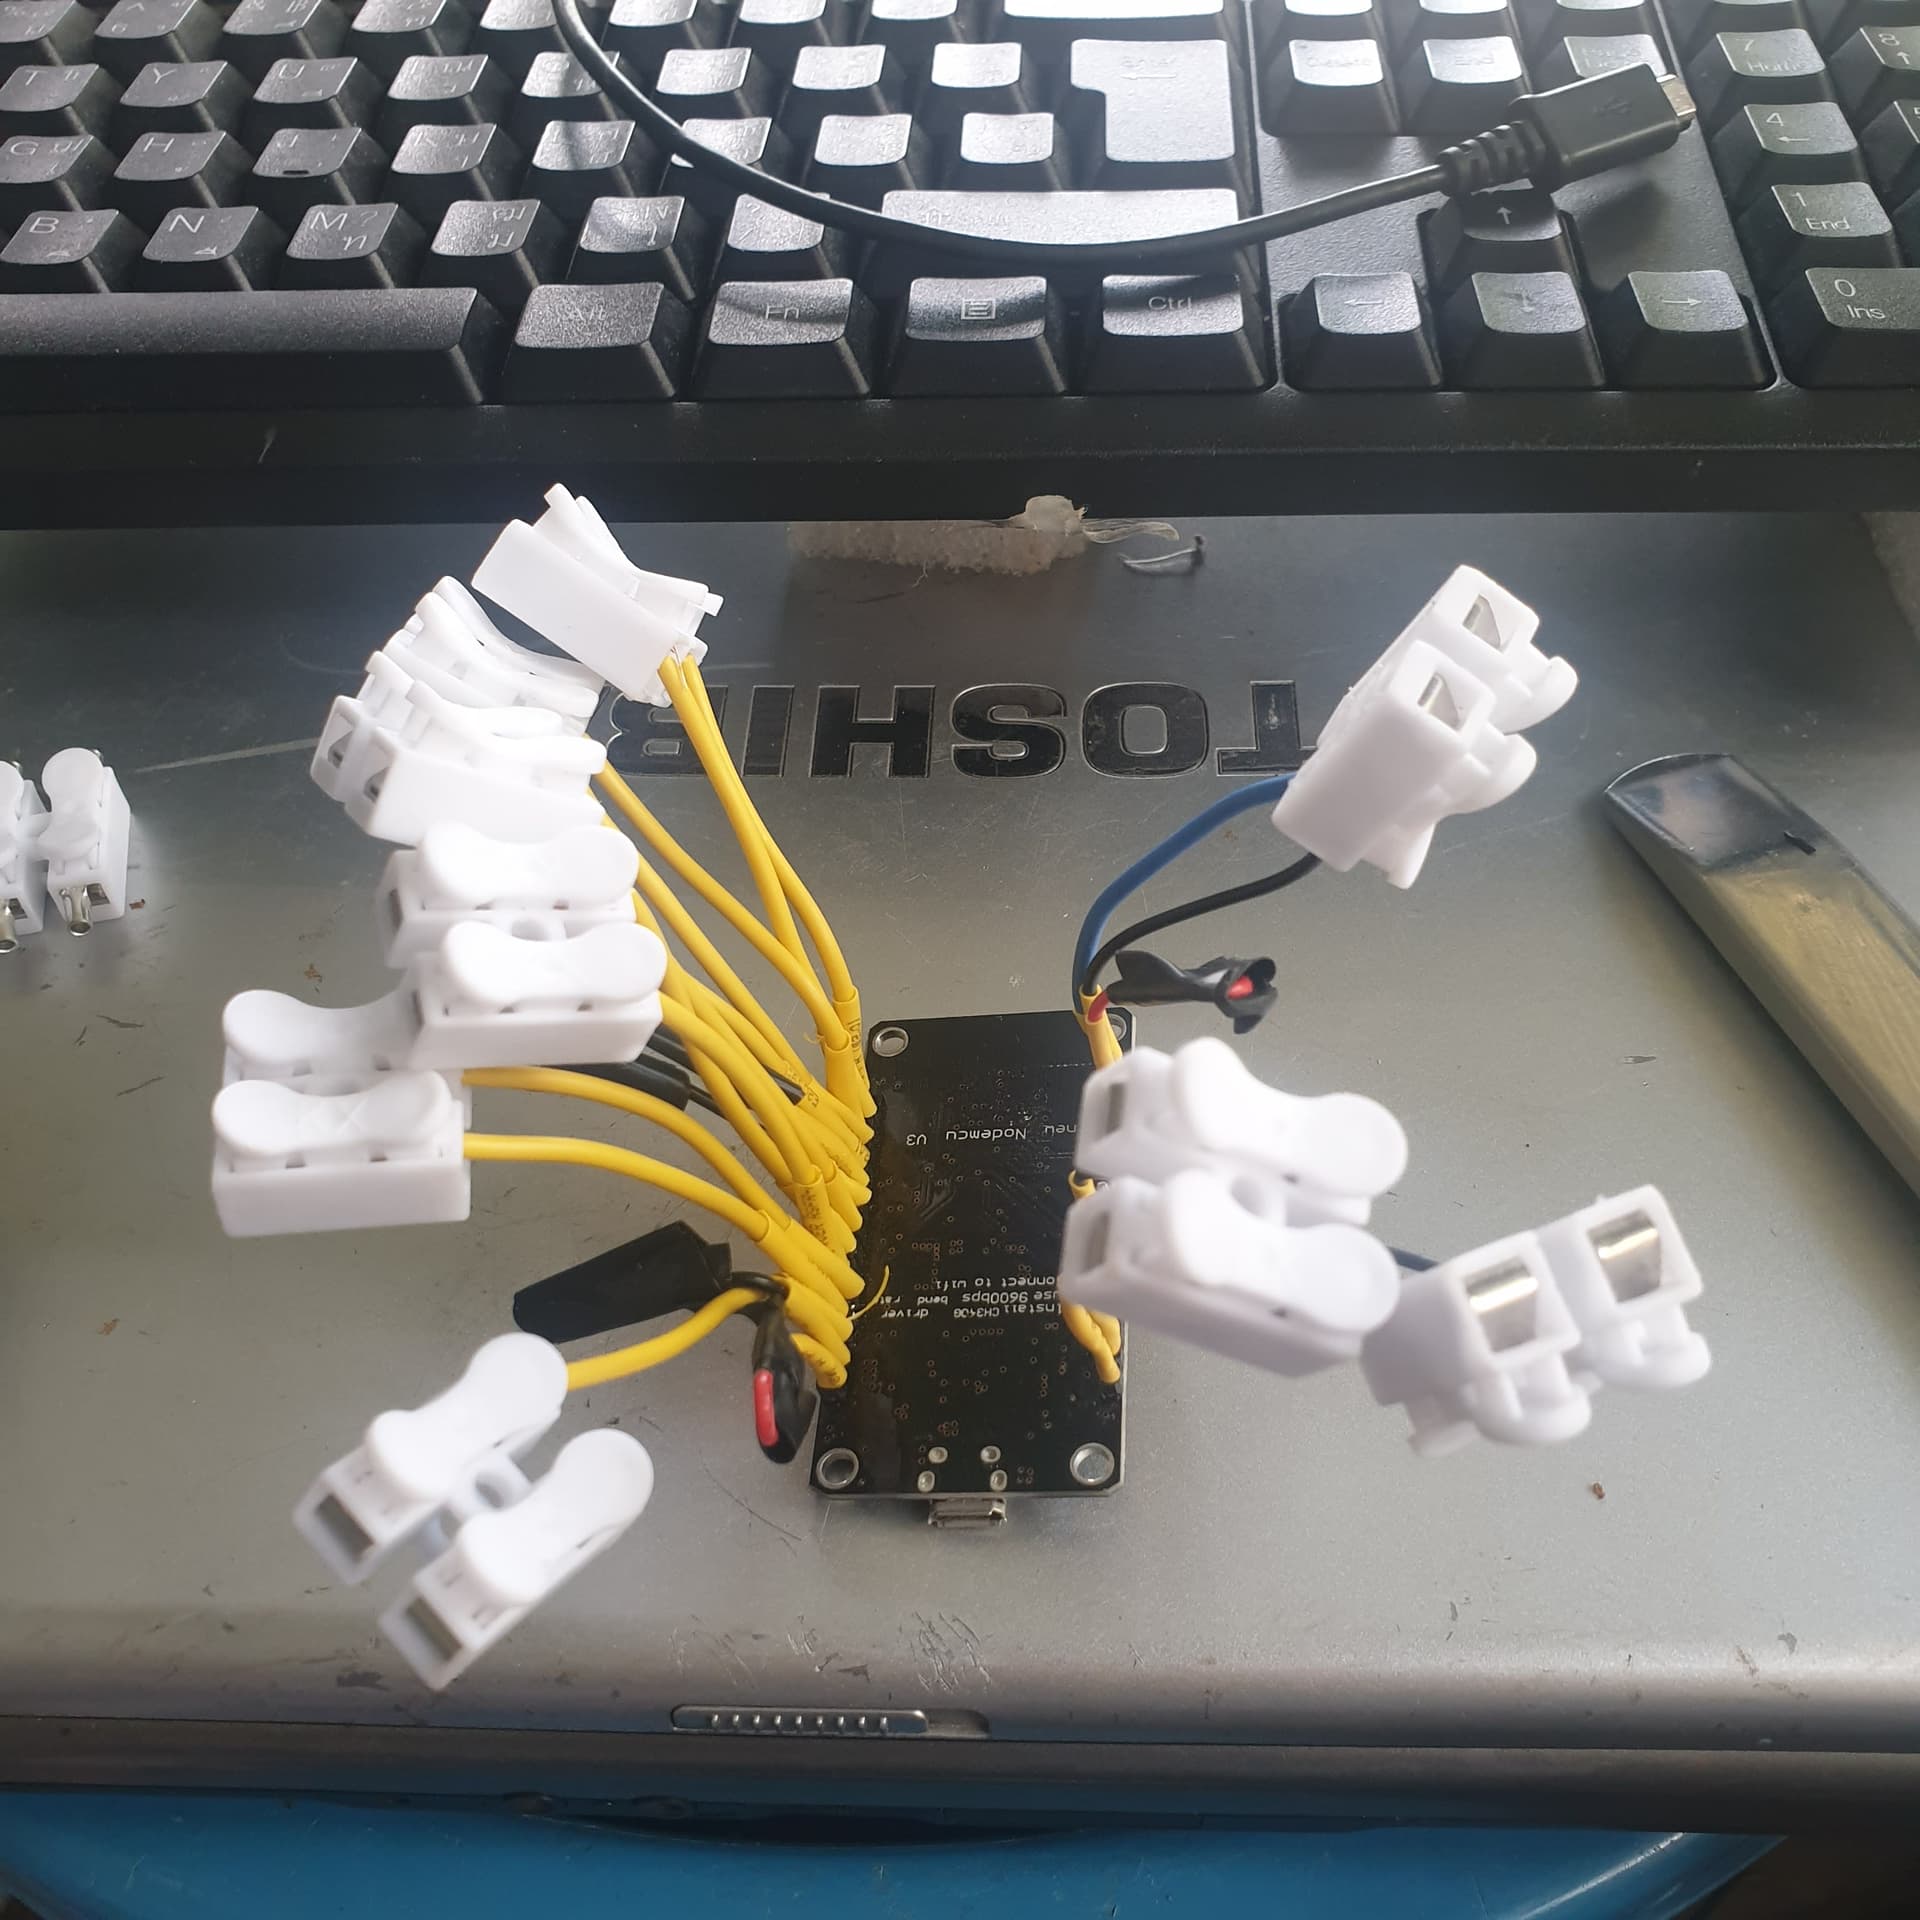
หลังจากไม่ใช้ base อาการดีขึ้นหน่อย แต่ mcp23017 ไม่ยอมทำงานอีก
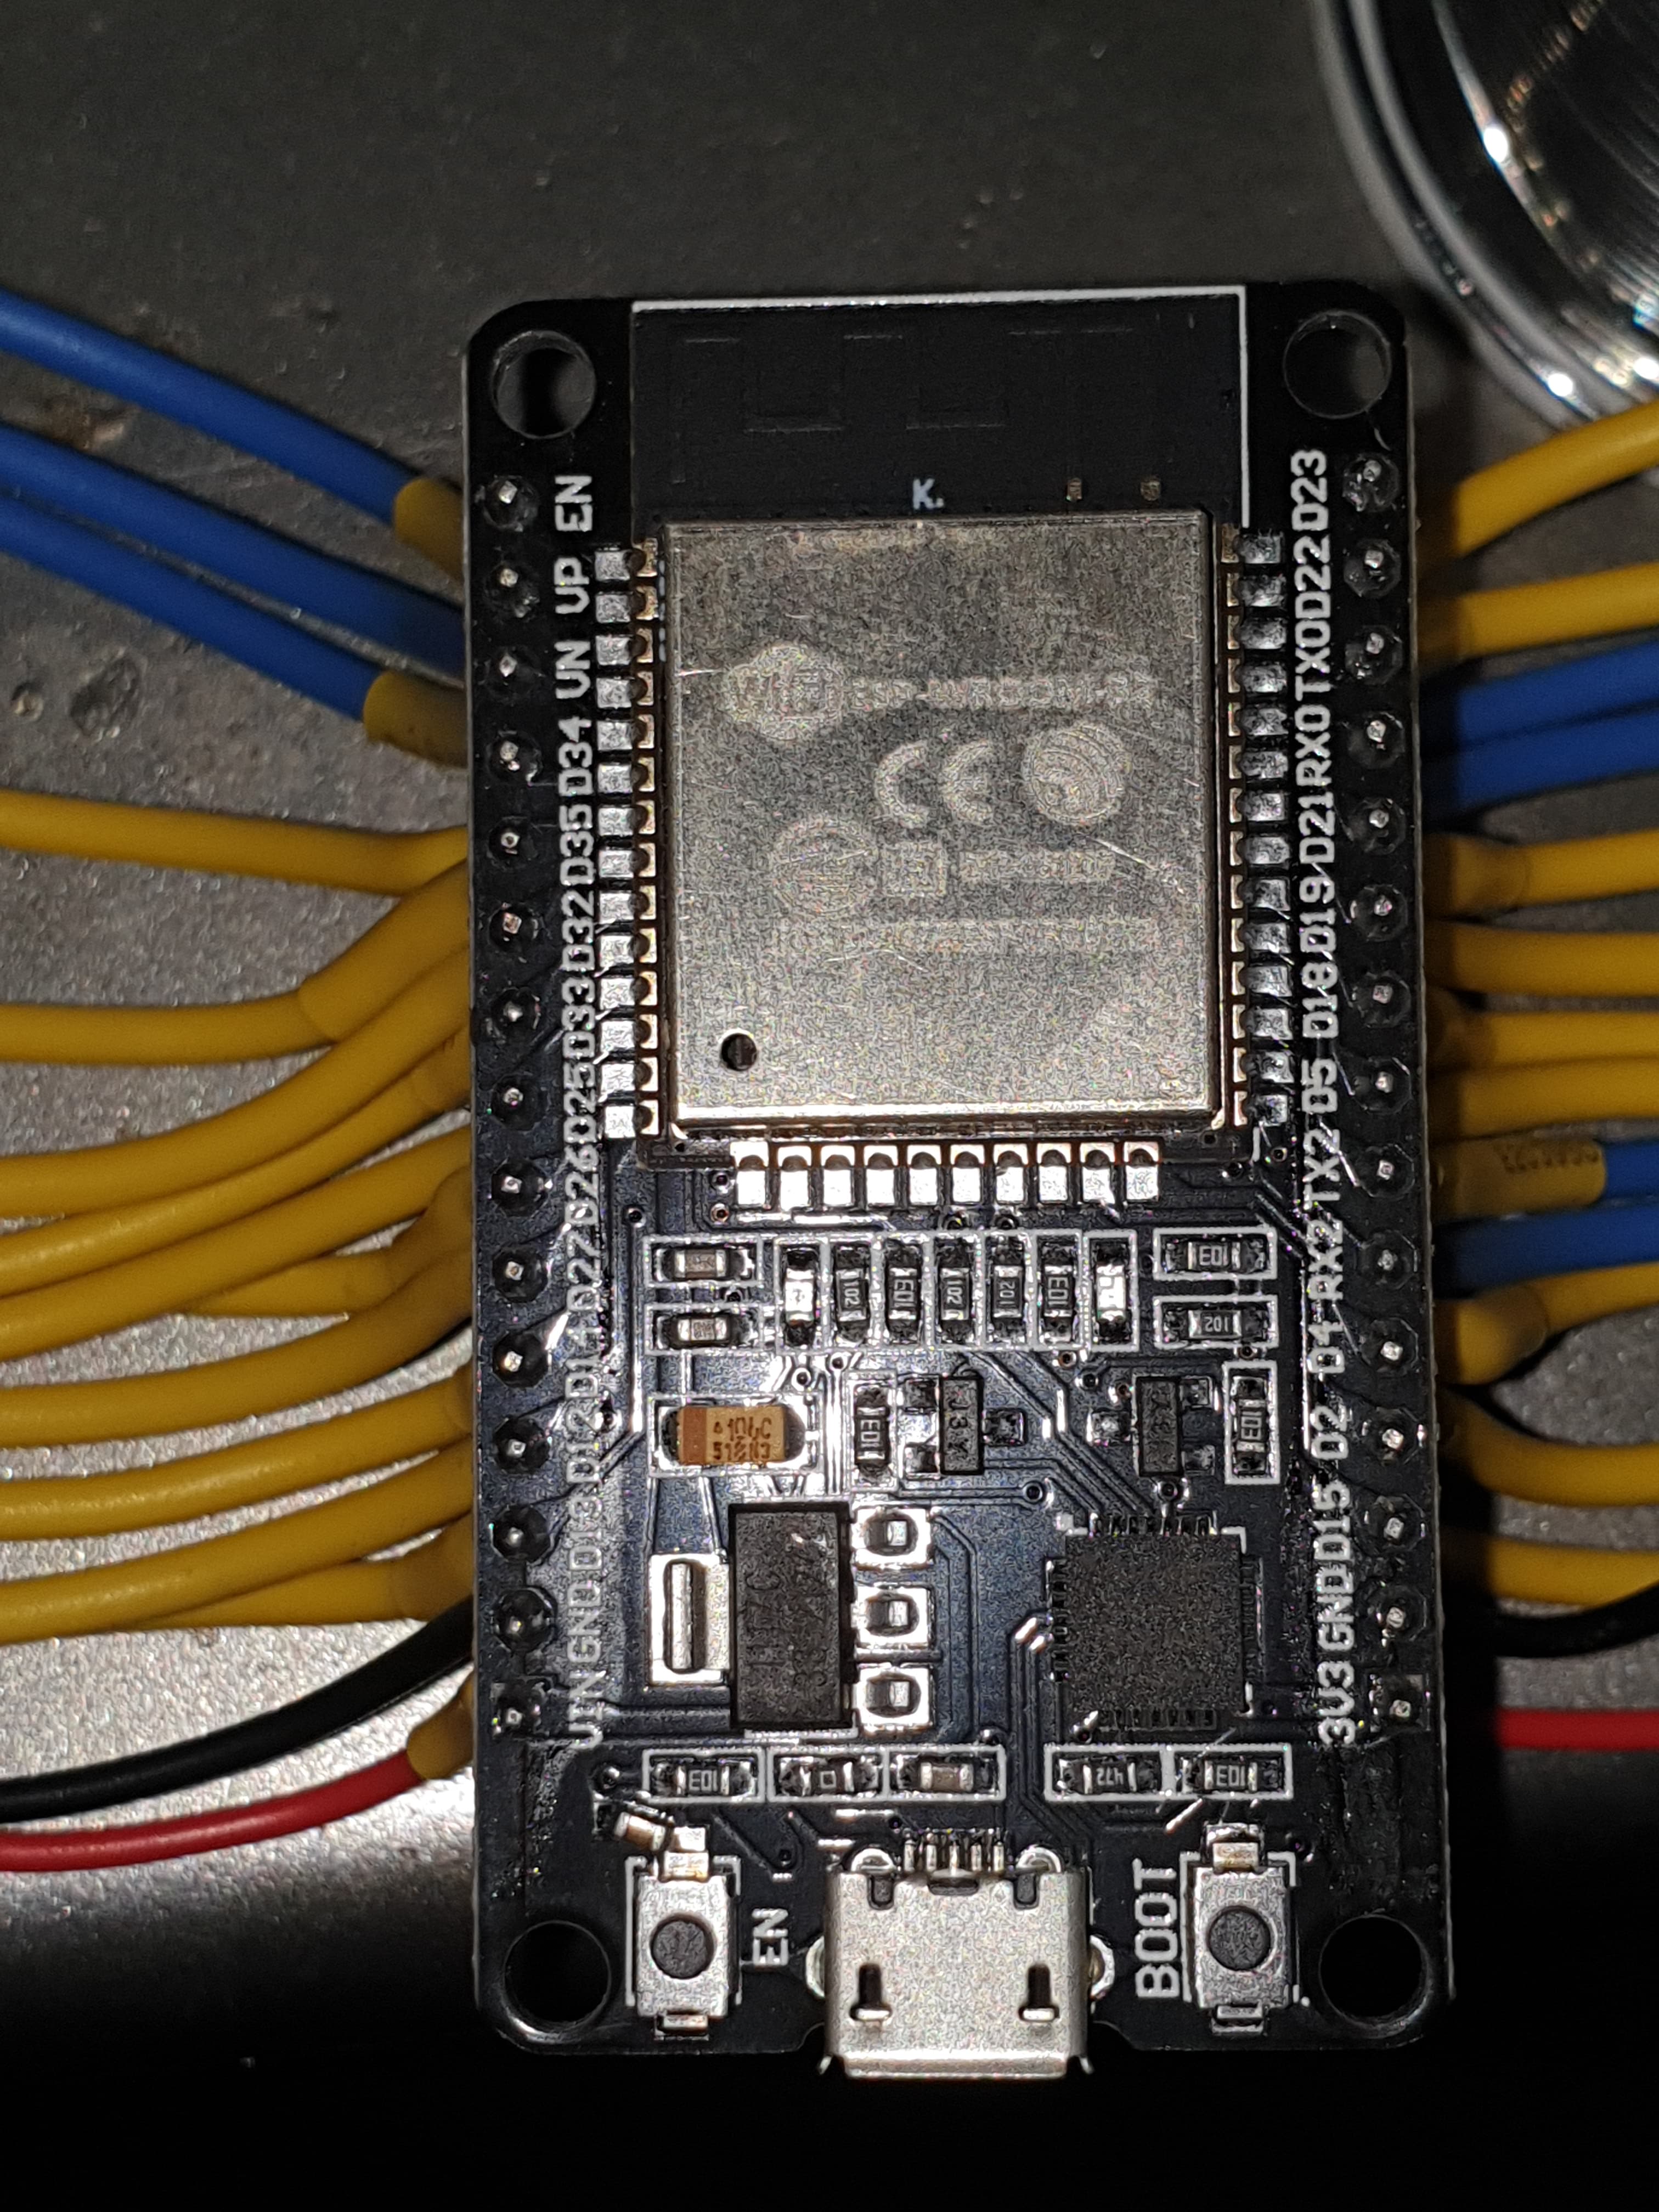
ผมเลย เปลี่ยนเป็น esp32
เพื่อจะลองดูว่าจะใช้กับ mcp ไหม
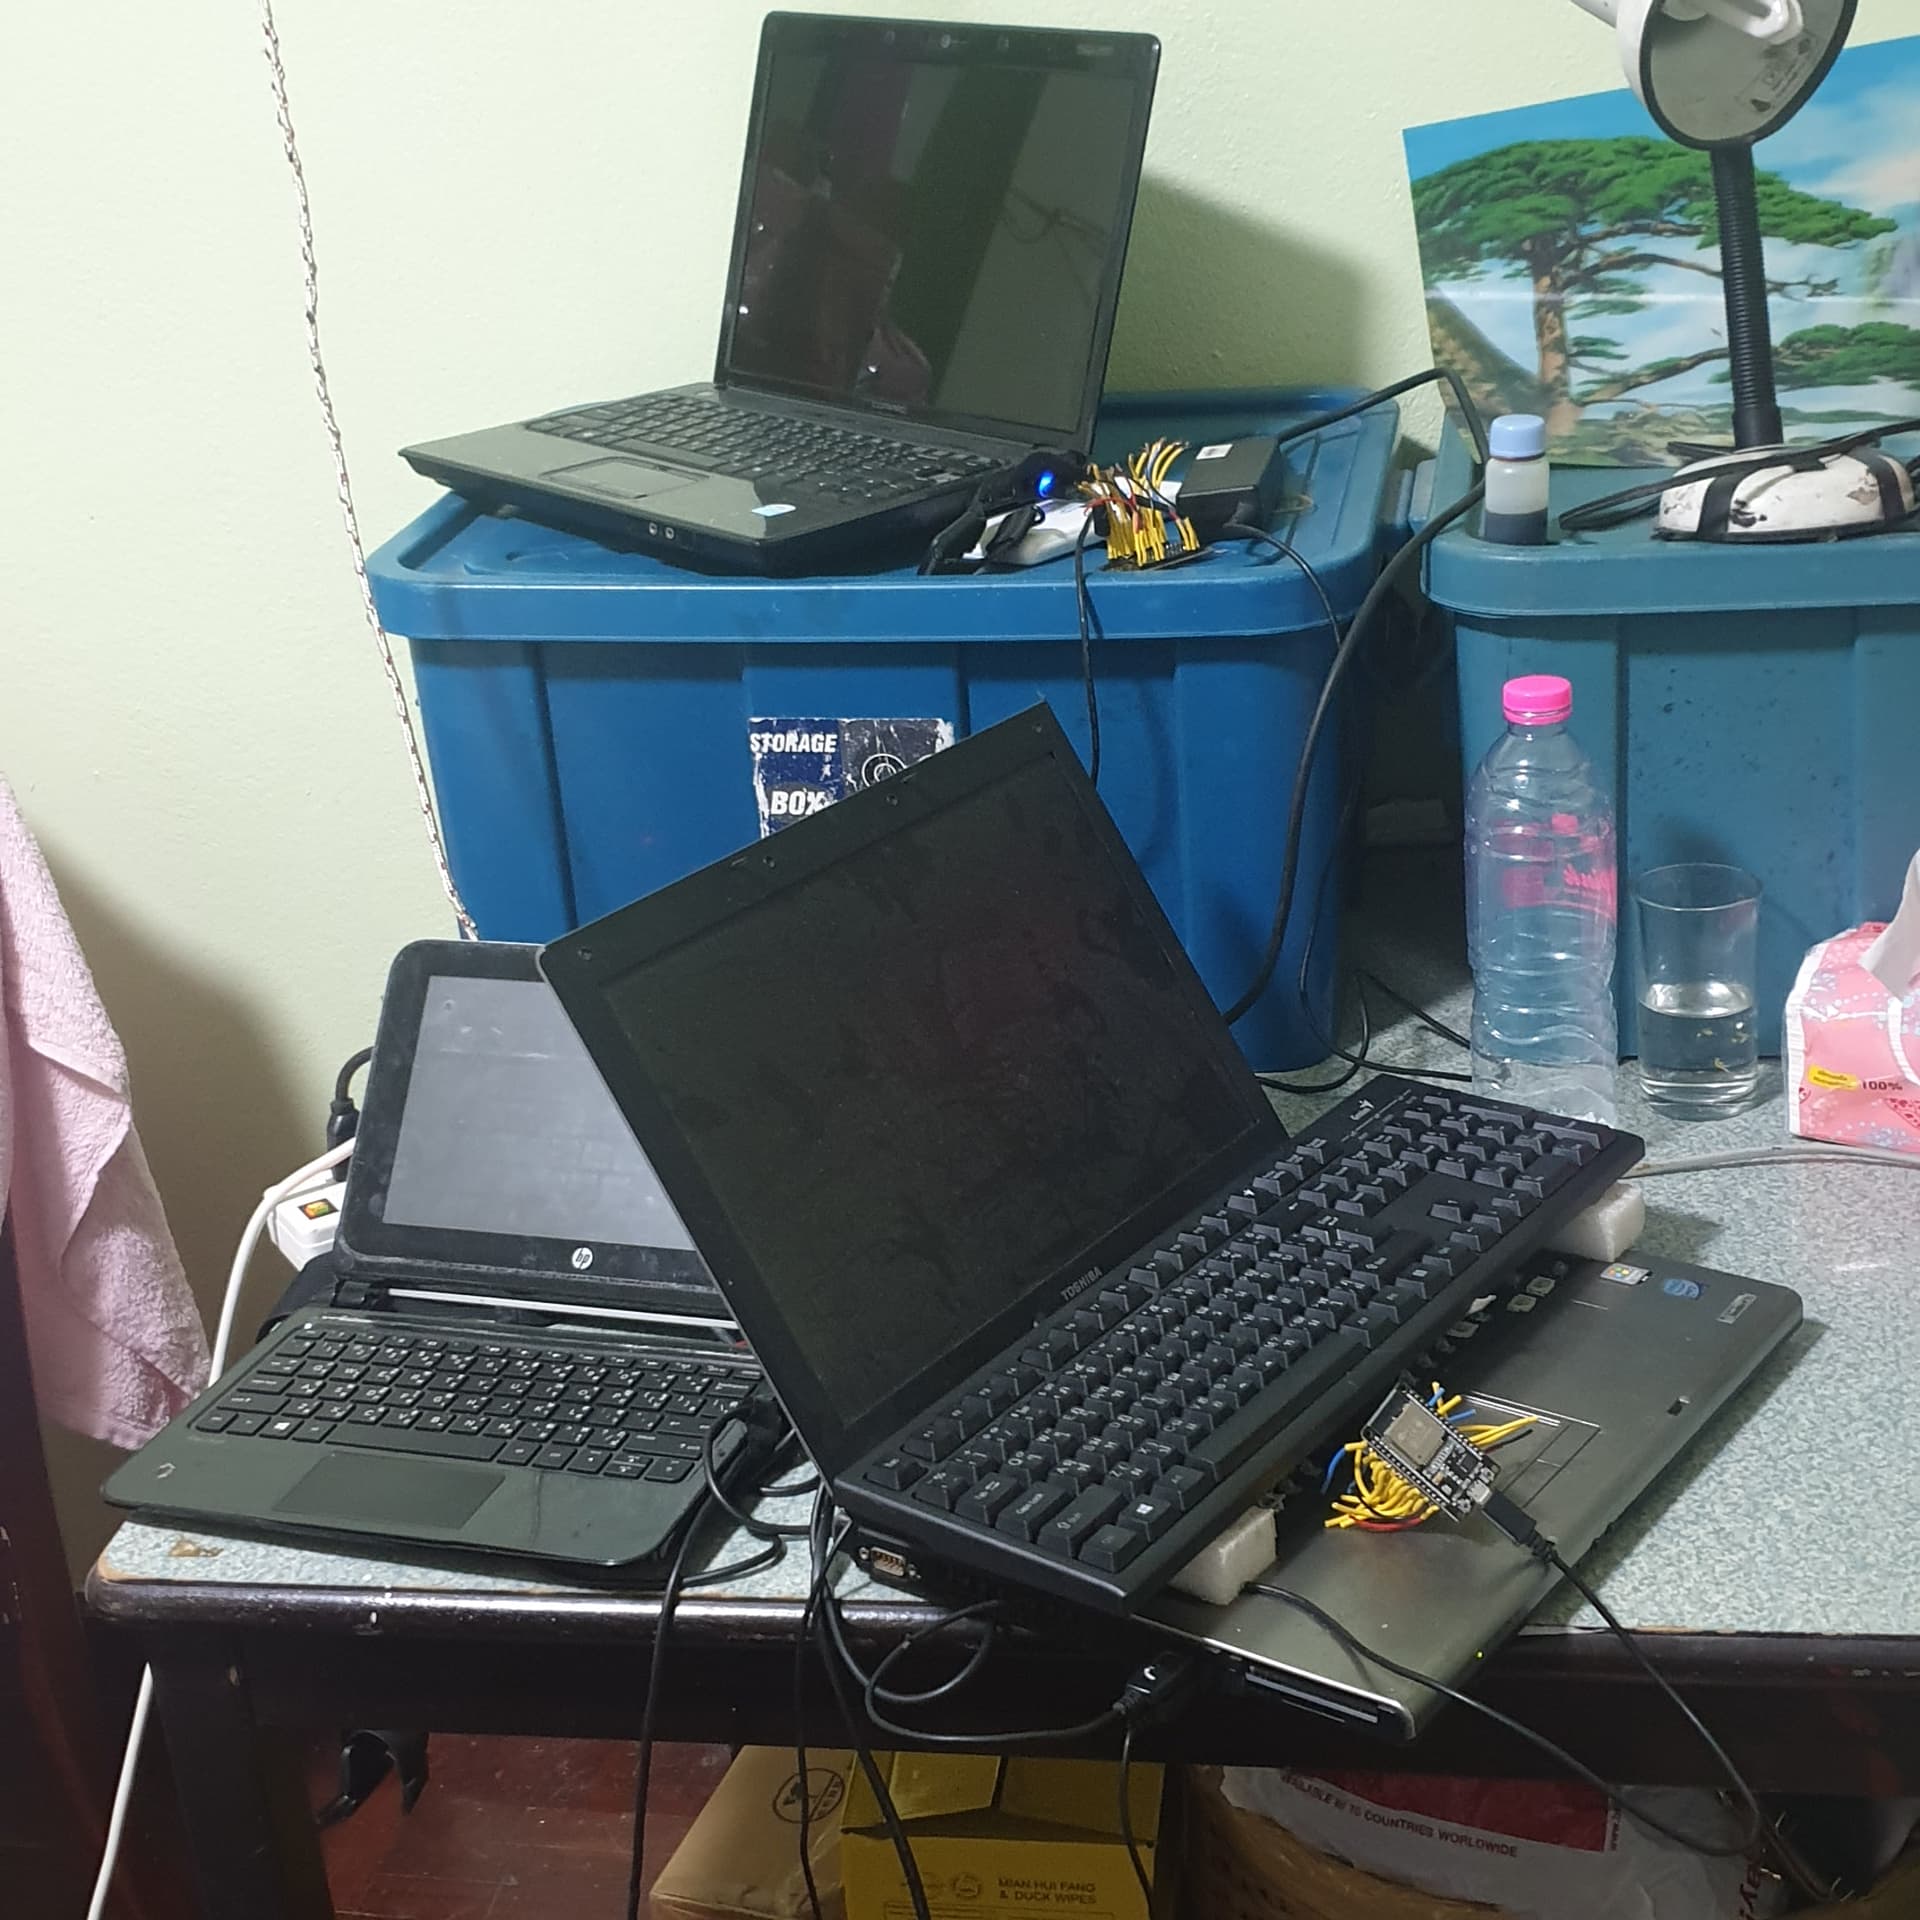
ผมได้เอาโน้ตบุคเก่าๆที่พอยังใช้ได้ 2เครื่อง แต่สู้เครื่องโตชิบาที่เสียไม่ได้เลย เวลาคอมไพล์จะนานมากๆ
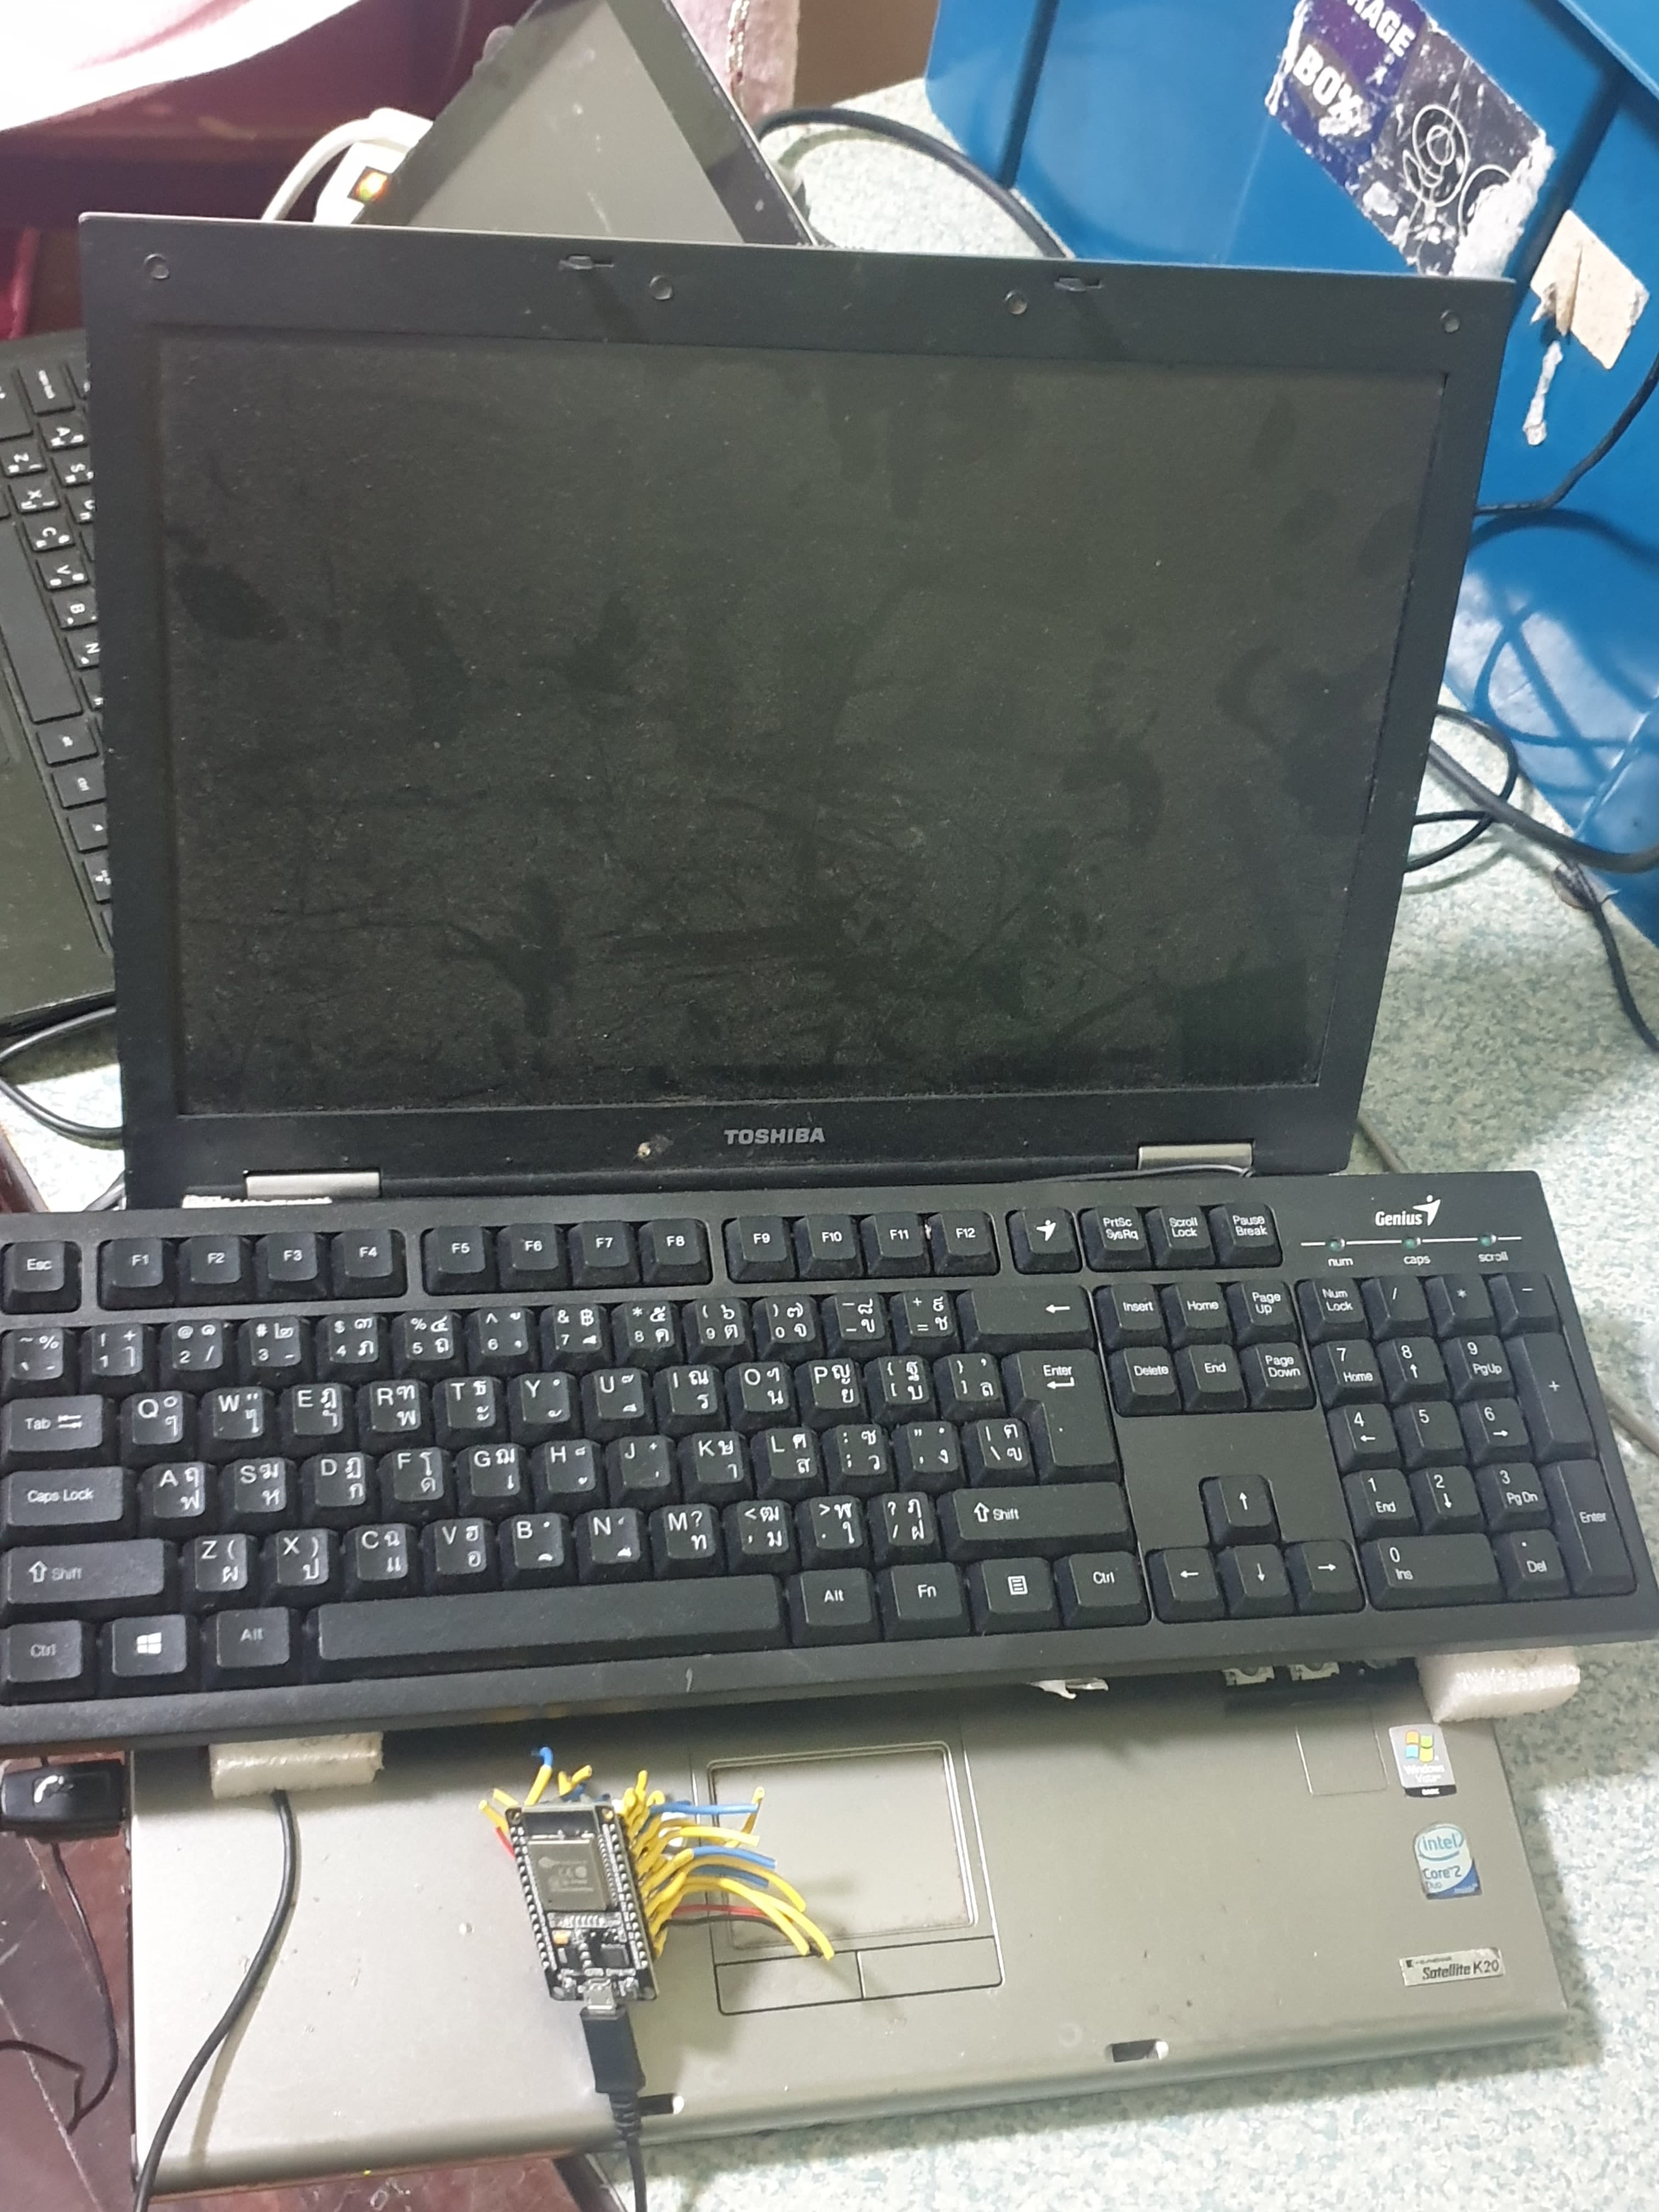
เครื่องนี้ที่ใช้ประจำ ตอนนี้จะเลิกใช้ แต่แรงสุดใน3เครื่องนี้ เริ่มมีปัญหา usb port, ปุ่มค้าง
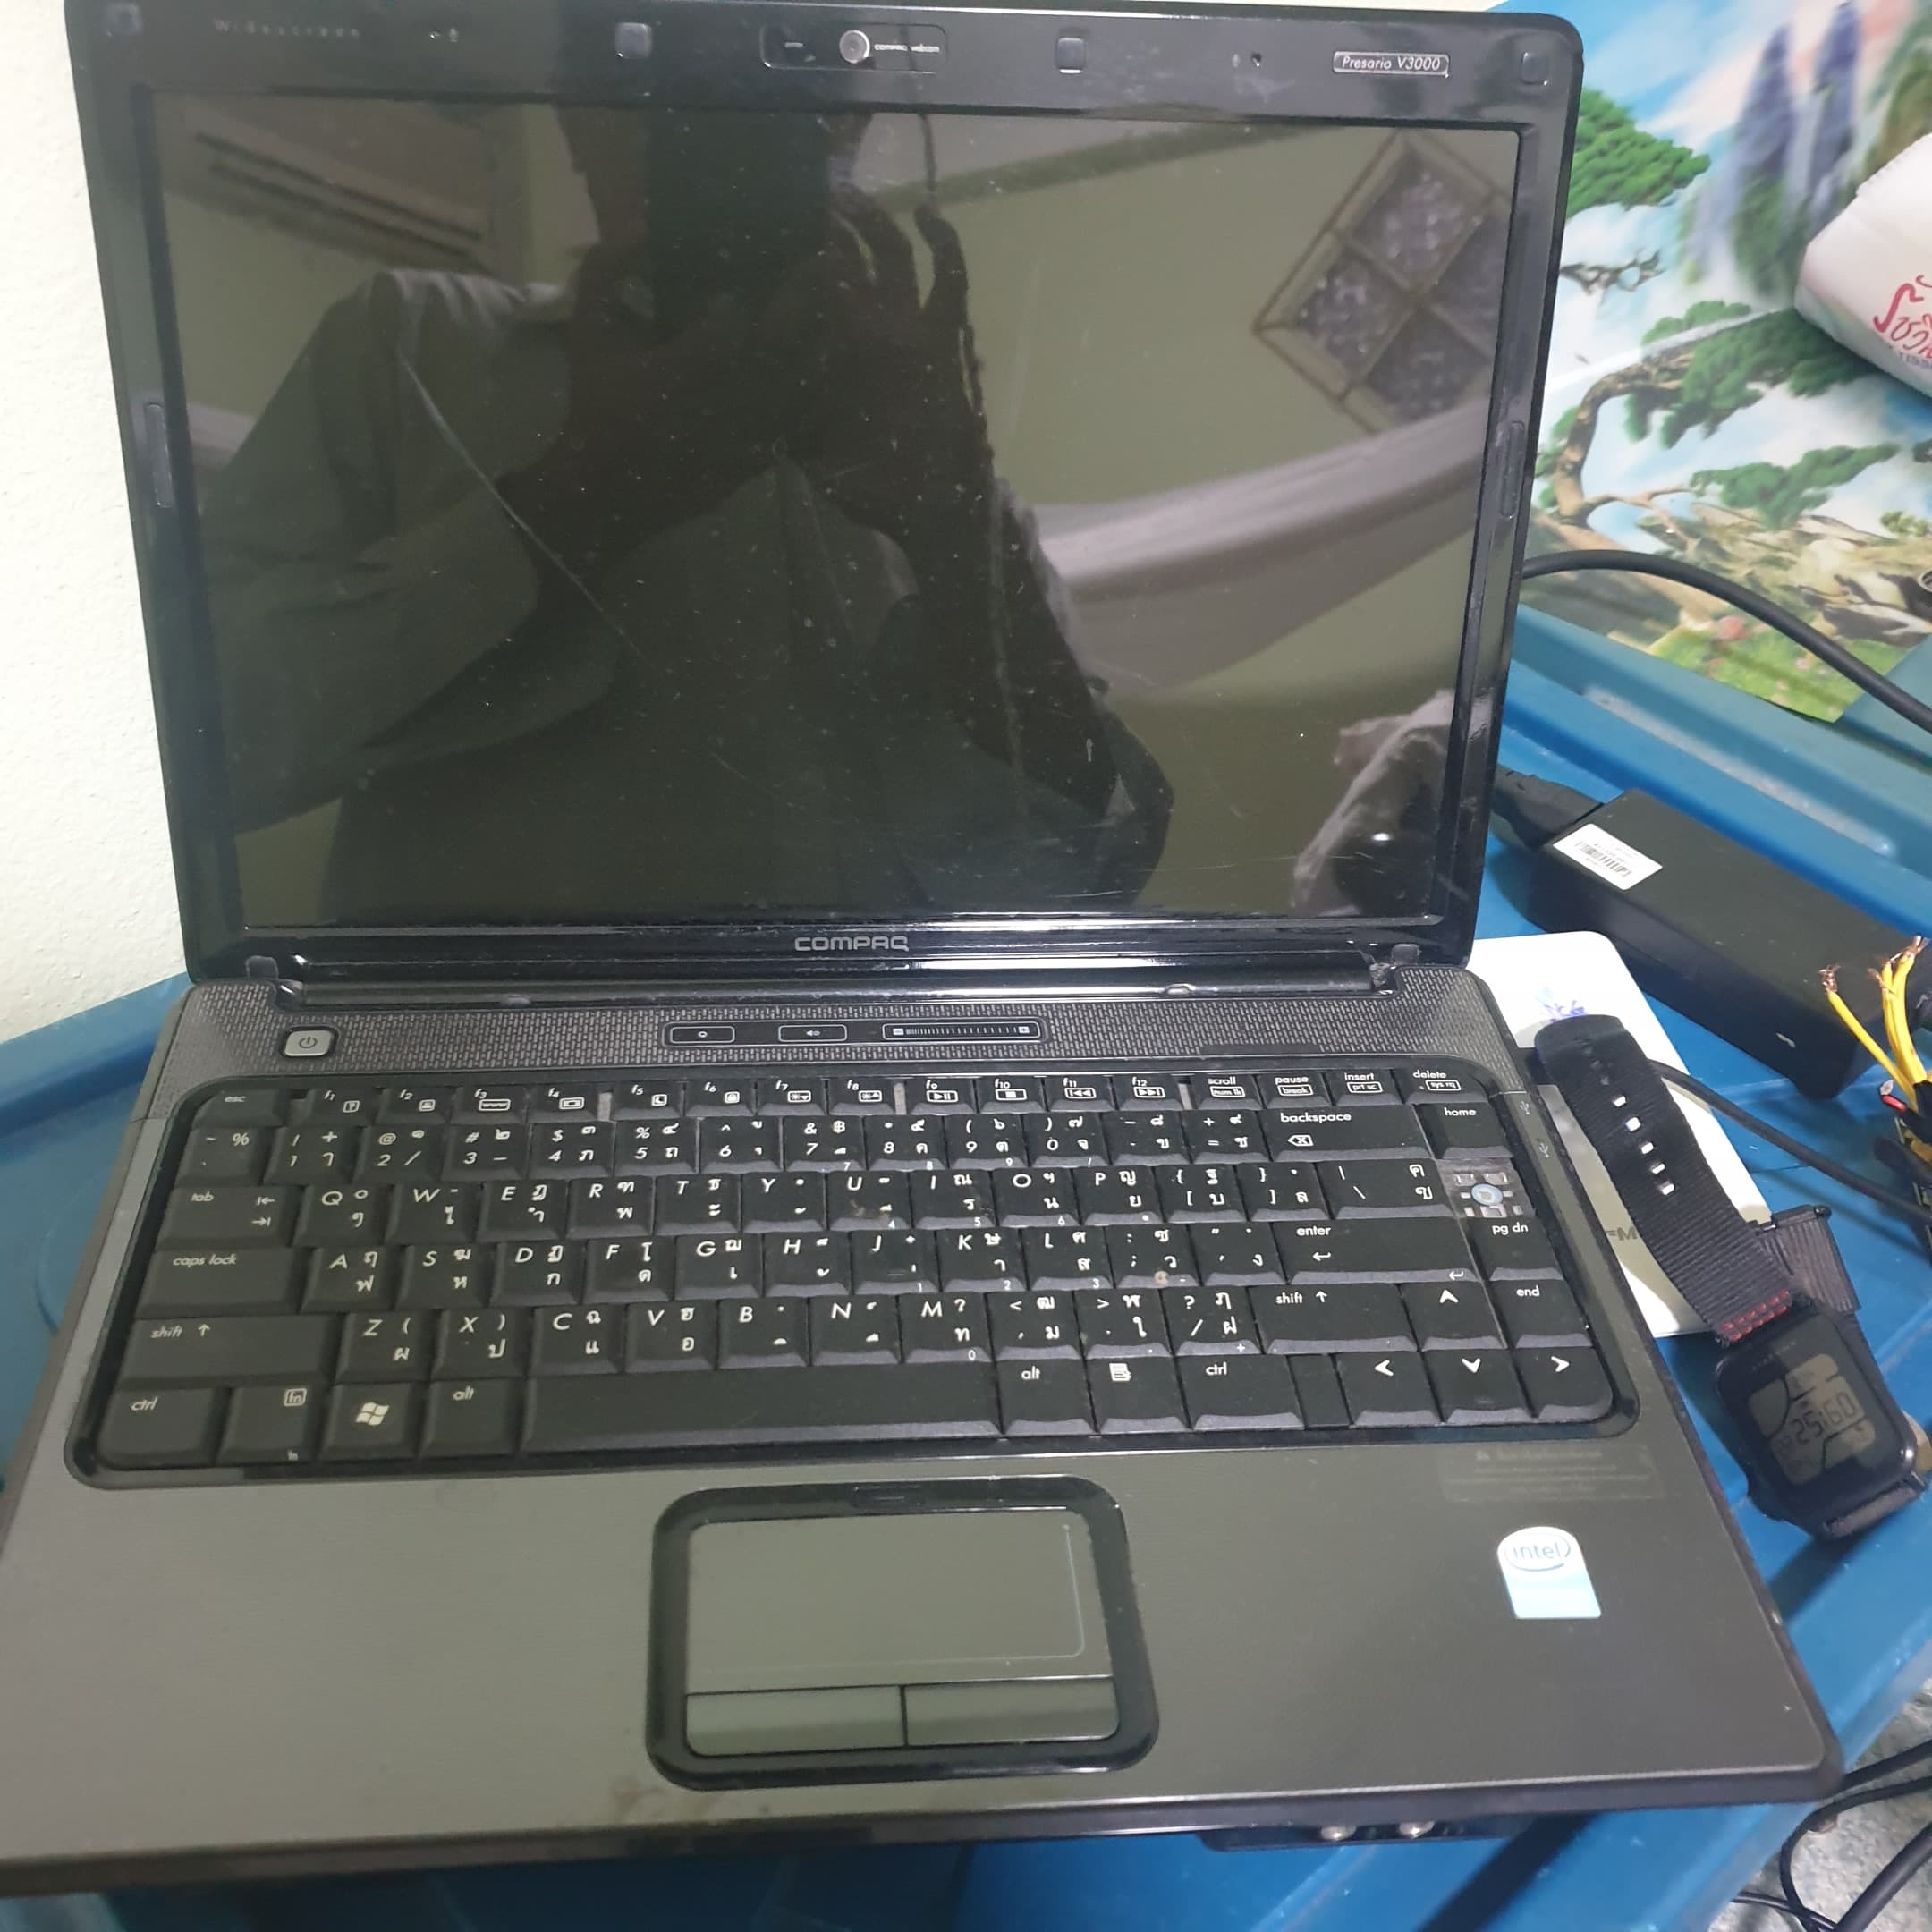
รุ่น pentium ช้าสุด
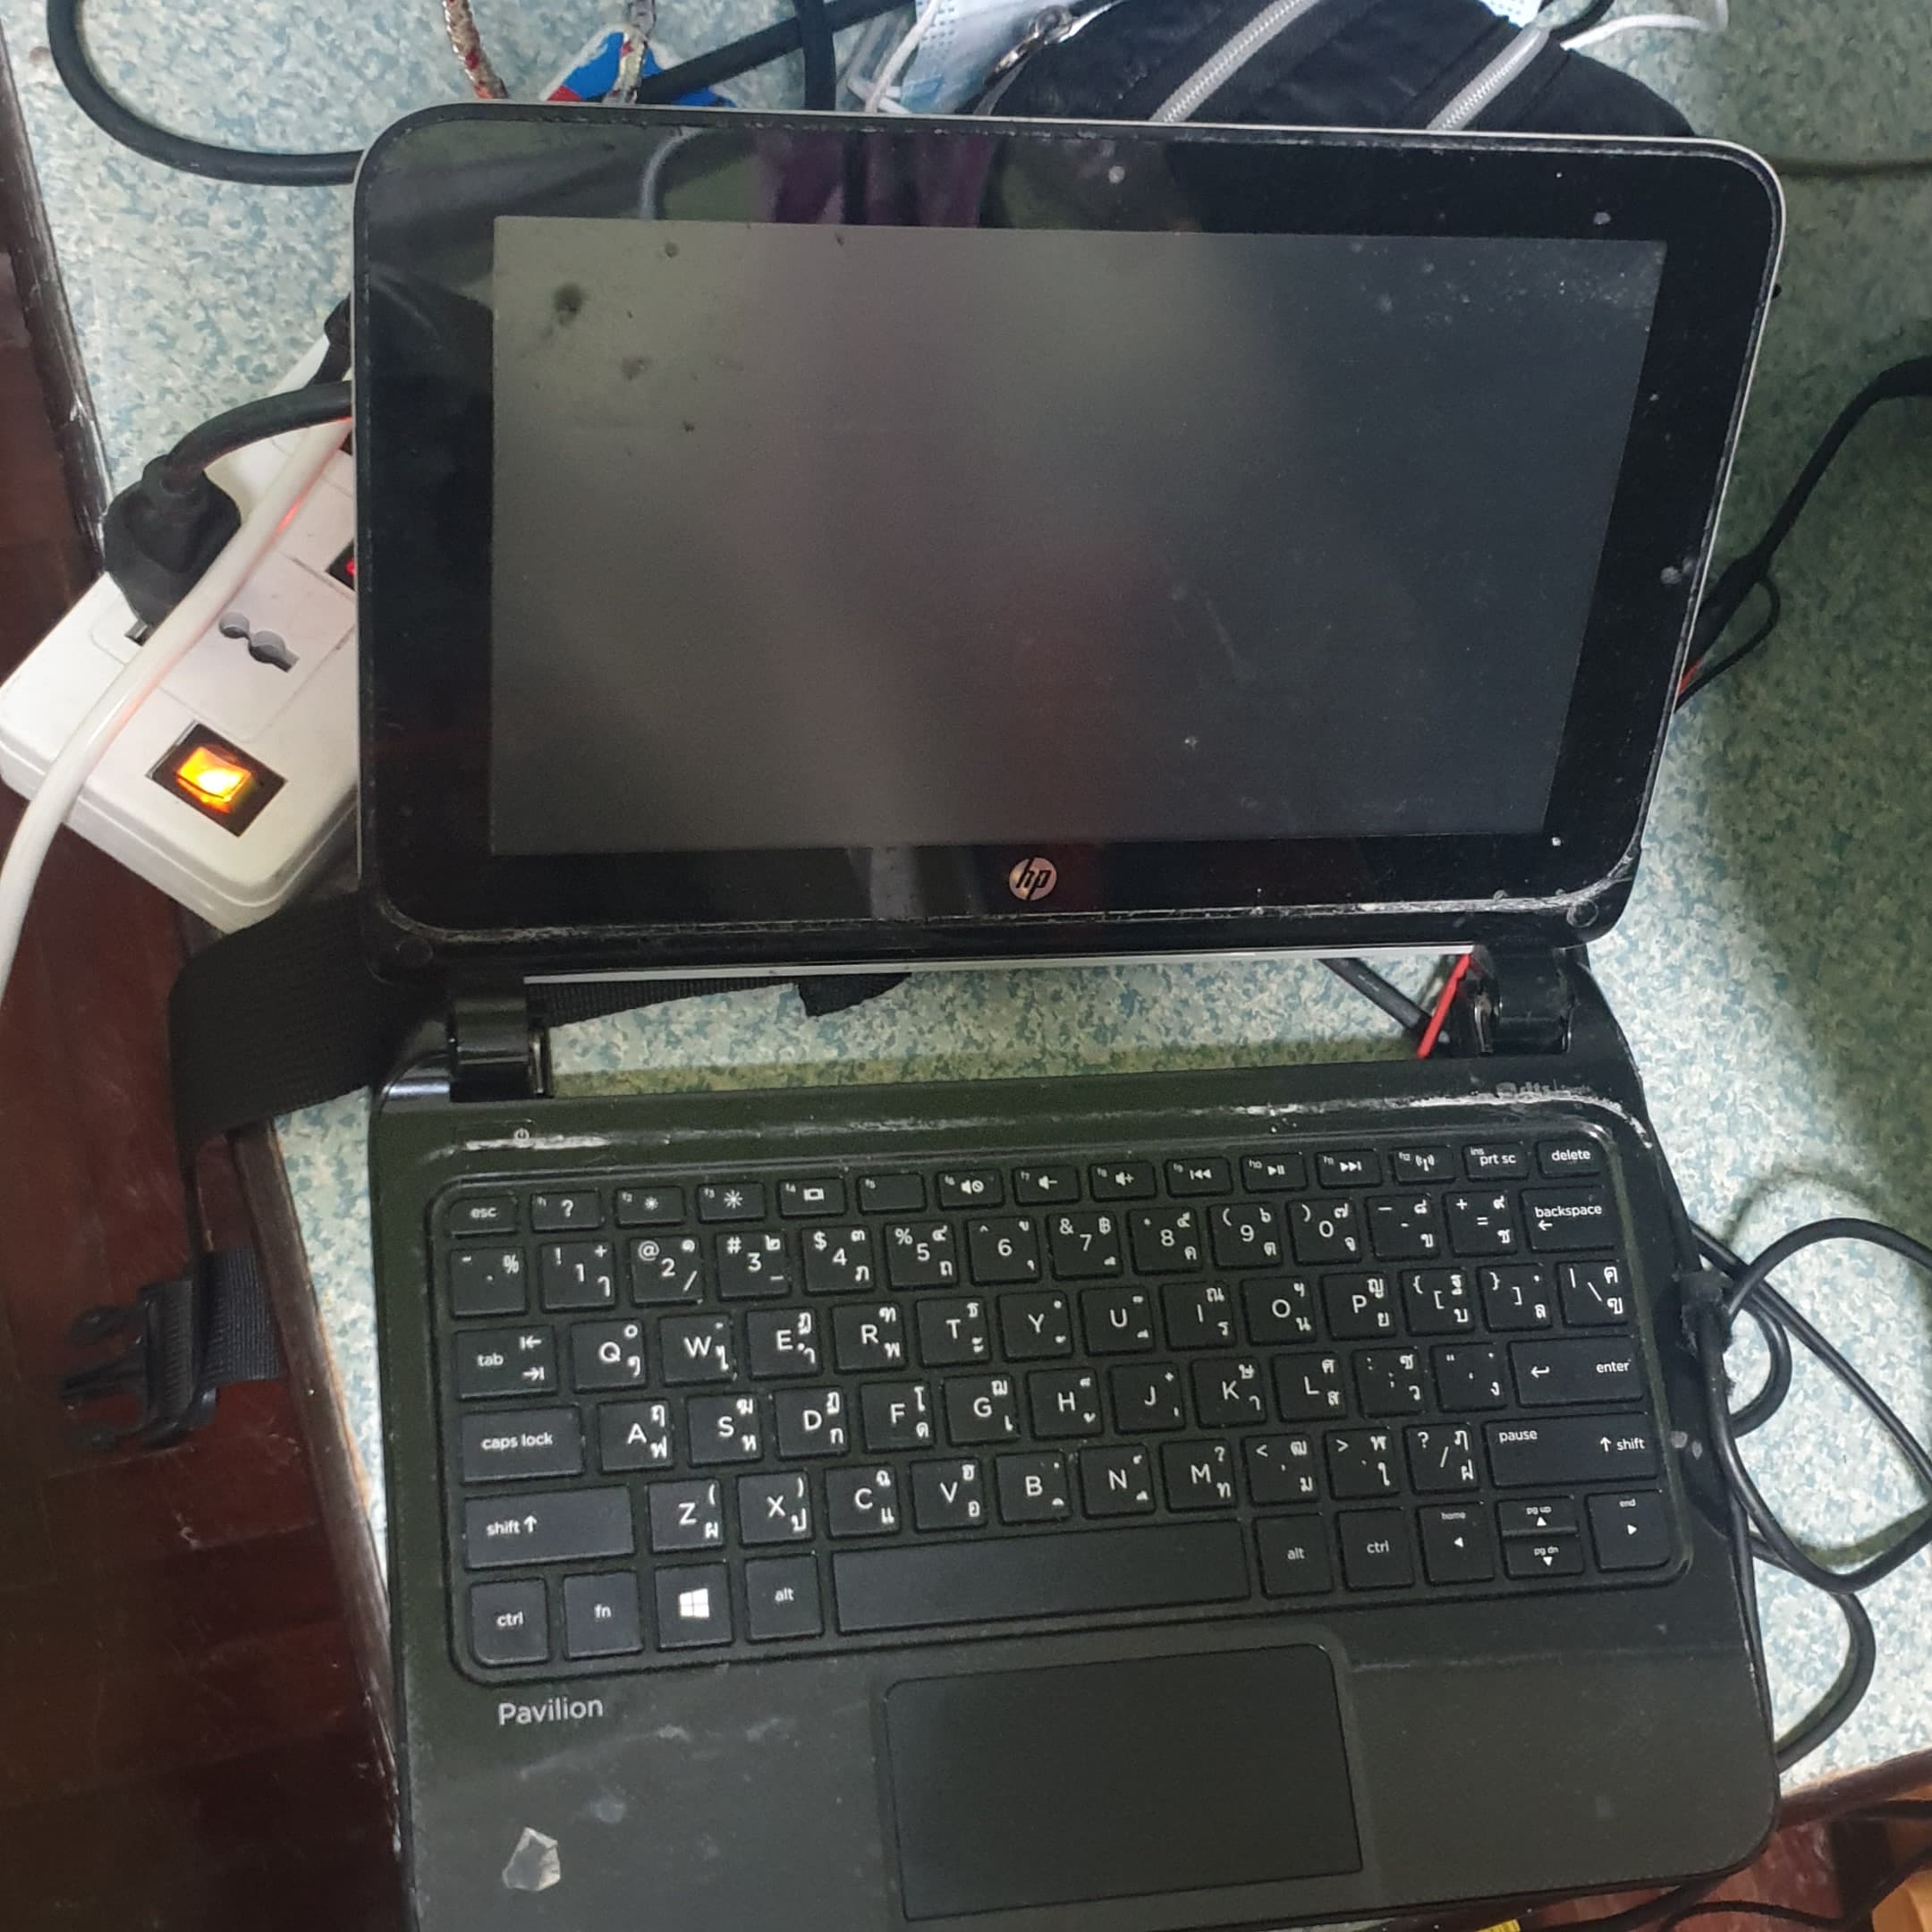
อันนี้ผมไม่รู้ cpu อะไร เป็น hp pavillion โตกว่าแทบเล็ตเล็กน้อย เป็น win8 ช้ารองลงมา
1 Likes
ผมมี lennovo i5 อีกเครื่องเอามาลง ปัดฝุ่นดูเมื่อต้นปี ก็พอได้ ลง window ไม่ได้แล้วมีอาการค้าง เลยเอามาลง linux ubuntu เมื่อจะลื่นๆ เอาลง vscode ก็ลงได้ แต่ให้รันหนักๆ ค้างได้เหมือนกัน
ตัวนี้ใช้อยู่ปัจจุบัน
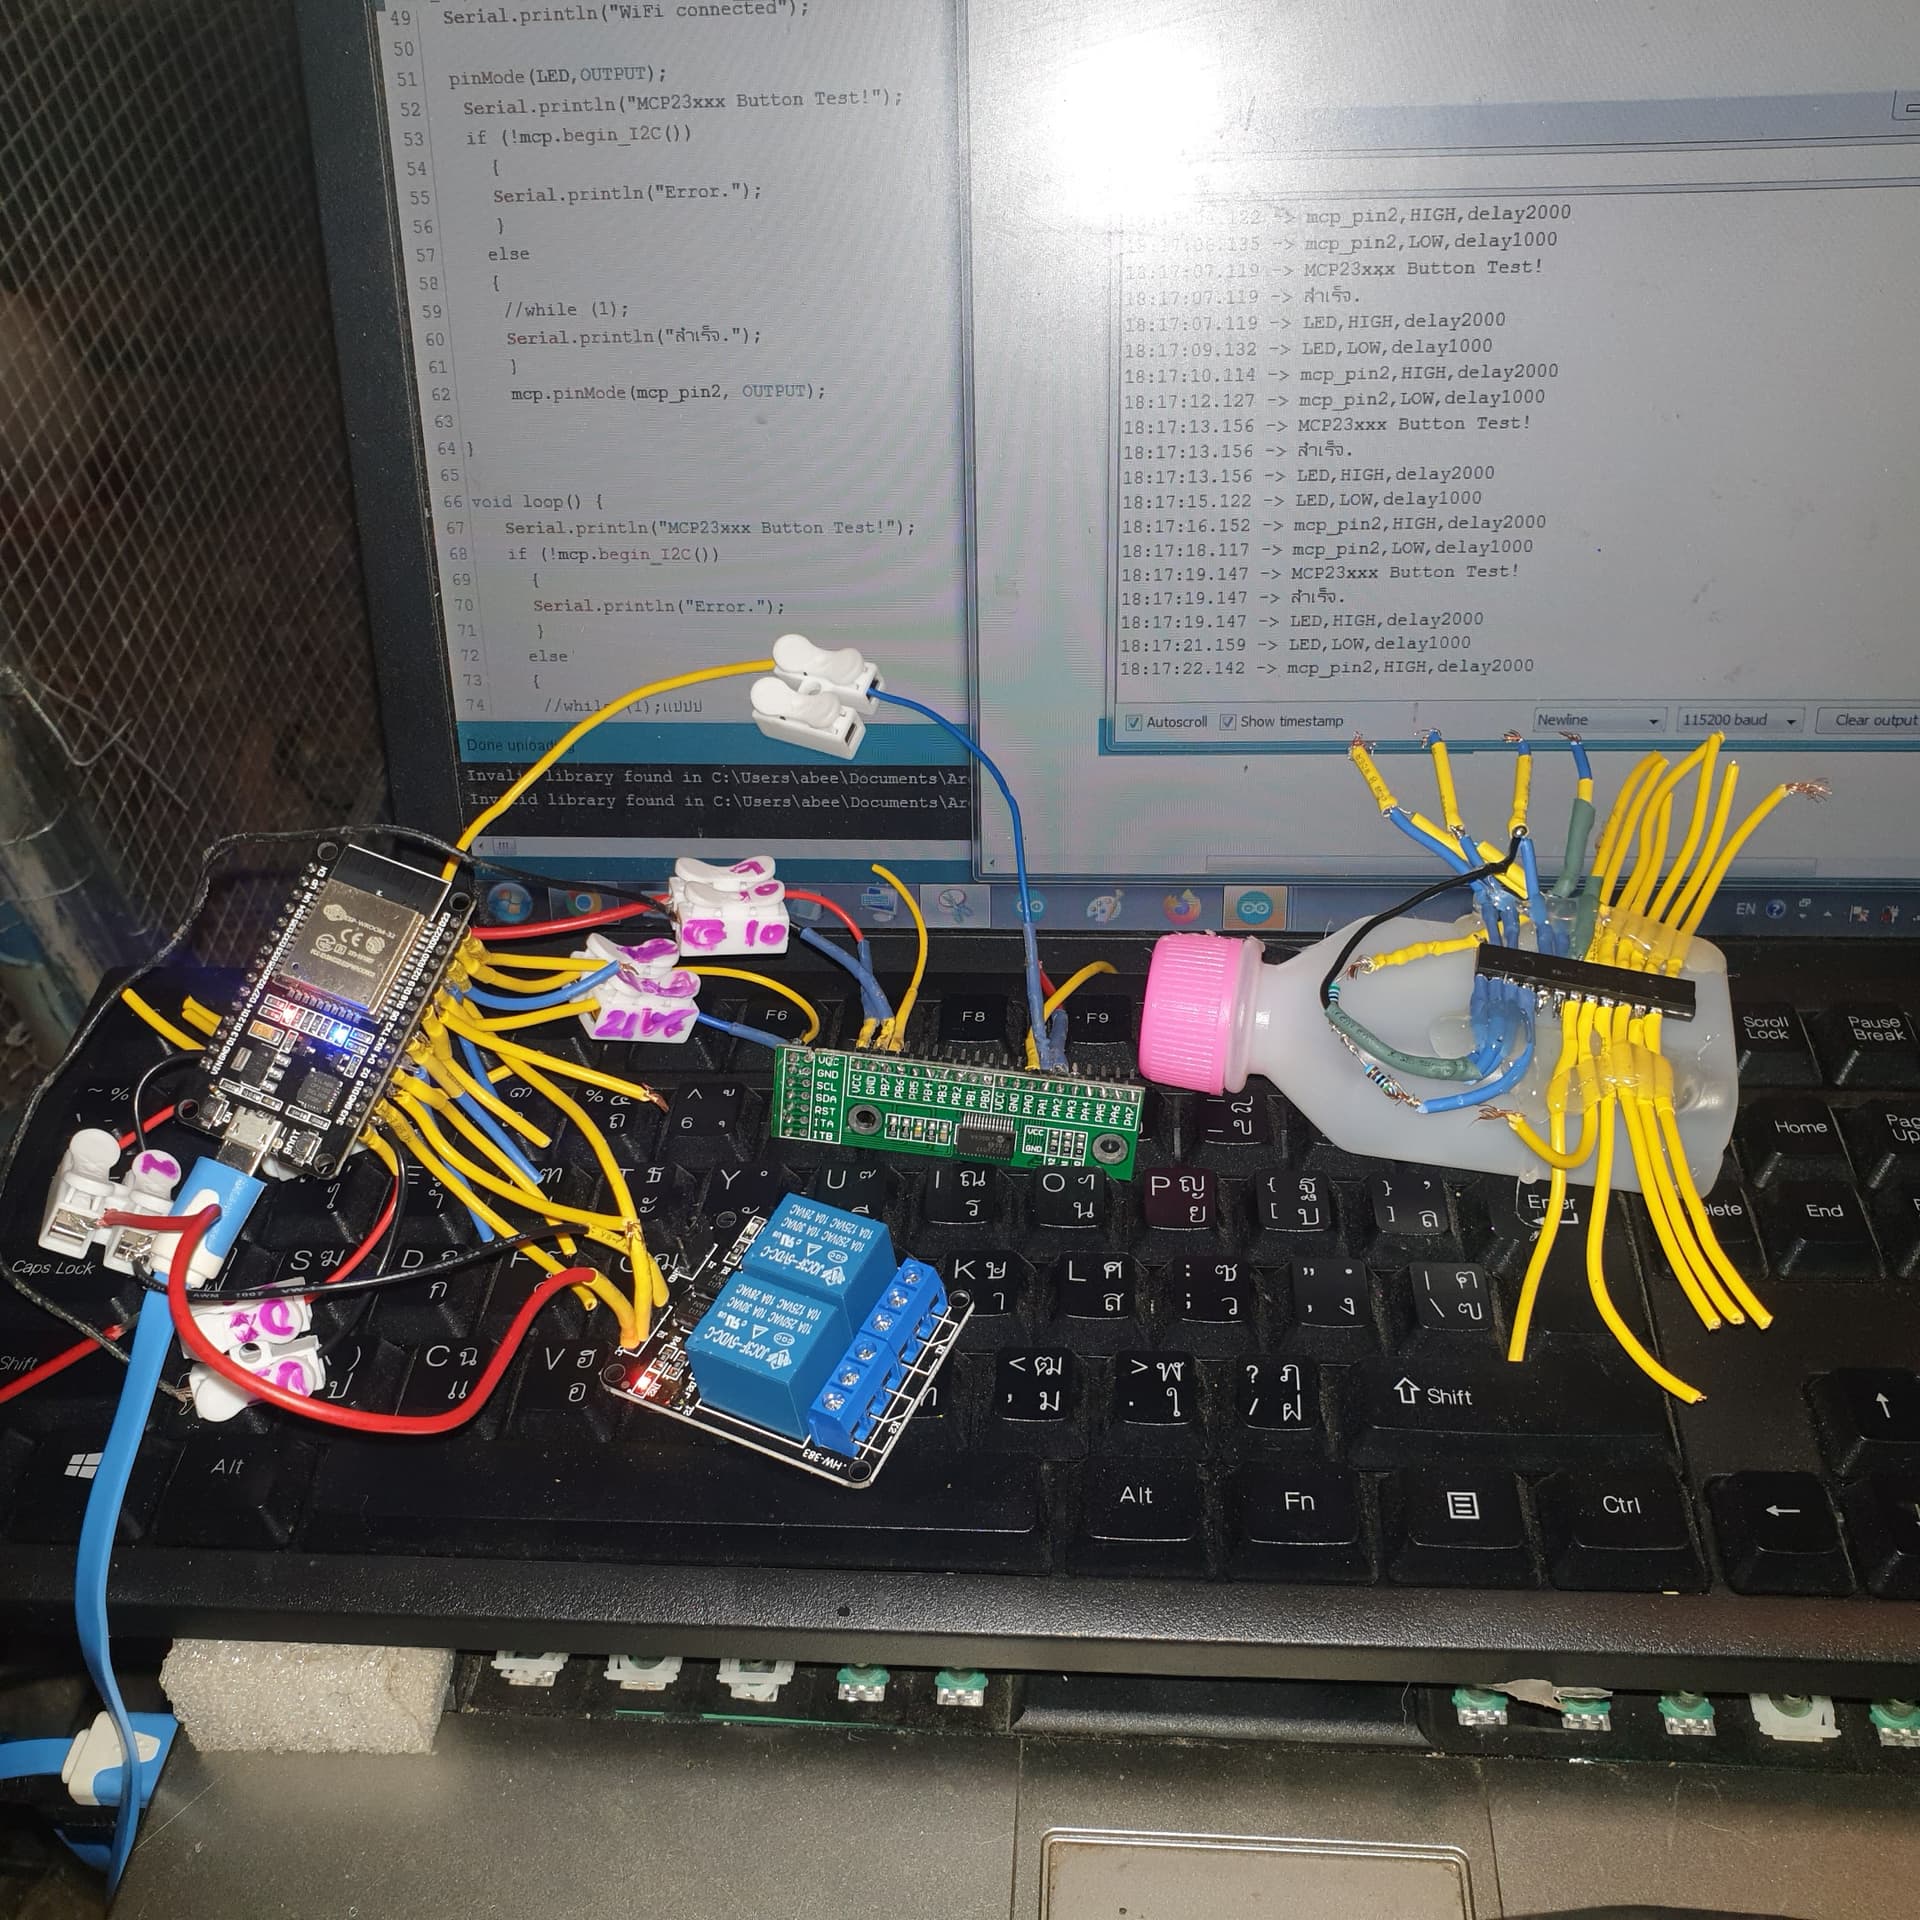
ผมลองใช้ esp32 และ มาต่อใหม่ แบบง่ายๆ เน้นๆ
และแยกโค้ดออกมาน้อยๆ ก่อน
ปรากฎว่า mcp ทำงานทั้ง2ตัว…
โดยต่อ ไฟ 3 v ,gndของ esp เข้า mcp ,
pin21 ของ esp ต่อเข้า sda ของ mcp
pin22 ของ esp ต่อเข้า scl ของ mcp
และขา gpa1 ของ mcp ต่อเข้า in1 ของรีเลย์โมดูล
โดยต่อ ไฟ vin ,gndของ esp เข้ารีเลย์โมดูล,
#include <WiFi.h>
#include <WiFiClient.h>
char ssid[] = "aaa";
char password[] = "zzzz";
#include <Adafruit_MCP23X17.h>
Adafruit_MCP23X17 mcp;
#define mcp_pin2 1//mcp23017
#define LED 2//built-in LED of esp32
void setup() {
// Set pin mode
Serial.begin(115200);
Serial.println("scan start");
// WiFi.scanNetworks will return the number of networks found
int n = WiFi.scanNetworks();
Serial.println("scan done");
if (n == 0) {
Serial.println("no networks found");
} else {
Serial.print(n);
Serial.println(" networks found");
for (int i = 0; i < n; ++i) {
// Print SSID and RSSI for each network found
Serial.print(i + 1);
Serial.print(": ");
Serial.print(WiFi.SSID(i));
Serial.print(" (");
Serial.print(WiFi.RSSI(i));
Serial.print(")");
Serial.println((WiFi.encryptionType(i) == WIFI_AUTH_OPEN)?" ":"*");
delay(10);
}
}
Serial.println("");
Serial.print("Connecting to ");
Serial.println(ssid);
WiFi.begin(ssid, password);
int wifi_ctr = 0;
while (WiFi.status() != WL_CONNECTED) {
delay(500);
Serial.print(".");
}
Serial.println("WiFi connected");
pinMode(LED,OUTPUT);
Serial.println("MCP23xxx Button Test!");
if (!mcp.begin_I2C())
{
Serial.println("Error.");
}
else
{
//while (1);
Serial.println("สำเร็จ.");
}
mcp.pinMode(mcp_pin2, OUTPUT);
}
void loop() {
Serial.println("MCP23xxx Button Test!");
if (!mcp.begin_I2C())
{
Serial.println("Error.");
}
else
{
//while (1);แปปป
Serial.println("สำเร็จ.");
}
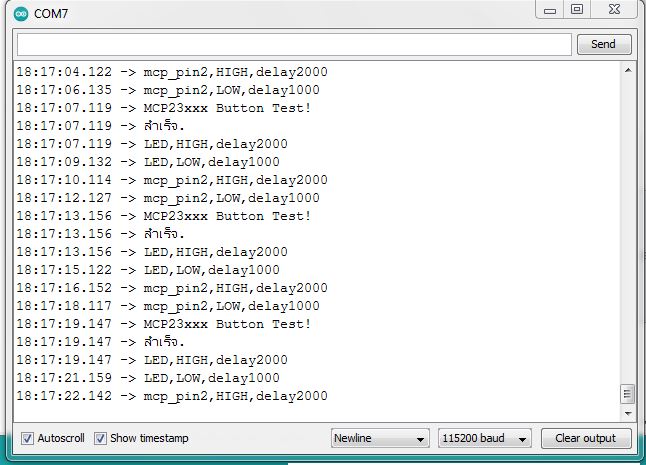
digitalWrite(LED,HIGH);
Serial.println("LED,HIGH,delay2000");
delay(2000);
digitalWrite(LED,LOW);
Serial.println("LED,LOW,delay1000");
delay(1000);
Serial.println("mcp_pin2,HIGH,delay2000");
mcp.digitalWrite(mcp_pin2,HIGH);
delay(2000);
Serial.println("mcp_pin2,LOW,delay1000");
mcp.digitalWrite(mcp_pin2,LOW);
delay(1000);
}
28กค65
วันนี้ว่าจะลองต่อ DHT 2 ตัว โดยผ่าน mcp23017 พอค้นๆดู DHT library ไม่สามารถใช้pin ผ่านmcp23017
เห็นเขาว่า ถึงแม้ เป็น GPIO แต่ส่วนใหญ่ ใช้ในmode output มากกว่า (1)
-ไม่ทราบว่า มีใครสามารถใช้dht ผ่าน mcpได้บ้าง
-ผมจะลองกำหนด input ผ่าน esp32, output ผ่าน mcp23017 เหตุผลในบางกระทู้ว่า มันช้ามากไม่เหมาะใช้เป็นinput
ว่างๆ อยากลองกับesp32อีกที เคยลองกับ nodemcu8266 ที่ผ่านมา มันมีอาการแฮงค์บ่อยเหมือนกัน ไม่ทราบว่าเป็นจาก
การล่าช้าของ input จาก mcpหรือเปล่า
29กค65
2-3วันนี้ ช่วงที่โน้ตบุครวน แต่พอทำงานได้บ้าง
ผมกำลังเอาโค้ดที่รันบน nodemcu1และ2 เอามารวมกัน เพื่อใช้ใน ESP32 1ตัว และ mcp23017 1ตัว
แต่ต้องใช้เวลานานมาก เพราะโค้ดจะยาวมาก และต้องแก้ชื่อ มากมาย
ที่สำเร็จแล้ว
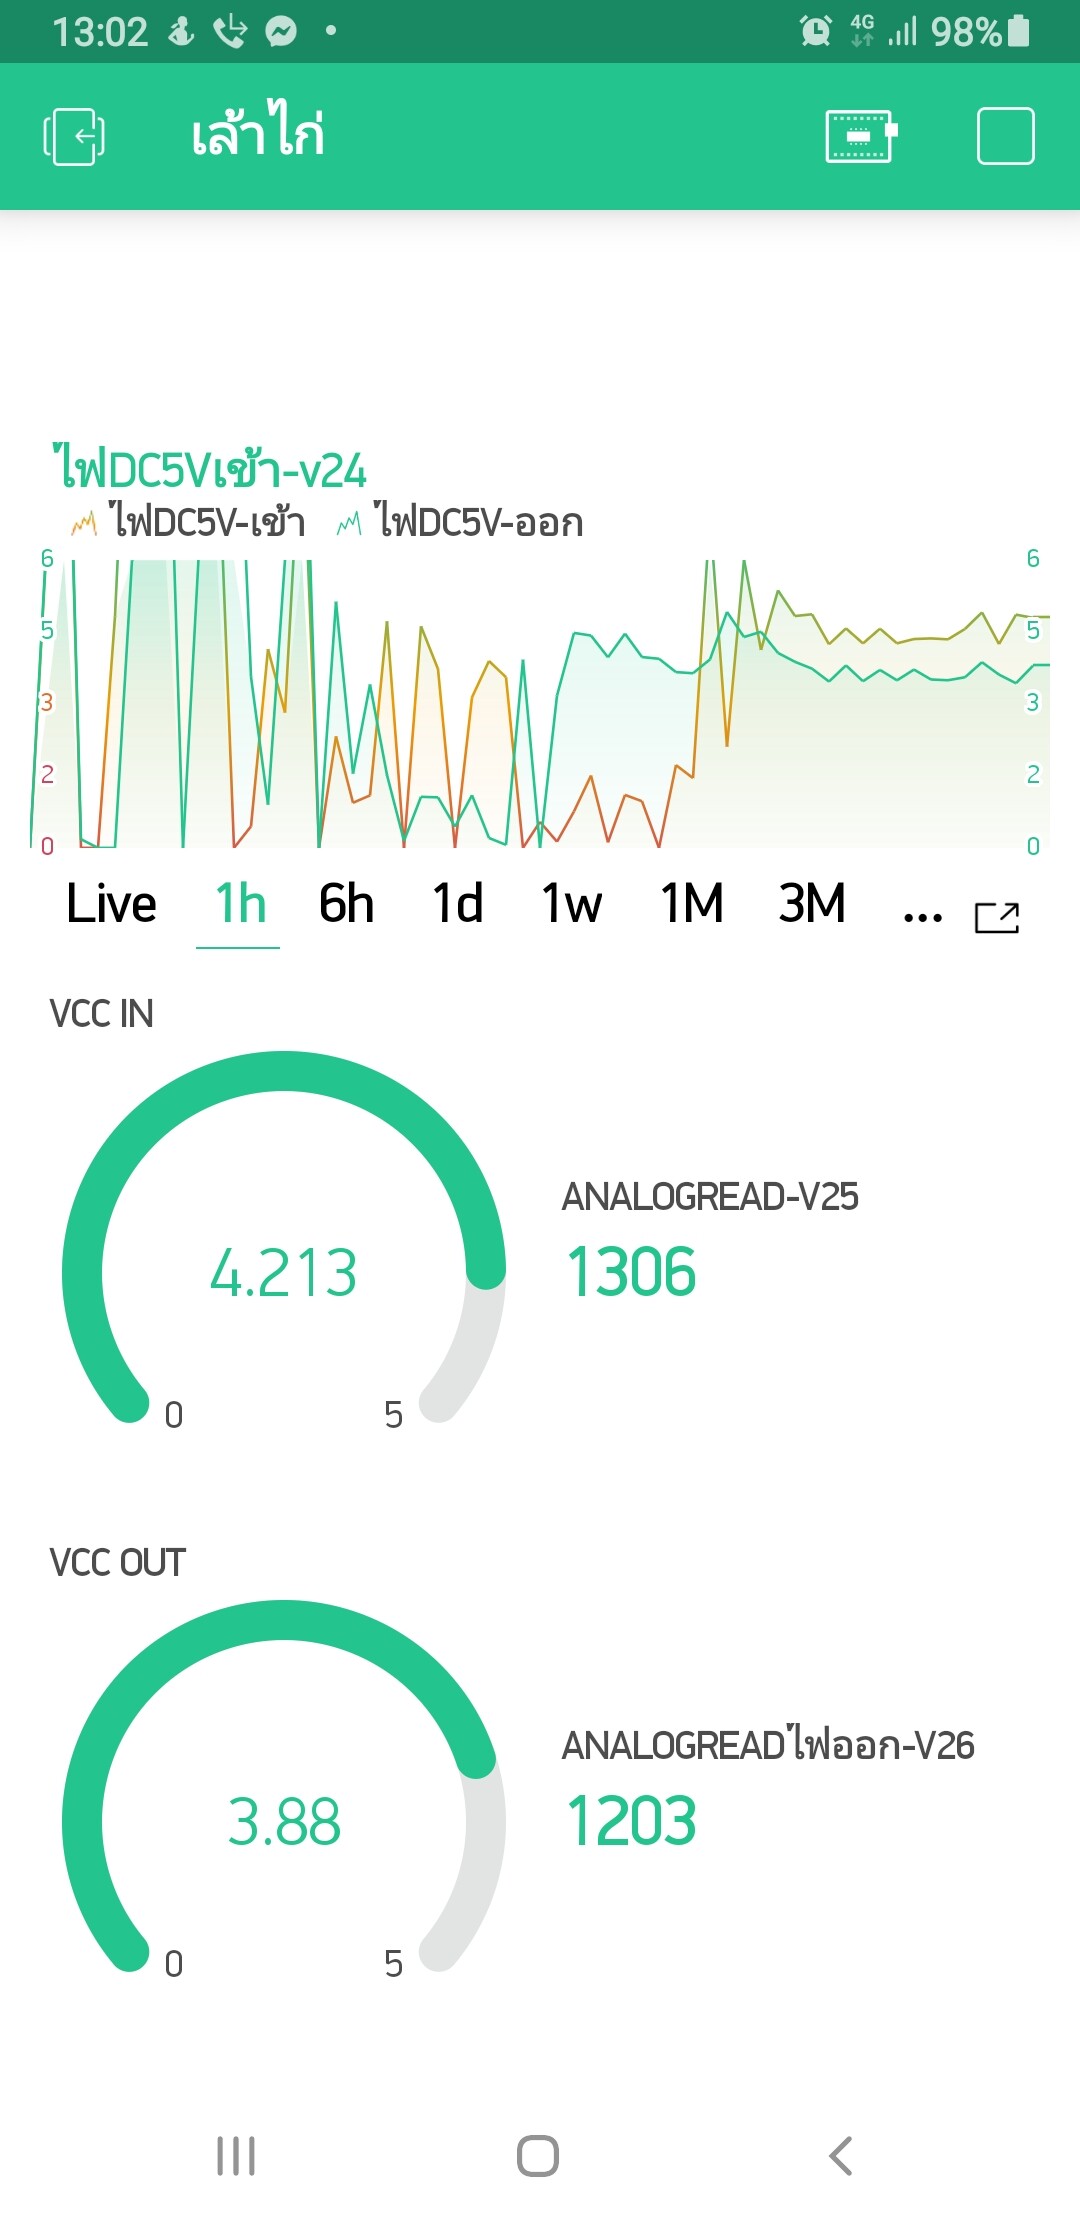
1.อ่านโวลเตจ 2 จุด (ใช้เซ็นเซอร์2ตัว)
2.ดึงเวลาจาก ntp server ได้
3.สามารถสั่ง output ผ่าน mcp ได้ (ลอง1ตัว)
4.สามารถใช้ blynk widget เดิมที่ใช้กับ nodemcu ได้หมด
ถึงแม้เป็น esp32 ก็ตาม แต่ต้องแก้ ค่าช่วงdefault เช่น gauge gadget จะแสดง 1-1023 แต่ จากesp32 1-4000กว่า เป็นต้น แต่ไม่มีปัญหาอะไร
แม้ว่า blynk ที่สร้างตอนแรกระบุ nodemcu ก็ตาม
ผมคิดว่าเป็นจาก ประโยชน์จากการใช้ ค่า virtual pin
5.dht11 สามารถใช้จากโค้ดnodemcuเดิมได้เลย เช่น
#include "DHT.h"
DHT dht;
void setup() {
           Serial.begin(115200);

     dht.setup(3); // ขาD3

}

void loop() {
     delay(dht.getMinimumSamplingPeriod());
  float temperature = dht.getTemperature(); // ดึงค่าอุณหภูมิ
  Serial.print("อุณหภูมิ");
  Serial.println(temperature, 1);
//  currenttemp = temperature;

}
ข้อนี้ผมเสียเวลา1วันเต็มๆ เพราะนึกว่าต้องแก้โค้ดเมื่อใช้ node mcu ผมลองแบบอื่น
จะมีปัญหาเรื่อง error ตัวนี้
‘DHT11’ was not declared in this scope
สุดท้ายผมใช้แบบเดิมก็จบครับ
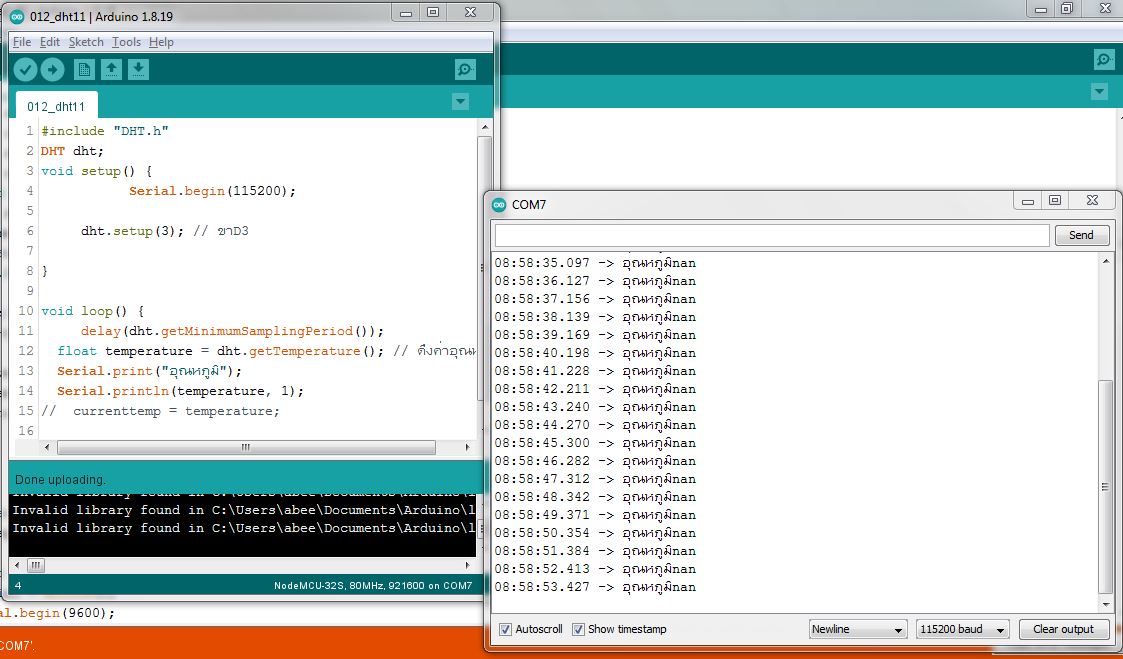
ได้ค่า nan เพราะผมยังไม่ต่อกับ dht sensor ครับ
30กค65
ผมได้รับ โน้ตบุคมือ2 แล้ว เร็วกว่าของเดิม เป็นNEC รุ่น VERSAPRO , Core I5 ,Ram8GB,SSD128GB , windows64bit
ได้ลง arduino ide , board manager , Driver ของ ESP8266 และ ESP32
สำหรับ driver ของ ESP32 ที่ ใช้ได้สำหรับ ผม ตามลิ้งค์นี้ครับ
ก่อนหน้านี้ผมลองตัวนี้ จะมองไม่เห็นครับ
30กย65
ตอนนี้ผมได้ใช้ เครื่อง NEC อัพโหลดโปรแกรม
มีข้อดีคือ เวลาอัพโหลด ไม่ต้องกดปุ่ม boot ของ esp32 เลยตั้งแต่ต้นจนครบ100% เร็วกว่าเครื่องเดิมมาก
แต่มันโชว์ว่า none on com3ที่ ใต้ของ serial monitor
ทั้งๆที่ อัพโหลดได้ และแสดงข้อความการทำงานใน serial ปกติ
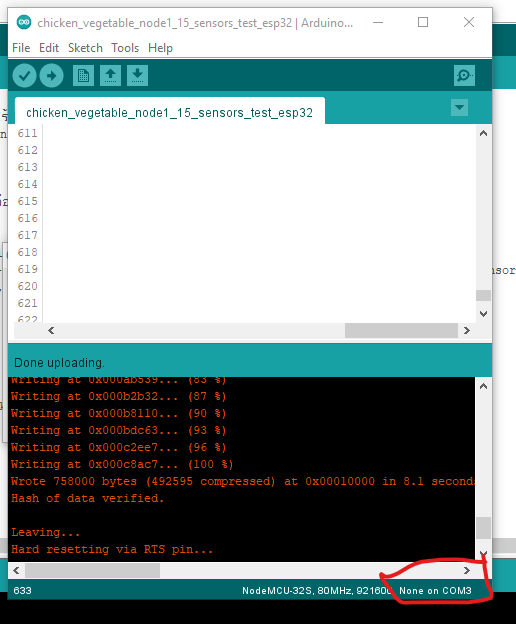
แต่เครื่องเก่านั้นจะไม่มีคำว่า none ตอนที่ อัพโหลดสำเร็จ
มันแปลกดี
อยากถามผู้รู้ว่าเป็นเพราะอะไร
ปัญหาที่2
คือ mcp pin D8 หรือ ขา1 นับแบบICทั่วไป ไม่ทำงาน
mcp.digitalWrite(switch_sensor_upper_tank_mcp_pin8, 0);
เป็นขาที่ปล่อยไฟเลี้ยงเซ็นเซอร์ถังบน(ผ่านรีเลย์อีกที)
ผมลองทำโค้ดตรวจสอบโค้ดนี้ โดยเช็คขากับ led
    //รายการเซ็ค mcp_pin8
    Serial.println("//รายการเซ็ค mcp_pin8");
    Serial.println("เตรียม10วินาที  เซ็ค mcp_pin8 ");
    Serial.println("mcp.digitalWrite(switch_sensor_upper_tank_mcp_pin8, 1);นาน5วินาที");
    delay(10000);
    mcp.digitalWrite(switch_sensor_upper_tank_mcp_pin8, 1);
    Serial.println("mcp.digitalWrite(switch_sensor_upper_tank_mcp_pin8, 1);นาน5วินาที");
    delay(5000);
    mcp.digitalWrite(switch_sensor_upper_tank_mcp_pin8, 0);
    Serial.println("mcp.digitalWrite(switch_sensor_upper_tank_mcp_pin8, 1);นาน5วินาที");
    delay(5000);
    Serial.println("จบการทดสอบmcp_pin8");
ปรากฎว่าไม่มาจริงๆครับ
ผมยอมแพ้แล้วกับ mcp23017 ต้องถอยก่อน
ถ้าใคร**สำเร็จทุกpin** ของ mcp กรุณาสอนผมด้วย
30กค65
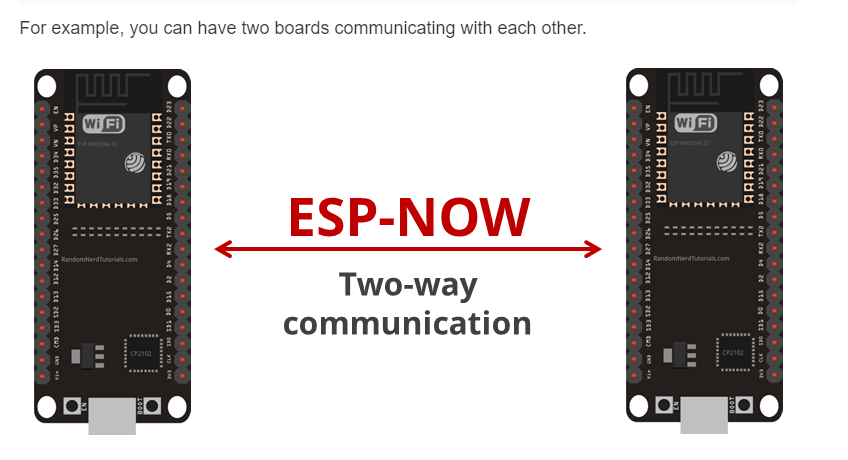
How to connect ESP32 and ESP8266 using ESP-Now protocol
จะลองแบบนี้ดู
มีใครมีความเห็นข่วยเล่าให้ฟังบ้าง
31กค65
ผมได้ลองโค้ดแรก จากที่นี่
//ตัวส่ง ESP32
#include <esp_now.h>
#include <WiFi.h>

// แก้ไขค่า mac ตัวที่ต้องการส่งไปหา
 uint8_t broadcastAddress[] = {0xEC, 0xzz, 0xzz, 0xzz, 0xzz, 0xzz};//ส่งไปหาเฉพาะ mac address
//uint8_t broadcastAddress[] = {0xFF, 0xFF, 0xFF, 0xFF, 0xFF, 0xFF};//ส่งไปหาทุกตัว

typedef struct struct_message { // สร้างตัวแปรแพ็จเกจแบบ struct
  char a[32];
  int b;
  float c;
  bool d;
} struct_message;

struct_message myData; // ตัวแปรแพ็คเกจที่ต้องการส่ง

//เมื่อส่งข้อมูลมาทำฟังก์ชั่นนี้
void OnDataSent(const uint8_t *mac_addr, esp_now_send_status_t status) {
  Serial.print("\r\nLast Packet Send Status:\t");
  Serial.println(status == ESP_NOW_SEND_SUCCESS ? "Delivery Success" : "Delivery Fail");
}

void setup() {
  Serial.begin(115200);
  //ตั้งเป็นโหมด Wi-Fi Station
  WiFi.mode(WIFI_STA);

  // สั่งให้เริ่ม ESP-NOW
  if (esp_now_init() != ESP_OK) {
    Serial.println("Error initializing ESP-NOW");
    return;
  }

  //เมื่อส่งให้ทำฟังก์ชั่น OnDataSend ที่เราสร้างขึ้น
  esp_now_register_send_cb(OnDataSent);

  // Register peer
  esp_now_peer_info_t peerInfo;
  memcpy(peerInfo.peer_addr, broadcastAddress, 6);
  peerInfo.channel = 0;
  peerInfo.encrypt = false;

  // เชื่อมต่ออุปกรณ์ที่ต้องการสื่อสาร
  if (esp_now_add_peer(&peerInfo) != ESP_OK) {
    Serial.println("Failed to add peer");
    return;
  }
}

void loop() {
  // สร้างตัวแปรแพ็คเกจที่ต้องการส่ง
  strcpy(myData.a, "THIS IS A CHAR");
  myData.b = random(1, 20);
  myData.c = 1.2;
  myData.d = false;

  // สั่งให้ส่งข้อมูล
  esp_err_t result = esp_now_send(broadcastAddress, (uint8_t *) &myData, sizeof(myData));

  if (result == ESP_OK) {
    Serial.println("Sent with success");
  }
  else {
    Serial.println("Error sending the data");
  }
  delay(2000);
}
ผมลอง verify ผ่านครับ
เริ่มต้นไม่ถูกเลยครับ…555 ดูจากที่นี่ ทีละข้อแล้วกัน
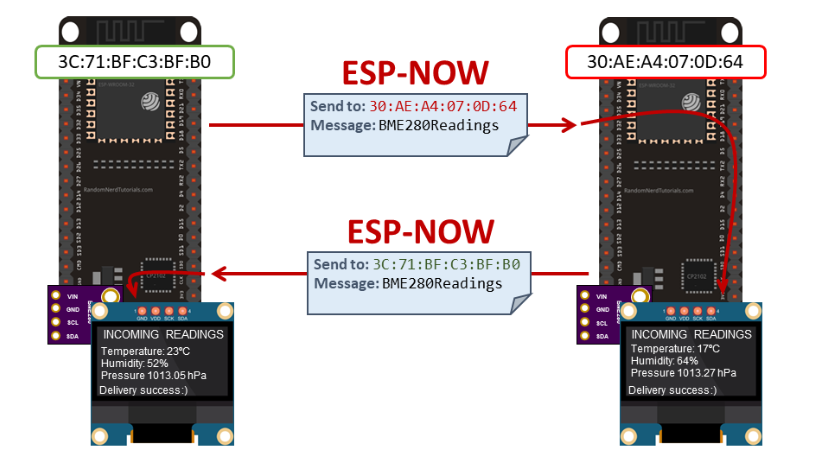
รูปตัวอย่างเพิ่อผมจะได้เข้าใจ
1.ใส่board managerของ esp8266 ลงใน arduino ide
2.ใส่ library DHT
3.ใส่ library Adafruit Unified Sensor
4.ผมเอา esp32 และ nodemcu เสียบสาย usb เข้าโน้ตบุต ตัวเดียวกัน

5.ดูใน device manager จะเห็น esp32->com3,nodemcu->com4

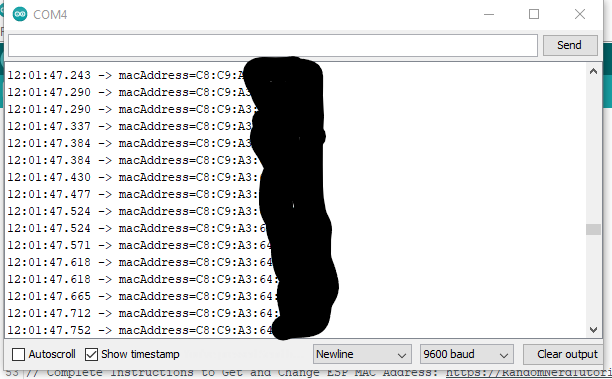
6.หา MAC address ของ ESP32
-เปิด new sketch ตั้งชื่อว่า 014_MAC_ADDRESS_01 (01คือ บอร์ดesp หมายเลข 1)
/*
 *  This sketch demonstrates how to scan WiFi networks.
 *  The API is almost the same as with the WiFi Shield library,
 *  the most obvious difference being the different file you need to include:
 */
#include "WiFi.h"

void setup()
{
    Serial.begin(115200);

    // Set WiFi to station mode and disconnect from an AP if it was previously connected
    WiFi.mode(WIFI_STA);
    WiFi.disconnect();
    delay(100);

    Serial.println("Setup done");
}

void loop()
{
    Serial.println("scan start");

    // WiFi.scanNetworks will return the number of networks found
    int n = WiFi.scanNetworks();
    Serial.println("scan done");
    if (n == 0) {
        Serial.println("no networks found");
    } else {
        Serial.print(n);
        Serial.println(" networks found");
        for (int i = 0; i < n; ++i) {
            // Print SSID and RSSI for each network found
            Serial.print(i + 1);
            Serial.print(": ");
            Serial.print(WiFi.SSID(i));
            Serial.print(" (");
            Serial.print(WiFi.RSSI(i));
            Serial.print(")");
            Serial.println((WiFi.encryptionType(i) == WIFI_AUTH_OPEN)?" ":"*");
            Serial.print("macAddress=");
            Serial.println(WiFi.macAddress());
            delay(10);
        }
    }
    Serial.println("");

    // Wait a bit before scanning again
    delay(5000);
}
-เลือก board nodemcu32s,port com3
-upload
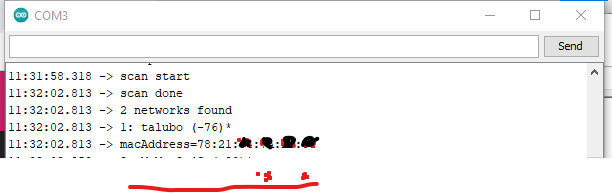
-ได้แล้วครับ สำหรับ esp32
7.หา MAC address ของ ESP8266
ทำsketch ใหม่ เลือกบอร์ด nodemcu8266และcom4
code
#include <ESP8266WiFi.h>
void setup(){
  Serial.begin(9600);
    WiFi.mode(WIFI_STA);
}

void loop(){
    Serial.print("macAddress=");
    Serial.println(WiFi.macAddress());

}
ดูในserial monitor
ได้แล้วครับ
8.ฝั่ง nodemcu
ต่อ DHT 11 เข้า D2
เขียนโค้ด ดังนี้
`//  macAddressของตัวนี้คือ=C8:C9:A3:zz:zz:zz
//macAddressของคู่ที่จะต่อด้วยเป็นesp32คือ  78:21:nn:nn:nn:nn
#include <ESP8266WiFi.h>
#include <espnow.h>

#include <Adafruit_Sensor.h>
#include <DHT.h>

// REPLACE WITH THE MAC Address of your receiver
uint8_t broadcastAddress[] = {0x78, 0x21, 0xnn, 0xnn, 0xxx, 0xnn};//ของ ESP32

// Digital pin connected to the DHT sensor
#define DHTPIN D2


// Digital pin connected to the DHT sensor
#define DHTPIN D2

// Uncomment the type of sensor in use:
#define DHTTYPE    DHT11     // DHT 11

DHT dht(DHTPIN, DHTTYPE);

// Define variables to store DHT readings to be sent
float temperature;
float humidity;

// Define variables to store incoming readings
float incomingTemp;
float incomingHum;

// Updates DHT readings every 10 seconds
const long interval = 10000;
unsigned long previousMillis = 0;    // will store last time DHT was updated

// Variable to store if sending data was successful
String success;

//Structure example to send data
//Must match the receiver structure
typedef struct struct_message {
    float temp;
    float hum;
} struct_message;

// Create a struct_message called DHTReadings to hold sensor readings
struct_message DHTReadings;

// Create a struct_message to hold incoming sensor readings
struct_message incomingReadings;

// Callback when data is sent
void OnDataSent(uint8_t *mac_addr, uint8_t sendStatus) {
  Serial.print("Last Packet Send Status: ");
  if (sendStatus == 0){
    Serial.println("Delivery success");
  }
  else{
    Serial.println("Delivery fail");
  }
}

// Callback when data is received
void OnDataRecv(uint8_t * mac, uint8_t *incomingData, uint8_t len) {
  memcpy(&incomingReadings, incomingData, sizeof(incomingReadings));
  Serial.print("Bytes received: ");
  Serial.println(len);
  incomingTemp = incomingReadings.temp;
  incomingHum = incomingReadings.hum;
}

void getReadings(){
        Serial.println("ผลที่อ่านได้จาก NODEMCU 8266");
  // Read Temperature
  temperature = dht.readTemperature();
  // Read temperature as Fahrenheit (isFahrenheit = true)
  //float t = dht.readTemperature(true);
  if (isnan(temperature)){
    Serial.println("มีข้อผิดพลาด");
    temperature = 0.0;
  }
  else
  {
        Serial.print("temperature=");
        Serial.println(temperature);

  }
  humidity = dht.readHumidity();
  if (isnan(humidity)){
    Serial.println("มีข้อผิดพลาด");
    humidity = 0.0;
  }
    else
  {
        Serial.print("humidity=");
        Serial.println(humidity);

  }

}

void printIncomingReadings(){
  // Display Readings in Serial Monitor
  Serial.println("รับจาก ESP32 ");
  Serial.print("Temperature: ");
  Serial.print(incomingTemp);
  Serial.println(" ºC");
  Serial.print("Humidity: ");
  Serial.print(incomingHum);
  Serial.println(" %");
}

void setup() {
  // Init Serial Monitor
  Serial.begin(9600);

  // Init DHT sensor
  dht.begin();

  // Set device as a Wi-Fi Station
  WiFi.mode(WIFI_STA);
  WiFi.disconnect();

  // Init ESP-NOW
  if (esp_now_init() != 0) {
    Serial.println("Error initializing ESP-NOW");
    return;
  }
    Serial.print("macAddress=");
    Serial.println(WiFi.macAddress());

  // Set ESP-NOW Role
  esp_now_set_self_role(ESP_NOW_ROLE_COMBO);

  // Once ESPNow is successfully Init, we will register for Send CB to
  // get the status of Trasnmitted packet
  esp_now_register_send_cb(OnDataSent);

  // Register peer
  esp_now_add_peer(broadcastAddress, ESP_NOW_ROLE_COMBO, 1, NULL, 0);

  // Register for a callback function that will be called when data is received
  esp_now_register_recv_cb(OnDataRecv);
}

void loop() {
  unsigned long currentMillis = millis();
  if (currentMillis - previousMillis >= interval) {
    // save the last time you updated the DHT values
    previousMillis = currentMillis;

    //Get DHT readings
    getReadings();

    //Set values to send
    DHTReadings.temp = temperature;
    DHTReadings.hum = humidity;

    // Send message via ESP-NOW
    esp_now_send(broadcastAddress, (uint8_t *) &DHTReadings, sizeof(DHTReadings));

    // Print incoming readings
    printIncomingReadings();
  }
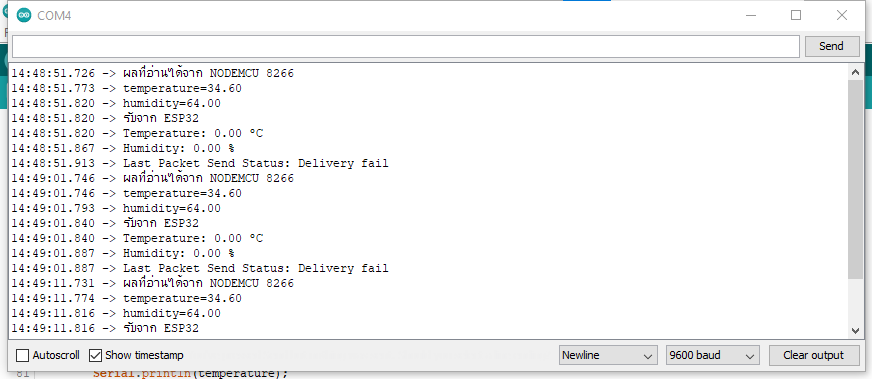
ผลฝั่งเดียวที่ออกคือ nodemcu8266
1สค65
วันนี้ได้ทำฝั่ง ESP32 ซึ่งต่อกับ DHT22 ผมได้แนวทางจากที่นี่
โค้ด
//#include <esp_now.h>
//#include <WiFi.h>

//#include <Wire.h>
//#include <Adafruit_Sensor.h>
//#include <Adafruit_BME280.h>
///o
#include <Adafruit_Sensor.h>
#include <DHT.h>
#include <esp_now.h>
#include <WiFi.h>
float humidity ;
float temperature;
///-o
//#include <Adafruit_GFX.h>
//#include <Adafruit_SSD1306.h>

//#define SCREEN_WIDTH 128  // OLED display width, in pixels
//#define SCREEN_HEIGHT 64  // OLED display height, in pixels

// Declaration for an SSD1306 display connected to I2C (SDA, SCL pins)
//Adafruit_SSD1306 display(SCREEN_WIDTH, SCREEN_HEIGHT, &Wire, -1);

//Adafruit_BME280 bme;

// REPLACE WITH THE MAC Address of your receiver
//uint8_t broadcastAddress[] = {0xFF, 0xFF, 0xFF, 0xFF, 0xFF, 0xFF};
///o
uint8_t broadcastAddress[] = {0xC8, 0xC9, 0x84, 0xzz, 0xzz, 0xzz};
#define DHTPIN 2
#define DHTTYPE    DHT22     // DHT 11

DHT dht(DHTPIN, DHTTYPE);

///-o
// Define variables to store BME280 readings to be sent
//float temperature;
//float humidity;
//float pressure;

// Define variables to store incoming readings
//float incomingTemp;
//float incomingHum;
//float incomingPres;
///o
float incomingTemperature;
float incomingHumidity;
///-o
// Variable to store if sending data was successful
//String success;
///o
const long interval = 10000;
unsigned long previousMillis = 0;    // will store last time DHT was updated

// Variable to store if sending data was successful
String success;
///-o
//Structure example to send data
//Must match the receiver structure
//typedef struct struct_message {
//    float temp;
//    float hum;
//    float pres;
//} struct_message;
///o
typedef struct struct_message {
    float temp;
    float hum;
} struct_message;

///-o
// Create a struct_message called BME280Readings to hold sensor readings
//struct_message BME280Readings;
///o
struct_message DHTReadings;

///-o

// Create a struct_message to hold incoming sensor readings
struct_message incomingReadings;
esp_now_peer_info_t peerInfo;

// Callback when data is sent
void OnDataSent(const uint8_t *mac_addr, esp_now_send_status_t status) {
  Serial.print("\r\nLast Packet Send Status:\t");
  Serial.println(status == ESP_NOW_SEND_SUCCESS ? "Delivery Success" : "Delivery Fail");
  if (status ==0){
    success = "Delivery Success :)";
  }
  else{
    success = "Delivery Fail :(";
  }
}
///o
//void OnDataSent(const uint8_t *mac_addr, esp_now_send_status_t status) {
//  Serial.print("\r\nLast Packet Send Status:\t");
//  Serial.println(status == ESP_NOW_SEND_SUCCESS ? "Delivery Success" : "Delivery Fail");
//}
///-o
// Callback when data is received
void OnDataRecv(const uint8_t * mac, const uint8_t *incomingData, int len) {
  memcpy(&incomingReadings, incomingData, sizeof(incomingReadings));
  Serial.print("Bytes received: ");
  Serial.println(len);
  incomingTemperature = incomingReadings.temp;
  incomingHumidity = incomingReadings.hum;
//  incomingPres = incomingReadings.pres;
}

void setup() {
  // Init Serial Monitor
//  Serial.begin(115200);
  // Set device as a Wi-Fi Station
//  WiFi.mode(WIFI_STA);
  ///o
     Serial.begin(9600);
  //ตั้งเป็นโหมด Wi-Fi Station
  WiFi.mode(WIFI_STA);

  ///-o

  // Init ESP-NOW
//  if (esp_now_init() != ESP_OK) {
//    Serial.println("Error initializing ESP-NOW");
//    return;
//  }
  ///o
    // สั่งให้เริ่ม ESP-NOW
  if (esp_now_init() != ESP_OK) {
    Serial.println("Error initializing ESP-NOW");
    return;
  }

  ///-o

  // Once ESPNow is successfully Init, we will register for Send CB to
  // get the status of Trasnmitted packet
 // esp_now_register_send_cb(OnDataSent);
  ///o
   //เมื่อส่งให้ทำฟังก์ชั่น OnDataSend ที่เราสร้างขึ้น
  esp_now_register_send_cb(OnDataSent);


  ///-o
  // Register peer
//  memcpy(peerInfo.peer_addr, broadcastAddress, 6);
//  peerInfo.channel = 0;
//  peerInfo.encrypt = false;
 ///o
   // Register peer
  esp_now_peer_info_t peerInfo;
  memcpy(peerInfo.peer_addr, broadcastAddress, 6);
  peerInfo.channel = 0;
  peerInfo.encrypt = false;

 ///-o
  // Add peer
//  if (esp_now_add_peer(&peerInfo) != ESP_OK){
//    Serial.println("Failed to add peer");
//    return;
//  }
  ///o
   // เชื่อมต่ออุปกรณ์ที่ต้องการสื่อสาร
  if (esp_now_add_peer(&peerInfo) != ESP_OK) {
    Serial.println("Failed to add peer");
    return;
  }
  ///-o
  // Register for a callback function that will be called when data is received
  esp_now_register_recv_cb(OnDataRecv);
  ///o
    Serial.println(F("DHTxx test!"));

  dht.begin();
  ///-o
}

void loop() {
//  getReadings();
///o
  unsigned long currentMillis = millis();
  if (currentMillis - previousMillis >= interval) {
    // save the last time you updated the DHT values
    previousMillis = currentMillis;

    //Get DHT readings
    getReadings();

///-o
  // Set values to send
//  BME280Readings.temp = temperature;
//  BME280Readings.hum = humidity;
//  BME280Readings.pres = pressure;
///o
    //Set values to send
    DHTReadings.temp = temperature;
    DHTReadings.hum = humidity;
///-o
  // Send message via ESP-NOW
 // esp_err_t result = esp_now_send(broadcastAddress, (uint8_t *) &BME280Readings, sizeof(BME280Readings));
///o
 // สั่งให้ส่งข้อมูล
  esp_err_t result = esp_now_send(broadcastAddress, (uint8_t *) &DHTReadings, sizeof(DHTReadings));;
///-o
  if (result == ESP_OK) {
    Serial.println("Sent with success");
  }
  else {
    Serial.println("Error sending the data");
  }
//  updateDisplay();
    printIncomingReadings();
  delay(10000);
}
///o
 // if (result == ESP_OK) {
 //   Serial.println("Sent with success");
//  }
//  else {
//    Serial.println("Error sending the data");
//  }
 // delay(2000);
//}
    // Print incoming readings
//    printIncomingReadings();
//  }
///-o
}
//void getReadings(){
//  temperature = bme.readTemperature();
//  humidity = bme.readHumidity();
//  pressure = (bme.readPressure() / 100.0F);
//}
///o
void getReadings()
{
        Serial.println("ผลที่อ่านได้จากESP32");
  delay(2000);

  // Read Temperature
  temperature = dht.readTemperature();
   delay(2000);
  // Read temperature as Fahrenheit (isFahrenheit = true)
  //float t = dht.readTemperature(true);
  if (isnan(temperature)){
    Serial.println("มีข้อผิดพลาด");
    temperature = 0.0;
  }
  else
  {
        Serial.print("temperature=");
        Serial.println(temperature);

  }
  humidity = dht.readHumidity();

  delay(2000);
  if (isnan(humidity)){
    Serial.println("มีข้อผิดพลาด");
    humidity = 0.0;
  }
    else
  {
        Serial.print("humidity=");
        Serial.println(humidity);

  }

}
///-o

//void updateDisplay(){

  // Display Readings in Serial Monitor
//  Serial.println("INCOMING READINGS");
//  Serial.print("Temperature: ");
//  Serial.print(incomingReadings.temp);
//  Serial.println(" ºC");
//  Serial.print("Humidity: ");
//  Serial.print(incomingReadings.hum);
//  Serial.println(" %");
//  Serial.print("Pressure: ");
//  Serial.print(incomingReadings.pres);
//  Serial.println(" hPa");
//  Serial.println();
//}
///o
void printIncomingReadings(){
  // Display Readings in Serial Monitor
  Serial.println("รับจาก NodeMCU8266 ");
  Serial.print("Temperature: ");
  Serial.print(incomingTemperature);
  Serial.println(" ºC");
  Serial.print("Humidity: ");
  Serial.print(incomingHumidity);
  Serial.println(" %");
}
///-o
สำเร็จครึ่งหนึ่งครับ 555
2สค65
แต่ละฝั่งทำงานได้ แต่ยังไม่สามารถรับข้อมูลของอีกฝั่งได้ เดี่ยวเริ่มใหม่ เอาตามเว๊บ1นี้ ก่อนนะครับ
จุดนี้ผมไม่รู้มาก่อน ว่าโค้ดมีความแตกต่างกันระหว่าง esp32 และ esp8266
-1.
ESP32
include libarary
#include <esp_now.h>
#include <WiFi.h>
(ESP8266)
#include <espnow.h>
#include <ESP8266WiFi.h>
2.
ESP32
esp_now_init() != ESP_OK
(ESP8266)
esp_now_init() != 0
3.ฟังก์ชั่น OnDataRecv
ESP32
void OnDataRecv(const uint8_t * mac, const uint8_t *incomingData, int len)
(ESP8266)
void OnDataRecv(uint8_t * mac, uint8_t *incomingData, uint8_t len)
4 ฟังก์ชั่น OnDataSend
ESP32
void OnDataSent(uint8_t *mac_addr, esp_now_send_status_t status)
ESP8266
void OnDataSent(uint8_t *mac_addr, uint8_t status
5
ESP32
status == ESP_NOW_SEND_SUCCESS
ESP8266
sendStatus == 0
6
Register peer
ESP32
esp_now_peer_info_t peerInfo;
memcpy(peerInfo.peer_addr, broadcastAddress, 6);
peerInfo.channel = 0;
peerInfo.encrypt = false;
ESP8266
esp_now_set_self_role(ESP_NOW_ROLE_CONTROLLER);
esp_now_add_peer(broadcastAddress, ESP_NOW_ROLE_SLAVE, 1, NULL, 0);
หลังแก้เสร็จ2 ฝั่ง เวลาจะ verify ให้ตรวจสอบก่อนว่า ในหัวข้อ tool ต้องให้ตรงกับชนิดของboard ด้วย มิฉะนั้นจะมี error
หลังจากแกะโค้ด แล้วมายำเป็นของผมอีกที
โค้ดนี้ สำหรับ ESP32 ที่ติดกับ DHT22 ซึ่งทำหน้าที่รับและส่ง จาก esp8266
#include <Adafruit_Sensor.h>
#include <DHT.h>
//(ESP32)
#include <esp_now.h>
#include <WiFi.h>
// (ESP8266)
//#include <espnow.h>
//#include <ESP8266WiFi.h>
float humidity ;
float temperature;
uint8_t broadcastAddress[] = {0xC8, 0xC9, 0x84, 0xA3, 0x64, 0x2B};
#define DHTPIN 2
#define DHTTYPE DHT22 // DHT 11
DHT dht(DHTPIN, DHTTYPE);
float incomingTemperature;
float incomingHumidity;
const long interval = 10000;
unsigned long previousMillis = 0; // will store last time DHT was updated
// Variable to store if sending data was successful
String success;
typedef struct struct_message {
float temp;
float hum;
} struct_message;
struct_message DHTReadings;
struct_message incomingReadings;
esp_now_peer_info_t peerInfo;
// Callback when data is sent
//4 ฟังก์ชั่น OnDataSend
//ESP8266
//void OnDataSent(uint8_t *mac_addr, uint8_t status
//ESP32
void OnDataSent(uint8_t *mac_addr, esp_now_send_status_t status)
{
Serial.print("Last Packet Send Status: ");
// 5
//ESP8266
//sendStatus == 0
//ESP32
if (status == ESP_NOW_SEND_SUCCESS){
Serial.println("Delivery success");
}
else{
Serial.println("Delivery fail");
}
}
// Callback when data is received
//(ESP8266)
//void OnDataRecv(uint8_t * mac, uint8_t *incomingData, **uint8_t** len)
//(ESP32)
void OnDataRecv(const uint8_t * mac, const uint8_t *incomingData, int len) {
memcpy(&incomingReadings, incomingData, sizeof(incomingReadings));
Serial.print("Bytes received: ");
Serial.println(len);
incomingTemperature = incomingReadings.temp;
incomingHumidity = incomingReadings.hum;
}
void setup() {
Serial.begin(9600);
//ตั้งเป็นโหมด Wi-Fi Station
WiFi.mode(WIFI_STA);
Serial.print("macAddress=");
Serial.println(WiFi.macAddress());
// สั่งให้เริ่ม ESP-NOW
// (ESP8266)[/u]
//esp_now_init() != 0
//(ESP32)
//esp_now_init() != ESP_OK
if (esp_now_init() != ESP_OK) {
Serial.println("Error initializing ESP-NOW");
return;
}
// Set ESP-NOW Role
// esp_now_set_self_role(ESP_NOW_ROLE_COMBO);
// Once ESPNow is successfully Init, we will register for Send CB to
// get the status of Trasnmitted packet
esp_now_register_send_cb(OnDataSent);
// Register peer
//6
//Register peer
//ESP8266
// esp_now_set_self_role(ESP_NOW_ROLE_CONTROLLER);
// esp_now_add_peer(broadcastAddress, ESP_NOW_ROLE_SLAVE, 1, NULL, 0);
//ESP32
esp_now_peer_info_t peerInfo;
memcpy(peerInfo.peer_addr, broadcastAddress, 6);
peerInfo.channel = 0;
peerInfo.encrypt = false;
// Register for a callback function that will be called when data is received
esp_now_register_recv_cb(OnDataRecv);
///-d
Serial.println(F("DHTxx test!"));
dht.begin();
}
void loop() {
unsigned long currentMillis = millis();
if (currentMillis - previousMillis >= interval) {
// save the last time you updated the DHT values
previousMillis = currentMillis;
//Get DHT readings
getReadings();
//Set values to send
DHTReadings.temp = temperature;
DHTReadings.hum = humidity;
// สั่งให้ส่งข้อมูล
esp_err_t result = esp_now_send(broadcastAddress, (uint8_t *) &DHTReadings, sizeof(DHTReadings));;
if (result == ESP_OK) {
Serial.println("Sent with success");
}
else {
Serial.println("Error sending the data");
}
printIncomingReadings();
delay(10000);
}
}
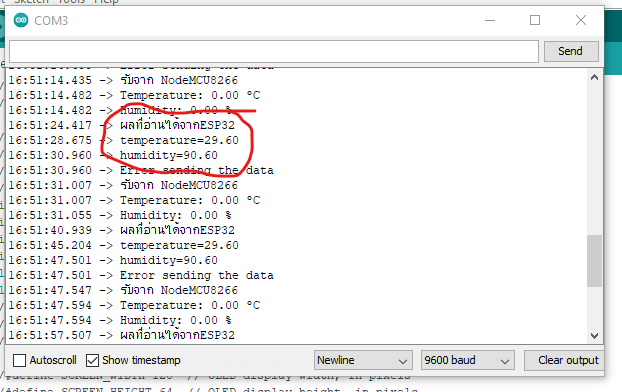
void getReadings()
{
Serial.println("ผลที่อ่านได้จากESP32");
delay(2000);
// Read Temperature
temperature = dht.readTemperature();
delay(2000);
// Read temperature as Fahrenheit (isFahrenheit = true)
//float t = dht.readTemperature(true);
if (isnan(temperature)){
Serial.println("มีข้อผิดพลาด");
temperature = 0.0;
}
else
{
Serial.print("temperature=");
Serial.println(temperature);
}
humidity = dht.readHumidity();
delay(2000);
if (isnan(humidity)){
Serial.println("มีข้อผิดพลาด");
humidity = 0.0;
}
else
{
Serial.print("humidity=");
Serial.println(humidity);
}
}
void printIncomingReadings(){
// Display Readings in Serial Monitor
Serial.println("รับจาก NodeMCU8266 ");
Serial.print("Temperature: ");
Serial.print(incomingTemperature);
Serial.println(" ºC");
Serial.print("Humidity: ");
Serial.print(incomingHumidity);
Serial.println(" %");
}
ปรากฎมี error ว่า
Arduino: 1.8.19 (Windows Store 1.8.57.0) (Windows 10), Board: "NodeMCU-32S, 80MHz, 921600, None"


C:\abee_esp32\020_esp_now_MAC_ADDRESS_01_esp32\020_esp_now_MAC_ADDRESS_01_esp32.ino: In function 'void setup()':

020_esp_now_MAC_ADDRESS_01_esp32:87:28: error: invalid conversion from 'void (*)(uint8_t*, esp_now_send_status_t)' {aka 'void (*)(unsigned char*, esp_now_send_status_t)'} to 'esp_now_send_cb_t' {aka 'void (*)(const unsigned char*, esp_now_send_status_t)'} [-fpermissive]

   esp_now_register_send_cb(OnDataSent);

                            ^~~~~~~~~~

In file included from C:\abee_esp32\020_esp_now_MAC_ADDRESS_01_esp32\020_esp_now_MAC_ADDRESS_01_esp32.ino:4:

C:\Users\NECgen4UEFI\Documents\ArduinoData\packages\esp32\hardware\esp32\2.0.4/tools/sdk/esp32/include/esp_wifi/include/esp_now.h:165:54: note:   initializing argument 1 of 'esp_err_t esp_now_register_send_cb(esp_now_send_cb_t)'

 esp_err_t esp_now_register_send_cb(esp_now_send_cb_t cb);

                                    ~~~~~~~~~~~~~~~~~~^~

Multiple libraries were found for "Adafruit_Sensor.h"

 Used: C:\Users\NECgen4UEFI\Documents\Arduino\libraries\Adafruit_Sensor-master

 Not used: C:\Users\NECgen4UEFI\Documents\Arduino\libraries\Adafruit_Unified_Sensor

Multiple libraries were found for "WiFi.h"

 Used: C:\Users\NECgen4UEFI\Documents\ArduinoData\packages\esp32\hardware\esp32\2.0.4\libraries\WiFi

 Not used: C:\Program Files\WindowsApps\ArduinoLLC.ArduinoIDE_1.8.57.0_x86__mdqgnx93n4wtt\libraries\WiFi

exit status 1

invalid conversion from 'void (*)(uint8_t*, esp_now_send_status_t)' {aka 'void (*)(unsigned char*, esp_now_send_status_t)'} to 'esp_now_send_cb_t' {aka 'void (*)(const unsigned char*, esp_now_send_status_t)'} [-fpermissive]


This report would have more information with
"Show verbose output during compilation"
option enabled in File -> Preferences.
1 Likes
2สค65
ตอนนี้ลองเข้าเว๊บ ที่ 3
esp32-ตัวส่ง
/*
  ESP-NOW Demo - Transmit
  esp-now-demo-xmit.ino
  Sends data to Responder

  DroneBot Workshop 2022
  https://dronebotworkshop.com
*/
//esp32a
//ผลที่ได้คือ01=  78:21:84:7A:B3:88
//       02=  58:BF:25:9F:CA:1C

// Include Libraries
#include <esp_now.h>
#include <WiFi.h>

// Variables for test data
int int_value;
float float_value;
bool bool_value = true;

// MAC Address of responder - edit as required
uint8_t broadcastAddress[] = {0x58, 0xBF, 0x25, 0x9F, 0xCA, 0x1C};//ส่งไป esp32_02

// Define a data structure
typedef struct struct_message {
  char a[32];
  int b;
  float c;
  bool d;
} struct_message;

// Create a structured object
struct_message myData;

// Peer info
esp_now_peer_info_t peerInfo;

// Callback function called when data is sent
void OnDataSent(const uint8_t *mac_addr, esp_now_send_status_t status) {
  Serial.print("\r\nLast Packet Send Status:\t");
  Serial.println(status == ESP_NOW_SEND_SUCCESS ? "Delivery Success" : "Delivery Fail");
}

void setup() {

  // Set up Serial Monitor
  Serial.begin(115200);

  // Set ESP32 as a Wi-Fi Station
  WiFi.mode(WIFI_STA);

  // Initilize ESP-NOW
  if (esp_now_init() != ESP_OK) {
    Serial.println("Error initializing ESP-NOW");
    return;
  }

  // Register the send callback
  esp_now_register_send_cb(OnDataSent);

  // Register peer
  memcpy(peerInfo.peer_addr, broadcastAddress, 6);
  peerInfo.channel = 0;
  peerInfo.encrypt = false;

  // Add peer
  if (esp_now_add_peer(&peerInfo) != ESP_OK){
    Serial.println("Failed to add peer");
    return;
  }
}

void loop() {

  // Create test data

  // Generate a random integer
  int_value = random(1,20);

  // Use integer to make a new float
  float_value = 1.3 * int_value;

  // Invert the boolean value
  bool_value = !bool_value;

  // Format structured data
  strcpy(myData.a, "Welcome to the Workshop!");
  myData.b = int_value;
  myData.c = float_value;
  myData.d = bool_value;

  // Send message via ESP-NOW
  esp_err_t result = esp_now_send(broadcastAddress, (uint8_t *) &myData, sizeof(myData));

  if (result == ESP_OK) {
    Serial.println("Sending confirmed");
  }
  else {
    Serial.println("Sending error");
  }
  delay(2000);
}
esp32-ตัวรับ
/*
  ESP-NOW Demo - Transmit
  esp-now-demo-xmit.ino
  Sends data to Responder

  DroneBot Workshop 2022
  https://dronebotworkshop.com
*/
//esp32a
//ผลที่ได้คือ01=  78:21:84:7A:B3:88
//       02=  58:BF:25:9F:CA:1C
/*
  ESP-NOW Demo - Receive
  esp-now-demo-rcv.ino
  Reads data from Initiator

  DroneBot Workshop 2022
  https://dronebotworkshop.com
*/

// Include Libraries
#include <esp_now.h>
#include <WiFi.h>

// Define a data structure
typedef struct struct_message {
  char a[32];
  int b;
  float c;
  bool d;
} struct_message;

// Create a structured object
struct_message myData;


// Callback function executed when data is received
void OnDataRecv(const uint8_t * mac, const uint8_t *incomingData, int len) {
  memcpy(&myData, incomingData, sizeof(myData));
  Serial.print("Data received: ");
  Serial.println(len);
  Serial.print("Character Value: ");
  Serial.println(myData.a);
  Serial.print("Integer Value: ");
  Serial.println(myData.b);
  Serial.print("Float Value: ");
  Serial.println(myData.c);
  Serial.print("Boolean Value: ");
  Serial.println(myData.d);
  Serial.println();
}

void setup() {
  // Set up Serial Monitor
  Serial.begin(115200);

  // Set ESP32 as a Wi-Fi Station
  WiFi.mode(WIFI_STA);

  // Initilize ESP-NOW
  if (esp_now_init() != ESP_OK) {
    Serial.println("Error initializing ESP-NOW");
    return;
  }

  // Register callback function
  esp_now_register_recv_cb(OnDataRecv);
}

void loop() {

}
เป็นแบบ one way
ส่งได้ครับ ลอกโค้ด 100% ยกเว้น ค่า mac address
แบบที่2 ให้esp32ตัวที่1 ส่งค่าdht22ไปesp32ตัวที่2
โค้ดตัวที่1
/*
  ESP-NOW Demo - Transmit
  esp-now-demo-xmit.ino
  Sends data to Responder

  DroneBot Workshop 2022
  https://dronebotworkshop.com
*/
//esp32a
//ผลที่ได้คือ01=  78:21:84:7A:B3:88
//       02=  58:BF:25:9F:CA:1C

// Include Libraries
#include <esp_now.h>
#include <WiFi.h>

#include <DHT.h>
#define DHT_SENSOR_PIN  2 // ESP32 pin GIOP21 connected to DHT22 sensor
#define DHT_SENSOR_TYPE DHT22

DHT dht_sensor(DHT_SENSOR_PIN, DHT_SENSOR_TYPE);

// Variables for test data
int int_value;
float float_value;
bool bool_value = true;

// MAC Address of responder - edit as required
uint8_t broadcastAddress[] = {0x58, 0xBF, 0x25, 0x9F, 0xCA, 0x1C};//ส่งไป esp32_02

// Define a data structure
typedef struct struct_message {
  char a[32];
  int b;
  float c;
  bool d;
  float hu;
  float te;
} struct_message;

// Create a structured object
struct_message myData;

// Peer info
esp_now_peer_info_t peerInfo;

// Callback function called when data is sent
void OnDataSent(const uint8_t *mac_addr, esp_now_send_status_t status) {
  Serial.print("\r\nLast Packet Send Status:\t");
  Serial.println(status == ESP_NOW_SEND_SUCCESS ? "Delivery Success" : "Delivery Fail");
}

void setup() {
    dht_sensor.begin(); // initialize the DHT sensor

  // Set up Serial Monitor
  Serial.begin(115200);

  // Set ESP32 as a Wi-Fi Station
  WiFi.mode(WIFI_STA);

  // Initilize ESP-NOW
  if (esp_now_init() != ESP_OK) {
    Serial.println("Error initializing ESP-NOW");
    return;
  }

  // Register the send callback
  esp_now_register_send_cb(OnDataSent);

  // Register peer
  memcpy(peerInfo.peer_addr, broadcastAddress, 6);
  peerInfo.channel = 0;
  peerInfo.encrypt = false;

  // Add peer
  if (esp_now_add_peer(&peerInfo) != ESP_OK){
    Serial.println("Failed to add peer");
    return;
  }
}

void loop() {

  float humi  = dht_sensor.readHumidity();
  // read temperature in Celsius
  float tempC = dht_sensor.readTemperature();

  delay(2000);
  // Create test data

  // Generate a random integer
  int_value = random(1,20);

  // Use integer to make a new float
  float_value = 1.3 * int_value;

  // Invert the boolean value
  bool_value = !bool_value;

  // Format structured data
  strcpy(myData.a, "Welcome to the Workshop!");
  myData.b = int_value;
  myData.c = float_value;
  myData.d = bool_value;
  myData.hu = humi;
  myData.te = tempC;

  // Send message via ESP-NOW
  esp_err_t result = esp_now_send(broadcastAddress, (uint8_t *) &myData, sizeof(myData));

  if (result == ESP_OK) {
    Serial.println("Sending confirmed");
  }
  else {
    Serial.println("Sending error");
  }
  // read humidity
}
และโค้ดตัวที่ 2
/*
  ESP-NOW Demo - Transmit
  esp-now-demo-xmit.ino
  Sends data to Responder

  DroneBot Workshop 2022
  https://dronebotworkshop.com
*/
//esp32a
//ผลที่ได้คือ01=  78:21:84:7A:B3:88
//       02=  58:BF:25:9F:CA:1C
/*
  ESP-NOW Demo - Receive
  esp-now-demo-rcv.ino
  Reads data from Initiator

  DroneBot Workshop 2022
  https://dronebotworkshop.com
*/

// Include Libraries
#include <esp_now.h>
#include <WiFi.h>

// Define a data structure
typedef struct struct_message {
  char a[32];
  int b;
  float c;
  bool d;
  float hu;
  float te;
} struct_message;

// Create a structured object
struct_message myData;


// Callback function executed when data is received
void OnDataRecv(const uint8_t * mac, const uint8_t *incomingData, int len) {
  memcpy(&myData, incomingData, sizeof(myData));
  Serial.print("Data received: ");
  Serial.println(len);
  Serial.print("Character Value: ");
  Serial.println(myData.a);
  Serial.print("Integer Value: ");
  Serial.println(myData.b);
  Serial.print("Float Value: ");
  Serial.println(myData.c);
  Serial.print("Boolean Value: ");
  Serial.println(myData.d);
  Serial.print("ความชื้น: ");
  Serial.println(myData.hu);
  Serial.print("อุณหภูมิ: ");
  Serial.println(myData.te);
  Serial.println();
}

void setup() {
  // Set up Serial Monitor
  Serial.begin(115200);

  // Set ESP32 as a Wi-Fi Station
  WiFi.mode(WIFI_STA);

  // Initilize ESP-NOW
  if (esp_now_init() != ESP_OK) {
    Serial.println("Error initializing ESP-NOW");
    return;
  }

  // Register callback function
  esp_now_register_recv_cb(OnDataRecv);
}

void loop() {

}
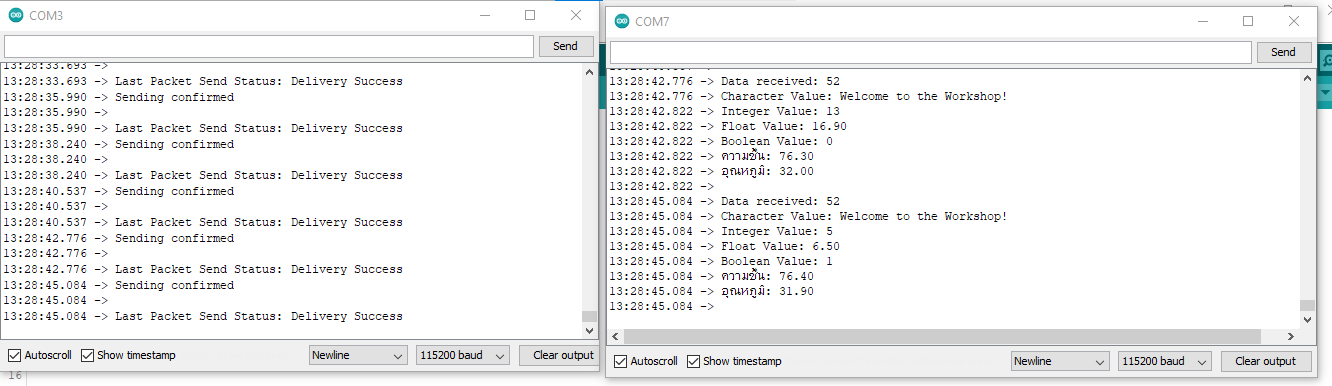
สามารถส่งได้สำเร็จ
2WAY ระหว่าง ESP32และESP32
คือแต่ละตัวจะรับและส่งได้พร้อมกัน
โค้ดตัวที่ 1
/*
  ESP-NOW Demo - Transmit
  esp-now-demo-xmit.ino
  Sends data to Responder

  DroneBot Workshop 2022
  https://dronebotworkshop.com
*/
//esp32a
//ผลที่ได้คือ01=  78:21:84:7A:B3:88
//       02=  58:BF:25:9F:CA:1C

// Include Libraries
#include <esp_now.h>
#include <WiFi.h>

#include <DHT.h>
#define DHT_SENSOR_PIN  2 // ESP32 pin GIOP21 connected to DHT22 sensor
#define DHT_SENSOR_TYPE DHT22

DHT dht_sensor(DHT_SENSOR_PIN, DHT_SENSOR_TYPE);

// Variables for test data
int int_value;
float float_value;
bool bool_value = true;

// MAC Address of responder - edit as required
uint8_t broadcastAddress[] = {0x58, 0xBF, 0x25, 0x9F, 0xCA, 0x1C};//ส่งไป esp32_02

// Define a data structure
typedef struct struct_message {
  char a[32];
  int b;
  float c;
  bool d;
  float hu;
  float te;
} struct_message;

// Create a structured object
struct_message myData;
struct_message myData_esp02;

// Peer info
esp_now_peer_info_t peerInfo;

// Callback function called when data is sent
void OnDataSent(const uint8_t *mac_addr, esp_now_send_status_t status) {
  Serial.print("\r\nLast Packet Send Status:\t");
  Serial.println(status == ESP_NOW_SEND_SUCCESS ? "Delivery Success" : "Delivery Fail");
}


// Callback function executed when data is received
void OnDataRecv(const uint8_t * mac, const uint8_t *incomingData, int len) {
  memcpy(&myData_esp02, incomingData, sizeof(myData_esp02));
  Serial.print("Data received: ");
  Serial.println(len);
  Serial.print("Character Value: ");
  Serial.println(myData_esp02.a);
  Serial.print("Integer Value: ");
  Serial.println(myData_esp02.b);
  Serial.print("Float Value: ");
  Serial.println(myData_esp02.c);
  Serial.print("Boolean Value: ");
  Serial.println(myData_esp02.d);
  Serial.print("ความชื้น: ");
  Serial.println(myData_esp02.hu);
  Serial.print("อุณหภูมิ: ");
  Serial.println(myData_esp02.te);
  Serial.println();
}

void setup() {
    dht_sensor.begin(); // initialize the DHT sensor

  // Set up Serial Monitor
  Serial.begin(115200);

  // Set ESP32 as a Wi-Fi Station
  WiFi.mode(WIFI_STA);

  // Initilize ESP-NOW
  if (esp_now_init() != ESP_OK) {
    Serial.println("Error initializing ESP-NOW");
    return;
  }

  // Register the send callback
  esp_now_register_send_cb(OnDataSent);

  // Register peer
  memcpy(peerInfo.peer_addr, broadcastAddress, 6);
  peerInfo.channel = 0;
  peerInfo.encrypt = false;

  // Add peer
  if (esp_now_add_peer(&peerInfo) != ESP_OK){
    Serial.println("Failed to add peer");
    return;
  }
  // Register callback function
  esp_now_register_recv_cb(OnDataRecv);
}

void loop() {

  float humi  = dht_sensor.readHumidity();
  // read temperature in Celsius
  float tempC = dht_sensor.readTemperature();

  delay(2000);
  // Create test data

  // Generate a random integer
  int_value = random(1,20);

  // Use integer to make a new float
  float_value = 1.3 * int_value;

  // Invert the boolean value
  bool_value = !bool_value;

  // Format structured data
  strcpy(myData.a, "Welcome to the Workshop!");
  myData.b = int_value;
  myData.c = float_value;
  myData.d = bool_value;
  myData.hu = humi;
  myData.te = tempC;

  // Send message via ESP-NOW
  esp_err_t result = esp_now_send(broadcastAddress, (uint8_t *) &myData, sizeof(myData));

  if (result == ESP_OK) {
    Serial.println("Sending confirmed");
  }
  else {
    Serial.println("Sending error");
  }
  // read humidity
}
โค้ดตัวที่2
/*
  ESP-NOW Demo - Transmit
  esp-now-demo-xmit.ino
  Sends data to Responder

  DroneBot Workshop 2022
  https://dronebotworkshop.com
*/
//esp32a
//ผลที่ได้คือ01=  78:21:84:7A:B3:88
//       02=  58:BF:25:9F:CA:1C
/*
  ESP-NOW Demo - Receive
  esp-now-demo-rcv.ino
  Reads data from Initiator

  DroneBot Workshop 2022
  https://dronebotworkshop.com
*/

// MAC Address of responder - edit as required
uint8_t broadcastAddress[] = {0x78, 0x21, 0x84, 0x7A, 0xB3, 0x88};//ส่งไป esp32_01

// Include Libraries
#include <esp_now.h>
#include <WiFi.h>
// Variables for test data
int int_value1;
float float_value1;
bool bool_value1 = true;
// Define a data structure
typedef struct struct_message {
  char a[32];
  int b;
  float c;
  bool d;
  float hu;
  float te;
} struct_message;

// Define a data structure
//typedef struct struct_message {
//  char a[32];
//  int b;
//  float c;
//  bool d;
//  float hu;
//  float te;
//} struct_message;

// Create a structured object
struct_message myData;


// Create a structured object
struct_message myData_esp02;
// Peer info
esp_now_peer_info_t peerInfo;

// Callback function called when data is sent
void OnDataSent(const uint8_t *mac_addr, esp_now_send_status_t status) {
  Serial.print("\r\nLast Packet Send Status:\t");
  Serial.println(status == ESP_NOW_SEND_SUCCESS ? "Delivery Success" : "Delivery Fail");
}


// Callback function executed when data is received
void OnDataRecv(const uint8_t * mac, const uint8_t *incomingData, int len) {
  memcpy(&myData, incomingData, sizeof(myData));
  Serial.print("Data received: ");
  Serial.println(len);
  Serial.print("Character Value: ");
  Serial.println(myData.a);
  Serial.print("Integer Value: ");
  Serial.println(myData.b);
  Serial.print("Float Value: ");
  Serial.println(myData.c);
  Serial.print("Boolean Value: ");
  Serial.println(myData.d);
  Serial.print("ความชื้น: ");
  Serial.println(myData.hu);
  Serial.print("อุณหภูมิ: ");
  Serial.println(myData.te);
  Serial.println();
}

void setup() {
  // Set up Serial Monitor
  Serial.begin(115200);

  // Set ESP32 as a Wi-Fi Station
  WiFi.mode(WIFI_STA);
  // Register the send callback
  esp_now_register_send_cb(OnDataSent);

  // Initilize ESP-NOW
  if (esp_now_init() != ESP_OK) {
    Serial.println("Error initializing ESP-NOW");
    return;
  }
   // Register peer
  memcpy(peerInfo.peer_addr, broadcastAddress, 6);
  peerInfo.channel = 0;
  peerInfo.encrypt = false;

  // Add peer
  if (esp_now_add_peer(&peerInfo) != ESP_OK){
    Serial.println("Failed to add peer");
    return;
  }

  // Register callback function
  esp_now_register_recv_cb(OnDataRecv);
}

void loop() {
  float humi=0 ;// = dht_sensor.readHumidity();
  // read temperature in Celsius
  float tempC=0;// = dht_sensor.readTemperature();

  // Generate a random integer
  int_value1 = random(1,20);

  // Use integer to make a new float
  float_value1 = 1.3 * int_value1;

  // Invert the boolean value
  bool_value1 = !bool_value1;

  // Format structured data

  strcpy(myData_esp02.a, "02ส่งจาก ESP32_");
  myData_esp02.b = int_value1;
  myData_esp02.c = float_value1;
  myData_esp02.d = bool_value1;
  myData_esp02.hu = humi;
  myData_esp02.te = tempC;
  // Send message via ESP-NOW
  esp_err_t result = esp_now_send(broadcastAddress, (uint8_t *) &myData_esp02, sizeof(myData_esp02));
  delay(2000);
  if (result == ESP_OK) {
    Serial.println("Sending confirmed");
  }
  else {
    Serial.println("Sending error");
  }
  // read humidity

}
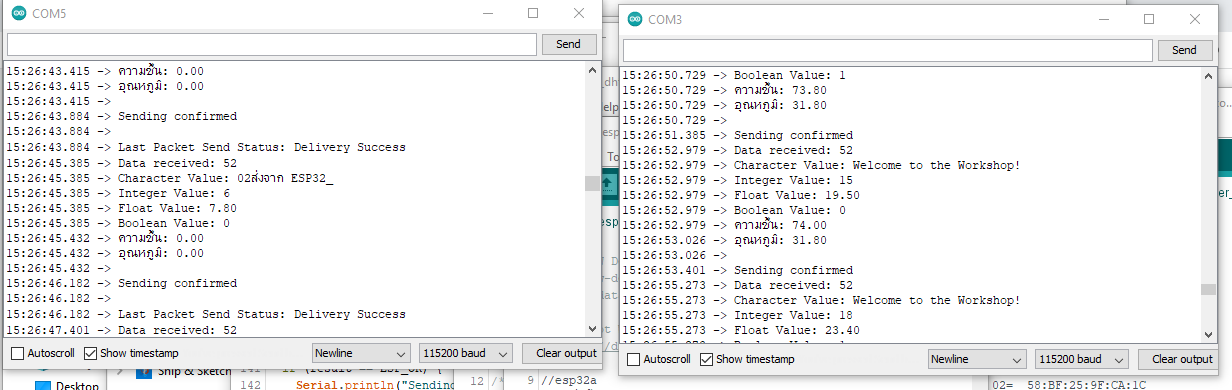
ส่งได้แล้วครับ DHTติดตัวเดียว อีกตัวไม่ได้ติด
ที่ยังทำไม่ได้ คือการส่งข้อมูลระหว่าง ESP32 กับ ESP8266 ใครทำได้บ้าง ช่วยแชร์ด้วยครับ
2สค65
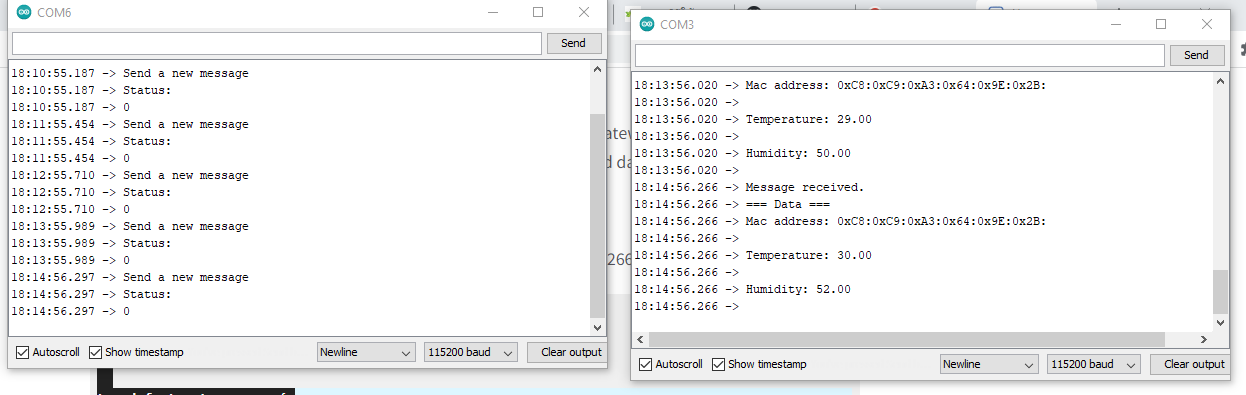
เจอโค้ด ที่ สามารถส่งข้อมูลจาก ESP8266 ไปแสดง ใน ESP32 ได้แล้วครับ
โค้ด ESP8266
//https://www.survivingwithandroid.com/esp-now-esp32-esp8266/
/**
 * ESP-NOW
 //esp32
//ผลที่ได้คือ01=  78:21:84:7A:B3:88
//       02=  58:BF:25:9F:CA:1C
*
 * Sender
*/
#include <Arduino.h>
#include <ESP8266WiFi.h>
#include <espnow.h>
// Mac address of the slave
//uint8_t peer1[] = {0xFF, 0xFF, 0xFF, 0xFF, 0xFF, 0xFF};
uint8_t peer1[] = {0x78, 0x21, 0x84, 0x7A, 0xB3, 0x88};//ส่งไป esp32_01
typedef struct message {
   int red;
   int green;
   int blue;
};
struct message msg_from_esp8266_01;
void onSent(uint8_t *mac_addr, uint8_t sendStatus) {
  Serial.println("Status:");
  Serial.println(sendStatus);
}
void setup() {
  Serial.begin(115200);
  WiFi.mode(WIFI_STA);
  // Get Mac Add
  Serial.print("Mac Address: ");
  Serial.print(WiFi.macAddress());
  Serial.println("ESP-Now Sender");
  // Initializing the ESP-NOW
  if (esp_now_init() != 0) {
    Serial.println("Problem during ESP-NOW init");
    return;
  }
  esp_now_set_self_role(ESP_NOW_ROLE_CONTROLLER);
  // Register the peer
  Serial.println("Registering a peer");
  esp_now_add_peer(peer1, ESP_NOW_ROLE_SLAVE, 1, NULL, 0);
  Serial.println("Registering send callback function");
  esp_now_register_send_cb(onSent);
}
void loop() {
  msg_from_esp8266_01.red = 10;
  msg_from_esp8266_01.green = 80;
  msg_from_esp8266_01.blue = 180;
  Serial.println("Send a new message");
  esp_now_send(NULL, (uint8_t *) &msg_from_esp8266_01, sizeof(msg_from_esp8266_01));
  delay(60000);
}
โค้ดฝั่ง ESP32
/*
  ESP-NOW Demo - Transmit
  esp-now-demo-xmit.ino
  Sends data to Responder

  DroneBot Workshop 2022
  https://dronebotworkshop.com
*/
//esp32a
//ผลที่ได้คือ01=  78:21:84:7A:B3:88
//       02=  58:BF:25:9F:CA:1C
//ESP8266_01)ตัวนี้คือ=C8:C9:A3:64:9E:2B
// Include Libraries
#include <Arduino.h>
#include <WiFi.h>
#include <esp_now.h>

typedef struct message {
  float temperature;
  float humidity;
};

struct message myMessage;

void onDataReceiver(const uint8_t * mac, const uint8_t *incomingData, int len) {
  Serial.println("Message received.");
  // We don't use mac to verify the sender
  // Let us transform the incomingData into our message structure
 memcpy(&myMessage, incomingData, sizeof(myMessage));
 Serial.println("=== Data ===");
 Serial.print("Mac address: ");
 for (int i = 0; i < 6; i++) {
     Serial.print("0x");
     Serial.print(mac[i], HEX);
     Serial.print(":");
 }

 Serial.print("\n\nTemperature: ");
 Serial.println(myMessage.temperature);
 Serial.print("\nHumidity: ");
 Serial.println(myMessage.humidity);
 Serial.println();
}

void setup() {
 Serial.begin(115200);
 WiFi.mode(WIFI_STA);

 // Get Mac Add
 Serial.print("Mac Address: ");
 Serial.print(WiFi.macAddress());
 Serial.println("ESP32 ESP-Now Broadcast");

 // Initializing the ESP-NOW
 if (esp_now_init() != 0) {
   Serial.println("Problem during ESP-NOW init");
   return;
 }
 esp_now_register_recv_cb(onDataReceiver);
}

void loop() {
 // put your main code here, to run repeatedly:
}


****
ยังขาด แบบเดียว คือ จาก ESP32 ส่งไปยัง ESP8266 ถ้าใครมีโค้ด แชร์หน่อยครับ
7สค65
ผมลอง อัปโหลด โค้ด ของ esp32 เพิ่อติดต่อ esp8266
ขึ้นข้อความ ESPNOW: Peer channel is not equal to the home channel, send fail!
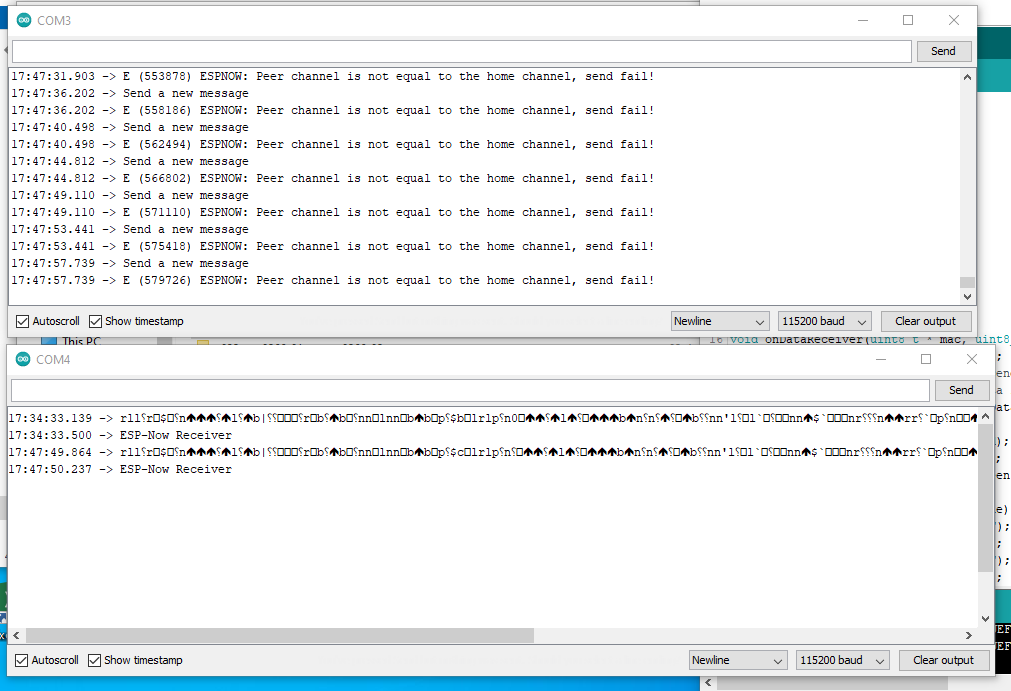
com3 จาก esp32
com4 จาก esp8266
โค้ด ESP32
//This code describes how to broadcast data to multiple peers using ESP32:
/**
 * ESP-NOW: ESP32 Broadcast with ESP-Now
 *
 *
*/
//esp32a
//mac คือ01=  78:21:84:7A:B3:88
//       02=  58:BF:25:9F:CA:1C
#include <Arduino.h>
#include <WiFi.h>
#include <esp_now.h>

#include <DHT.h>
#define DHT_SENSOR_PIN  2 // ESP32 pin GIOP21 connected to DHT22 sensor
#define DHT_SENSOR_TYPE DHT22
DHT dht_sensor(DHT_SENSOR_PIN, DHT_SENSOR_TYPE);

// Variables for test data
int int_value;
float float_value;
bool bool_value = true;
//esp8266ผลคือ 01= macAddress=C8:C9:A3:64:9E:2B
//       02= macAddress=C8:C9:A3:64:9C:7D
// ESP8266 Mac address (first peer)
uint8_t mac_peer1[] = {0xC8, 0xC9, 0xA3, 0x64, 0x9E, 0x2B};
// ESP8266 Mac address (second peer)
//uint8_t mac_peer2[] = {0xFF, 0xFF, 0xFF, 0xFF, 0xFF, 0xFF};
esp_now_peer_info_t peer1;

// Peer info
//esp_now_peer_info_t peerInfo;
//esp_now_peer_info_t peer2;
// Define a data structure
typedef struct struct_message {
  char a[32];
  int b;
  float c;
  bool d;
  float hu;
  float te;
  int red ;//= random(0, 254);
  int green;// = random(0, 254);
  int blue;// = random(0, 254);
} struct_message;

int i = 0;
//typedef struct message {
//   int red;
//   int green;
//   int blue;
//};

// Create a structured object
struct_message msg_from_esp32_01;
//struct message myMessage;
void setup() {
  dht_sensor.begin(); // initialize the DHT sensor
  Serial.begin(115200);
  WiFi.mode(WIFI_STA);
  // Get Mac Add
  Serial.print("Mac Address: ");
  Serial.print(WiFi.macAddress());
  Serial.println("ESP32 ESP-Now Broadcast");
  // Initializing the ESP-NOW
  if (esp_now_init() != 0) {
    Serial.println("Problem during ESP-NOW init");
    return;
  }

//  // Initilize ESP-NOW
//  if (esp_now_init() != ESP_OK) {
//    Serial.println("Error initializing ESP-NOW");
//    return;
//  }
//
  // Register peer
//  memcpy(peerInfo.peer_addr, broadcastAddress, 6);
//  peerInfo.channel = 0;
//  peerInfo.encrypt = false;
//-
//

  memcpy(peer1.peer_addr, mac_peer1, 6);
  peer1.channel = 4;
  peer1.encrypt = 0;
  // Register the peer
  Serial.println("Registering a peer 1");
  if ( esp_now_add_peer(&peer1) == ESP_OK) {
    Serial.println("Peer 1 added");
  }

}
void loop() {
//
  float humi  = dht_sensor.readHumidity();
  // read temperature in Celsius
  float tempC = dht_sensor.readTemperature();

  delay(2000);
  // Create test data

  // Generate a random integer
  int_value = random(1,20);

  // Use integer to make a new float
  float_value = 1.3 * int_value;

  // Invert the boolean value
  bool_value = !bool_value;

  // Format structured data
  strcpy(msg_from_esp32_01.a, "Welcome to the Workshop!");
  msg_from_esp32_01.b = int_value;
  msg_from_esp32_01.c = float_value;
  msg_from_esp32_01.d = bool_value;
  msg_from_esp32_01.hu = humi;
  msg_from_esp32_01.te = tempC;
//-
  msg_from_esp32_01.red = random(0, 254);
  msg_from_esp32_01.green = random(0, 254);
  msg_from_esp32_01.blue = random(0, 254);
  Serial.println("Send a new message");
  esp_now_send(NULL, (uint8_t *) &msg_from_esp32_01, sizeof(msg_from_esp32_01));
  delay(2000);
//

  // Send message via ESP-NOW
//  esp_err_t result = esp_now_send(broadcastAddress, (uint8_t *) &msg_from_esp32_01, sizeof(msg_from_esp32_01));
//
//  if (result == ESP_OK) {
//    Serial.println("Sending confirmed");
//  }
//  else {
//    Serial.println("Sending error");
//  }
  // read humidity
//-
//

// Callback function called when data is sent
//void OnDataSent(const uint8_t *mac_addr, esp_now_send_status_t status) {
//  Serial.print("\r\nLast Packet Send Status:\t");
  //Serial.println(status == ESP_NOW_SEND_SUCCESS ? "Delivery Success" : "Delivery Fail");
}
//-
โค้ด ESP8266
#include <Arduino.h>
#include <ESP8266WiFi.h>
#include <espnow.h>
typedef struct struct_message {
  char a[32];
  int b;
  float c;
  bool d;
  float hu;
  float te;
  int red ;//= random(0, 254);
  int green;// = random(0, 254);
  int blue;// = random(0, 254);
} struct_message;
struct_message msg_from_esp32_01;
void onDataReceiver(uint8_t * mac, uint8_t *incomingData, uint8_t len) {
   Serial.println("Message received.");
   // We don't use mac to verify the sender
   // Let us transform the incomingData into our message structure
  memcpy(&msg_from_esp32_01, incomingData, sizeof(msg_from_esp32_01));
  Serial.print("Red(จาก ESP32_01):");
  Serial.println(msg_from_esp32_01.red);
  Serial.print("Green(จาก ESP32_01):");
  Serial.println(msg_from_esp32_01.green);
  Serial.print("Blue(จาก ESP32_01):");
  Serial.println(msg_from_esp32_01.blue);
  Serial.print("ความชื้น(จาก ESP32_01):");
  Serial.println(msg_from_esp32_01.hu);
  Serial.print("อุณหภูมิ(จาก ESP32_01):");
  Serial.println(msg_from_esp32_01.te);
}
void setup() {
  Serial.begin(115200);
  WiFi.disconnect();
  ESP.eraseConfig();
  WiFi.mode(WIFI_STA);
  // Get Mac Add
  Serial.print("Mac Address: ");
  Serial.print(WiFi.macAddress());
  Serial.println("\nESP-Now Receiver");

  // Initializing the ESP-NOW
  if (esp_now_init() != 0) {
    Serial.println("Problem during ESP-NOW init");
    return;
  }

  //esp_now_set_self_role(ESP_NOW_ROLE_SLAVE);
  // We can register the receiver callback function
  esp_now_register_recv_cb(onDataReceiver);
}
void loop() {
  // put your main code here, to run repeatedly:
}
ดูเหมือนว่า ฝั่ง esp8266 น่าจะเวิร์กแล้ว แต่ติดที่ ฝั่งส่ง ส่งไม่ได้ ติดที่เรื่อง channal
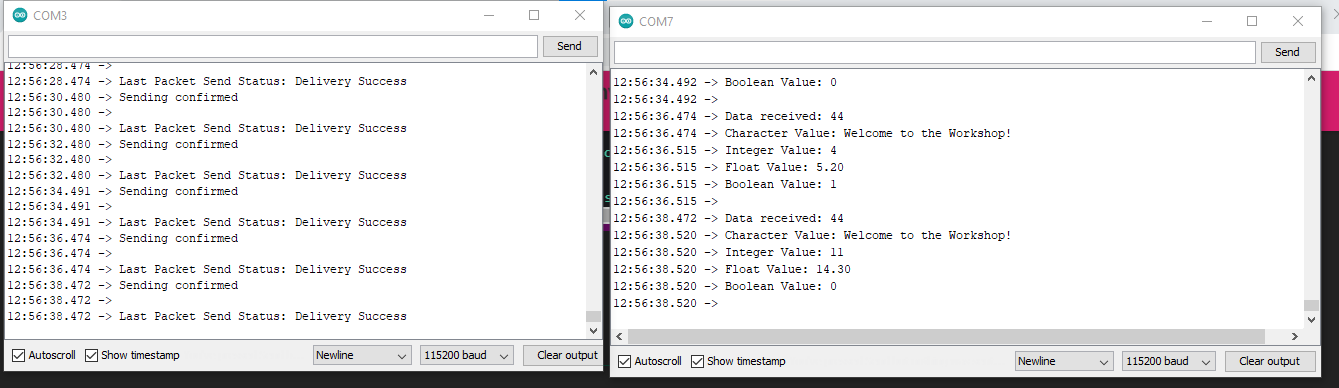
สำเร็จแล้วคร้าบบบบบบบบ
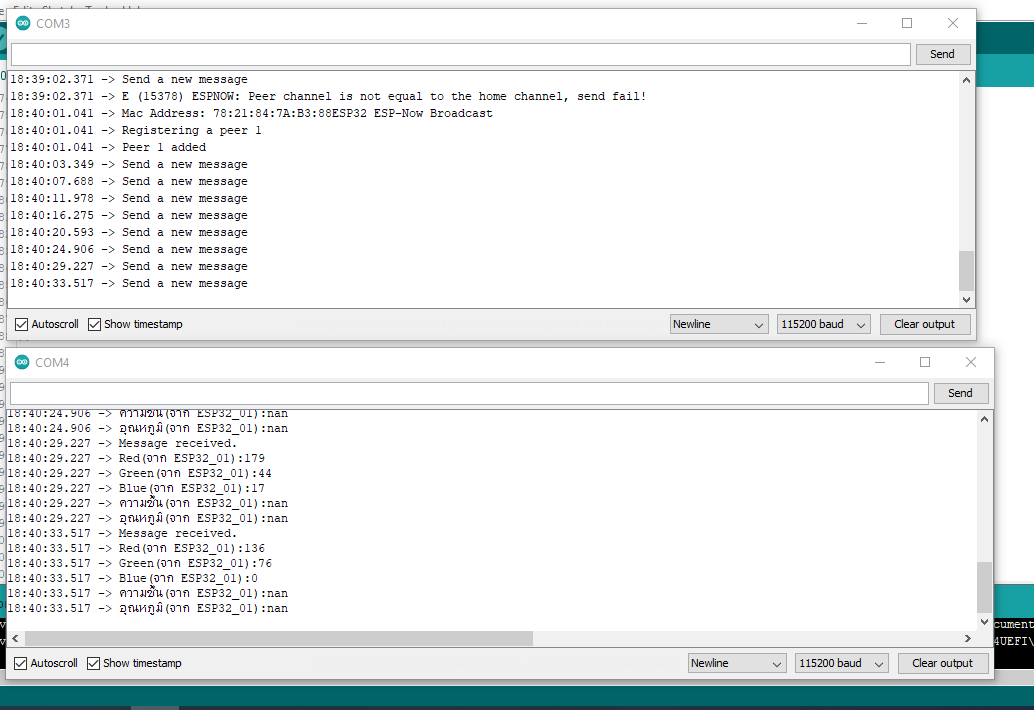
แก้บรรทัด peer1.channel = 4; เป็น peer1.channel = 0;
โค้ด ESP32 ที่แก้ใหม่ (อ้างอิง)
//This code describes how to broadcast data to multiple peers using ESP32:
/**
 * ESP-NOW: ESP32 Broadcast with ESP-Now
 *
 *
*/
//esp32a
//mac คือ01=  78:21:84:7A:B3:88
//       02=  58:BF:25:9F:CA:1C
#include <Arduino.h>
#include <WiFi.h>
#include <esp_now.h>

#include <DHT.h>
#define DHT_SENSOR_PIN  2 // ESP32 pin GIOP21 connected to DHT22 sensor
#define DHT_SENSOR_TYPE DHT22
DHT dht_sensor(DHT_SENSOR_PIN, DHT_SENSOR_TYPE);

// Variables for test data
int int_value;
float float_value;
bool bool_value = true;
//esp8266ผลคือ 01= macAddress=C8:C9:A3:64:9E:2B
//       02= macAddress=C8:C9:A3:64:9C:7D
// ESP8266 Mac address (first peer)
uint8_t mac_peer1[] = {0xC8, 0xC9, 0xA3, 0x64, 0x9E, 0x2B};
// ESP8266 Mac address (second peer)
//uint8_t mac_peer2[] = {0xFF, 0xFF, 0xFF, 0xFF, 0xFF, 0xFF};
esp_now_peer_info_t peer1;

// Peer info
//esp_now_peer_info_t peerInfo;
//esp_now_peer_info_t peer2;
// Define a data structure
typedef struct struct_message {
  char a[32];
  int b;
  float c;
  bool d;
  float hu;
  float te;
  int red ;//= random(0, 254);
  int green;// = random(0, 254);
  int blue;// = random(0, 254);
} struct_message;

int i = 0;
//typedef struct message {
//   int red;
//   int green;
//   int blue;
//};

// Create a structured object
struct_message msg_from_esp32_01;
//struct message myMessage;
void setup() {
  dht_sensor.begin(); // initialize the DHT sensor
  Serial.begin(115200);
  WiFi.mode(WIFI_STA);
  // Get Mac Add
  Serial.print("Mac Address: ");
  Serial.print(WiFi.macAddress());
  WiFi.disconnect();
  int chan=11;
 // ESP_ERROR_CHECK(esp_wifi_set_channel(chan,WIFI_SECOND_CHAN_NONE));
  Serial.println("ESP32 ESP-Now Broadcast");
  // Initializing the ESP-NOW
// if (esp_now_init() != ESP_OK) { ESP.restart(); return; }
 if (esp_now_init() != 0) {
    Serial.println("Problem during ESP-NOW init");
    return;
  }
 //peer1.channel = chan;
// memcpy(peerInfo.peer_addr, MAC, 6);

  memcpy(peer1.peer_addr, mac_peer1, 6);
  peer1.channel = 0;
  peer1.encrypt = 0;
  // Register the peer
  Serial.println("Registering a peer 1");
  if ( esp_now_add_peer(&peer1) == ESP_OK) {
    Serial.println("Peer 1 added");
  }

}
void loop() {
//
  float humi  = dht_sensor.readHumidity();
  // read temperature in Celsius
  float tempC = dht_sensor.readTemperature();

  delay(2000);
  // Create test data

  // Generate a random integer
  int_value = random(1,20);

  // Use integer to make a new float
  float_value = 1.3 * int_value;

  // Invert the boolean value
  bool_value = !bool_value;

  // Format structured data
  strcpy(msg_from_esp32_01.a, "Welcome to the Workshop!");
  msg_from_esp32_01.b = int_value;
  msg_from_esp32_01.c = float_value;
  msg_from_esp32_01.d = bool_value;
  msg_from_esp32_01.hu = humi;
  msg_from_esp32_01.te = tempC;
//-
  msg_from_esp32_01.red = random(0, 254);
  msg_from_esp32_01.green = random(0, 254);
  msg_from_esp32_01.blue = random(0, 254);
  Serial.println("Send a new message");
  esp_now_send(NULL, (uint8_t *) &msg_from_esp32_01, sizeof(msg_from_esp32_01));
  delay(2000);
//

  // Send message via ESP-NOW
//  esp_err_t result = esp_now_send(broadcastAddress, (uint8_t *) &msg_from_esp32_01, sizeof(msg_from_esp32_01));
//
//  if (result == ESP_OK) {
//    Serial.println("Sending confirmed");
//  }
//  else {
//    Serial.println("Sending error");
//  }
  // read humidity
//-
//

// Callback function called when data is sent
//void OnDataSent(const uint8_t *mac_addr, esp_now_send_status_t status) {
//  Serial.print("\r\nLast Packet Send Status:\t");
  //Serial.println(status == ESP_NOW_SEND_SUCCESS ? "Delivery Success" : "Delivery Fail");
}
//-
![]()
![]()
1 Likes
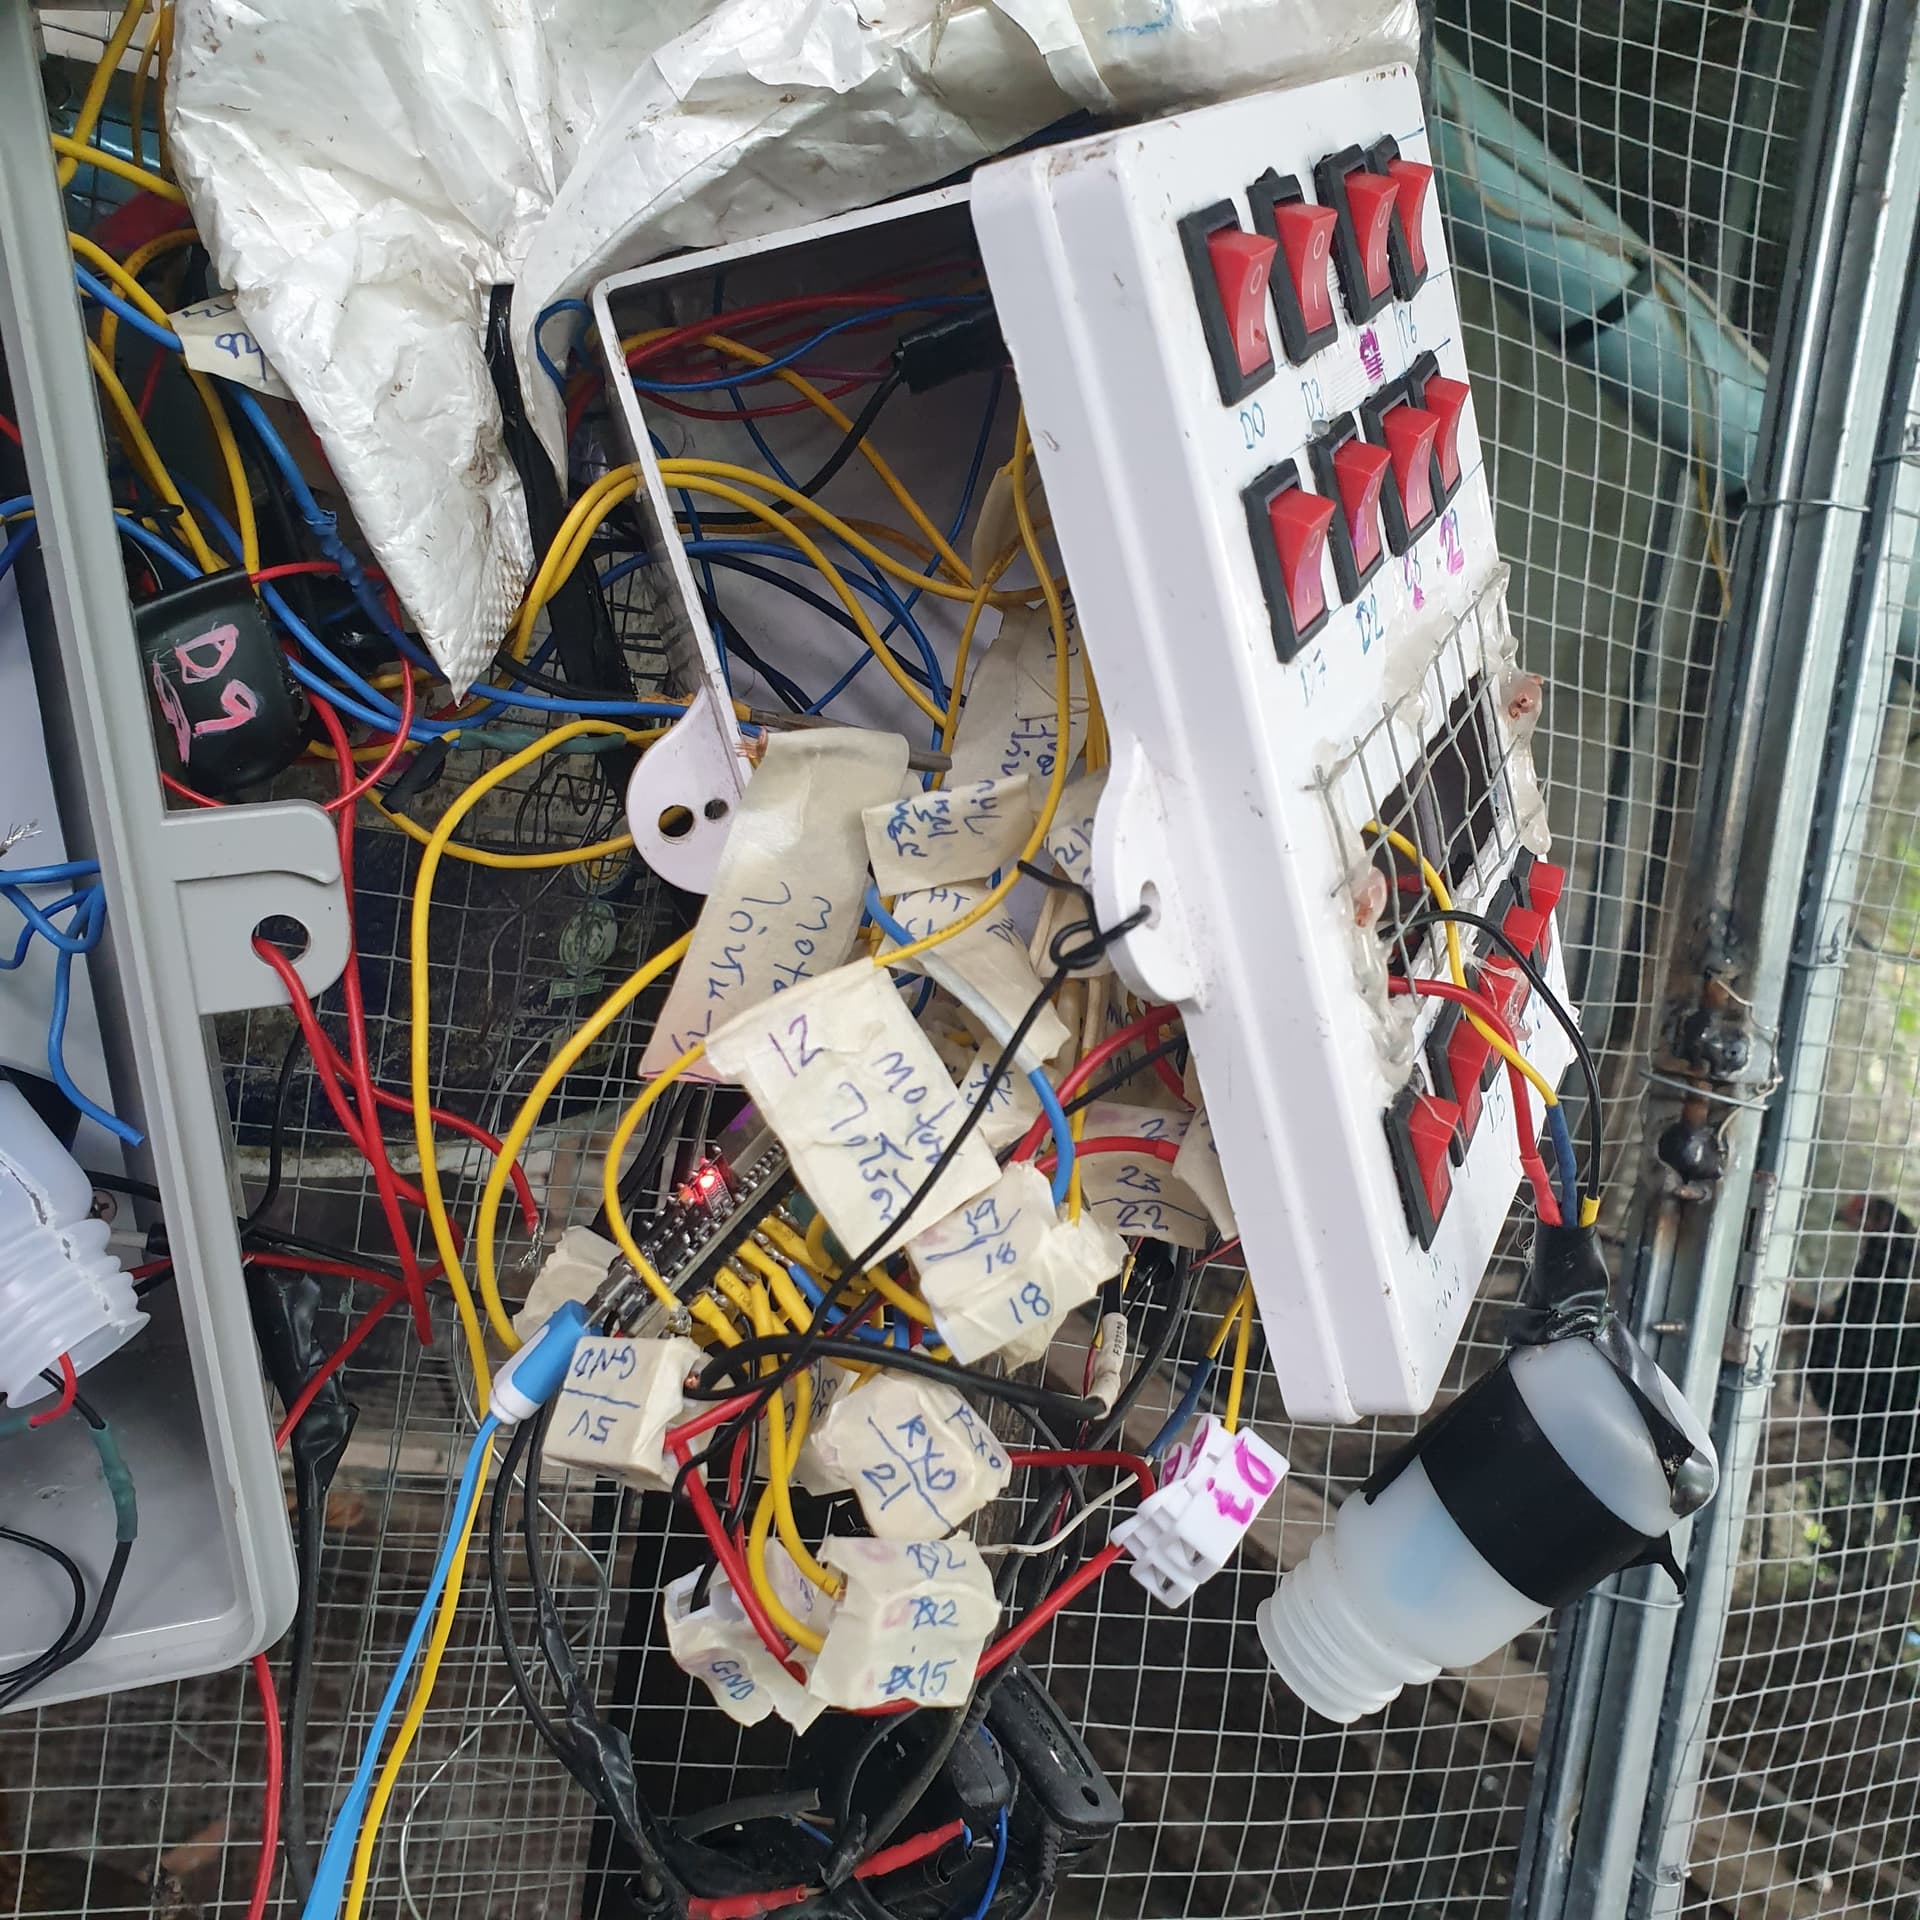
8สค.65
ได้ย้ายโค้ดเดิมที่มีเรื่อง mcp23017 ,ตอนนี้เอาออกหมดแล้ว เช้าบ้านใหม่ ESP32
ใช้เวลาครึ่งวัน
-และต่อสายไฟที่ขาด3เส้น
-และเขียน label สายไฟใหม่หมด เพราะของเดิมใช้ไม่ได้แล้ว
-หมดไป1วันพอดี
-ได้อัพโหลด และดูใน Blynk ทำงานปกติ แต่ยังมีบางงานที่ต้องแก้ไขต่อ
9สค65
ในโปรเจ็กนี้ มี ESP8266 เจ้าเก่า กับตัวใหม่ ESP32 พบมีความแตกต่างกันของการใช้ไฟ
ไฟจาก แบต 18650 ที่สำรอง นั้นปล่อยที่ 3.9-4.0V นั้น ESP8266ทำงานได้ปกติ แต่ ESP32ไม่ทำงาน
ผมต้องใช้สายUSBป้อนจาก wall charge ให้ไฟอยู่ที่ อย่างน้อย 4.5V ESP32 ถึงจะเริ่มทำงาน
ผมขอถามเพื่อนๆ ใช้แบตลิเธียมแบบไหนดีเพื่อสำรองไฟให้กับ ESP32 ขอบคุณครับ
ผมเห็นบางเว็บใช้โมดูลdc dc stepup
ผมลองสั่งจากช้อปปี้มาลองใช้ดู ถ้าได้ผลประการใด จะเล่าให้ฟังครับ
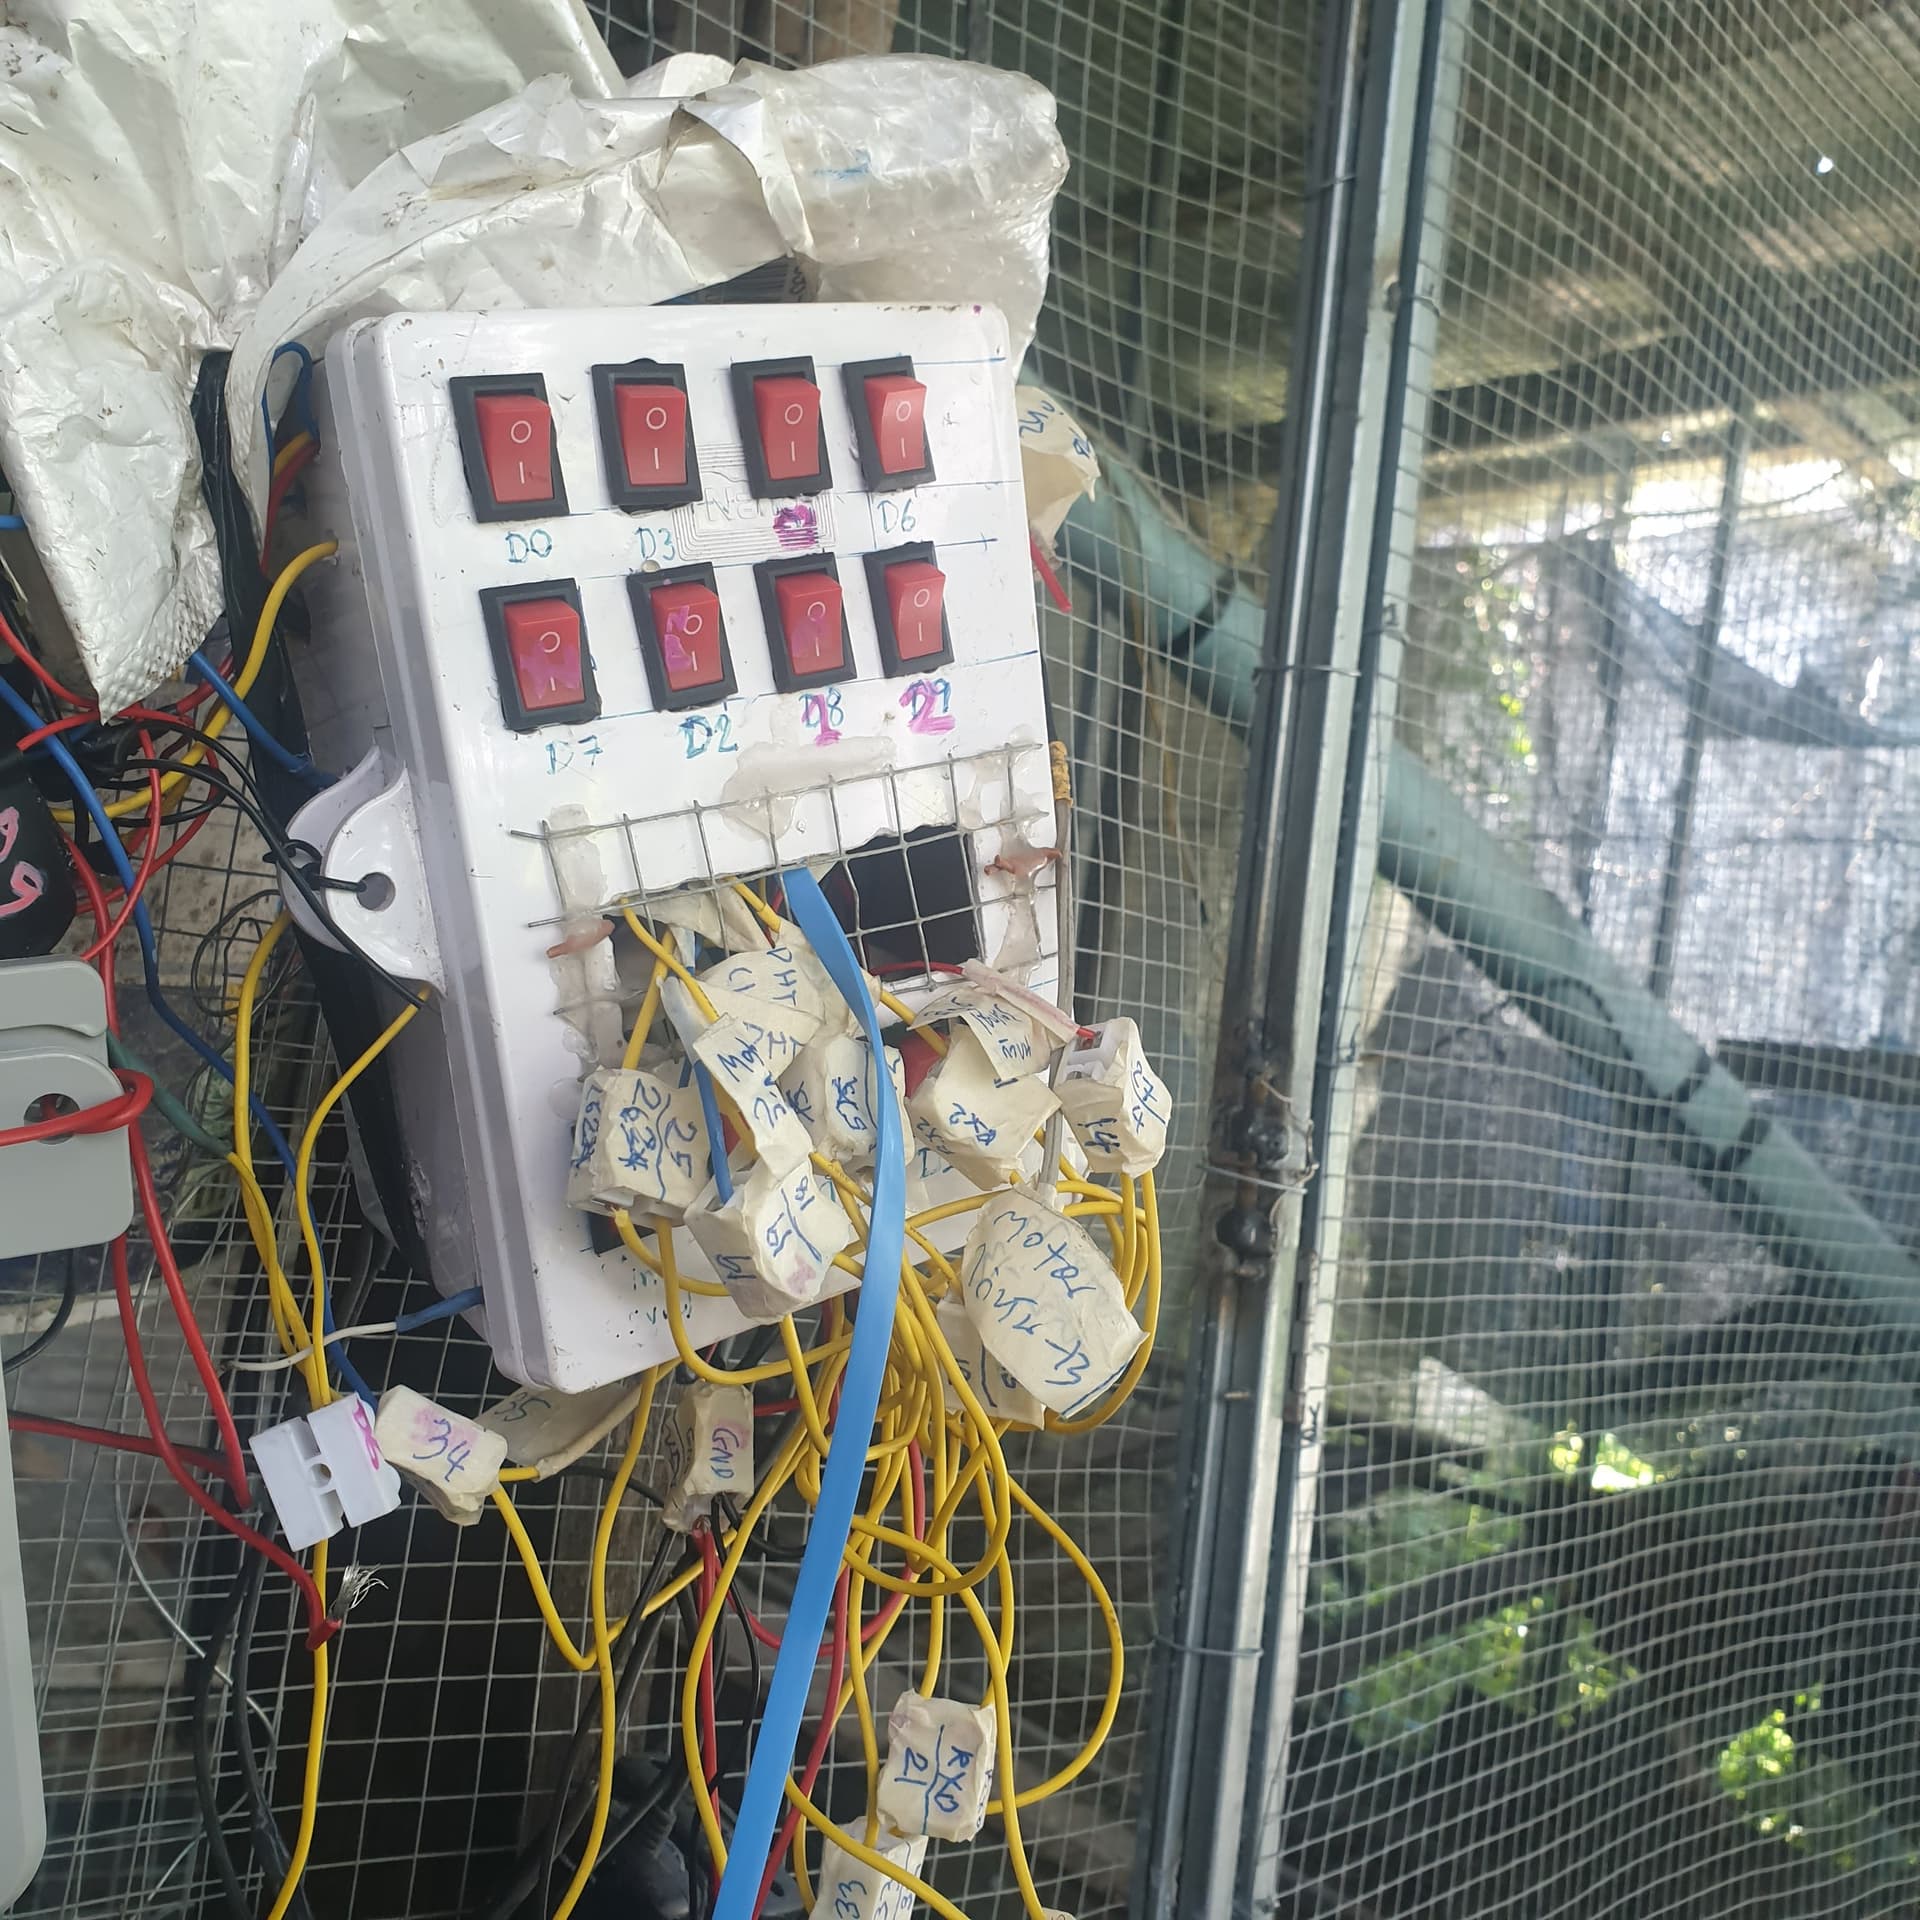
ปัญหาข้อ2
หลังจากต่อสายต่างๆ เข้ากับpin จำนวนมาดของesp32 จนเหลือแค่2pinที่ยังไม่ต่อ
ทำให้ปิดตู้ไม่ได้ 555
10สค65
ได้ต่อสายให้ยาวขึ้นให้ลูกเต๋าอยู่นอกกล่อง
สามารถปิดฝากล่องได้แล้ว
ปัญหาอุณหภูมิจากรังลูกไก่
ขึ้นคำว่า nan..
เลยดูdht11ของรังลูกไก่
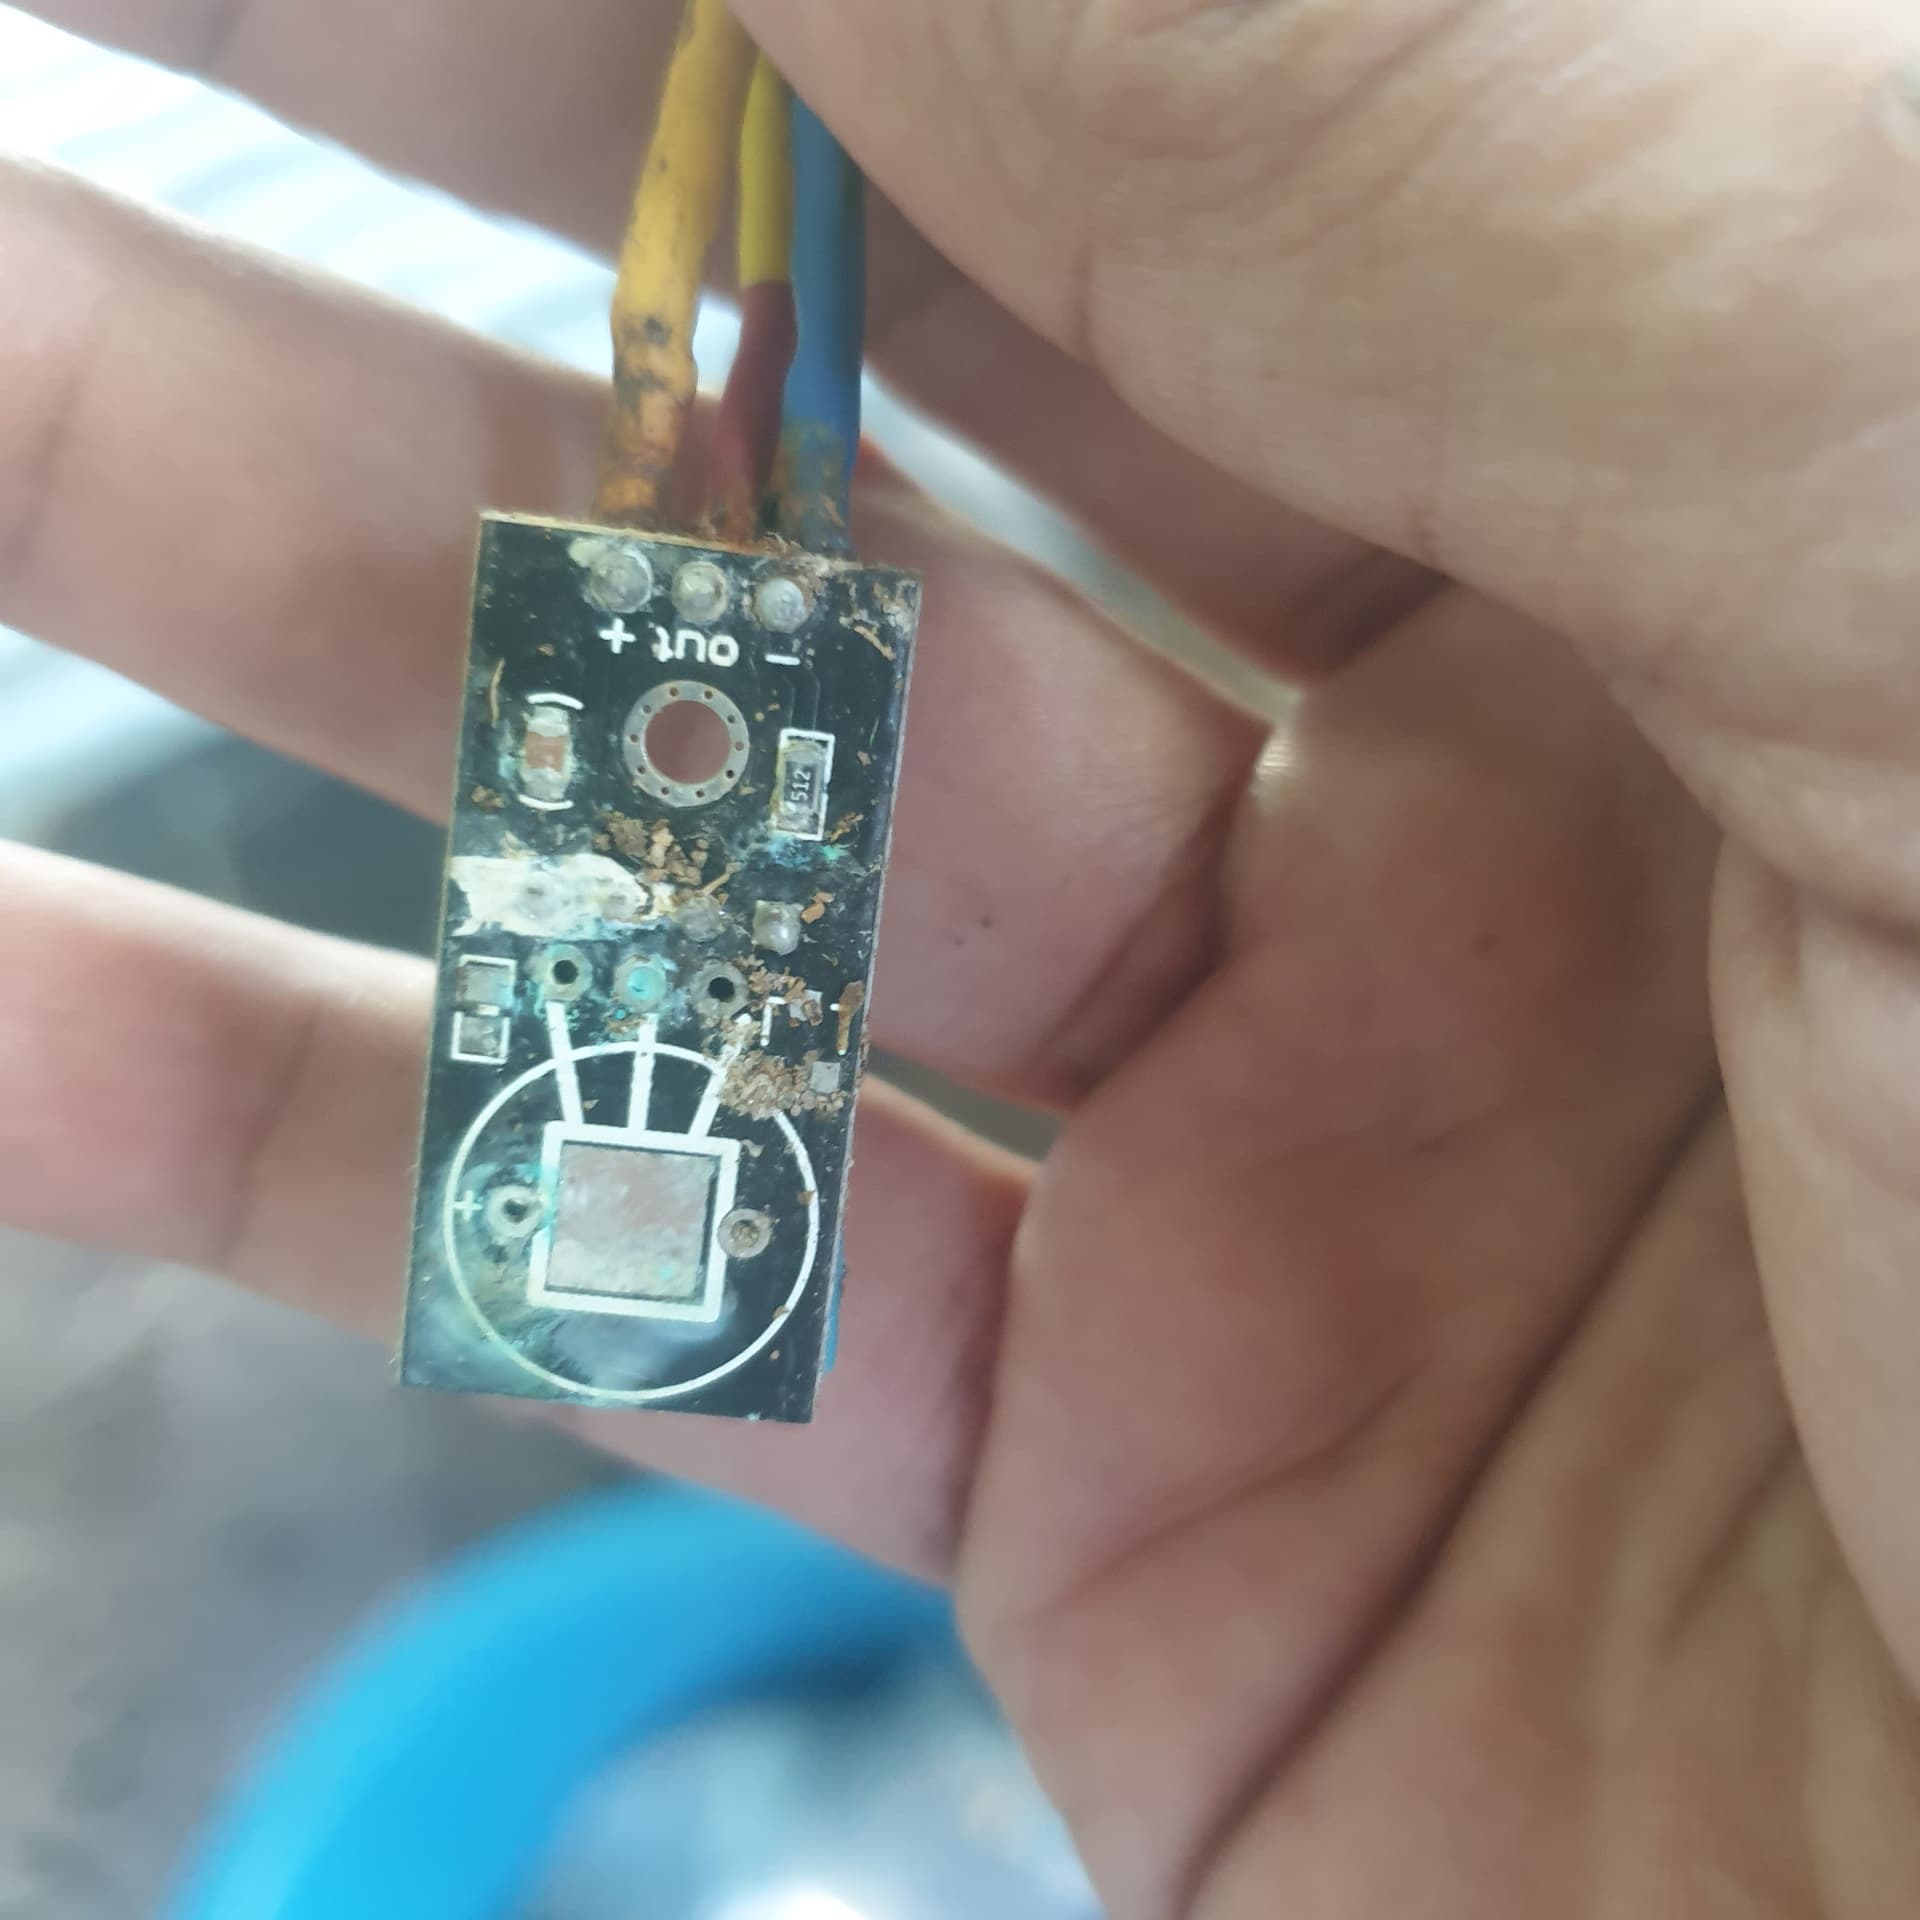
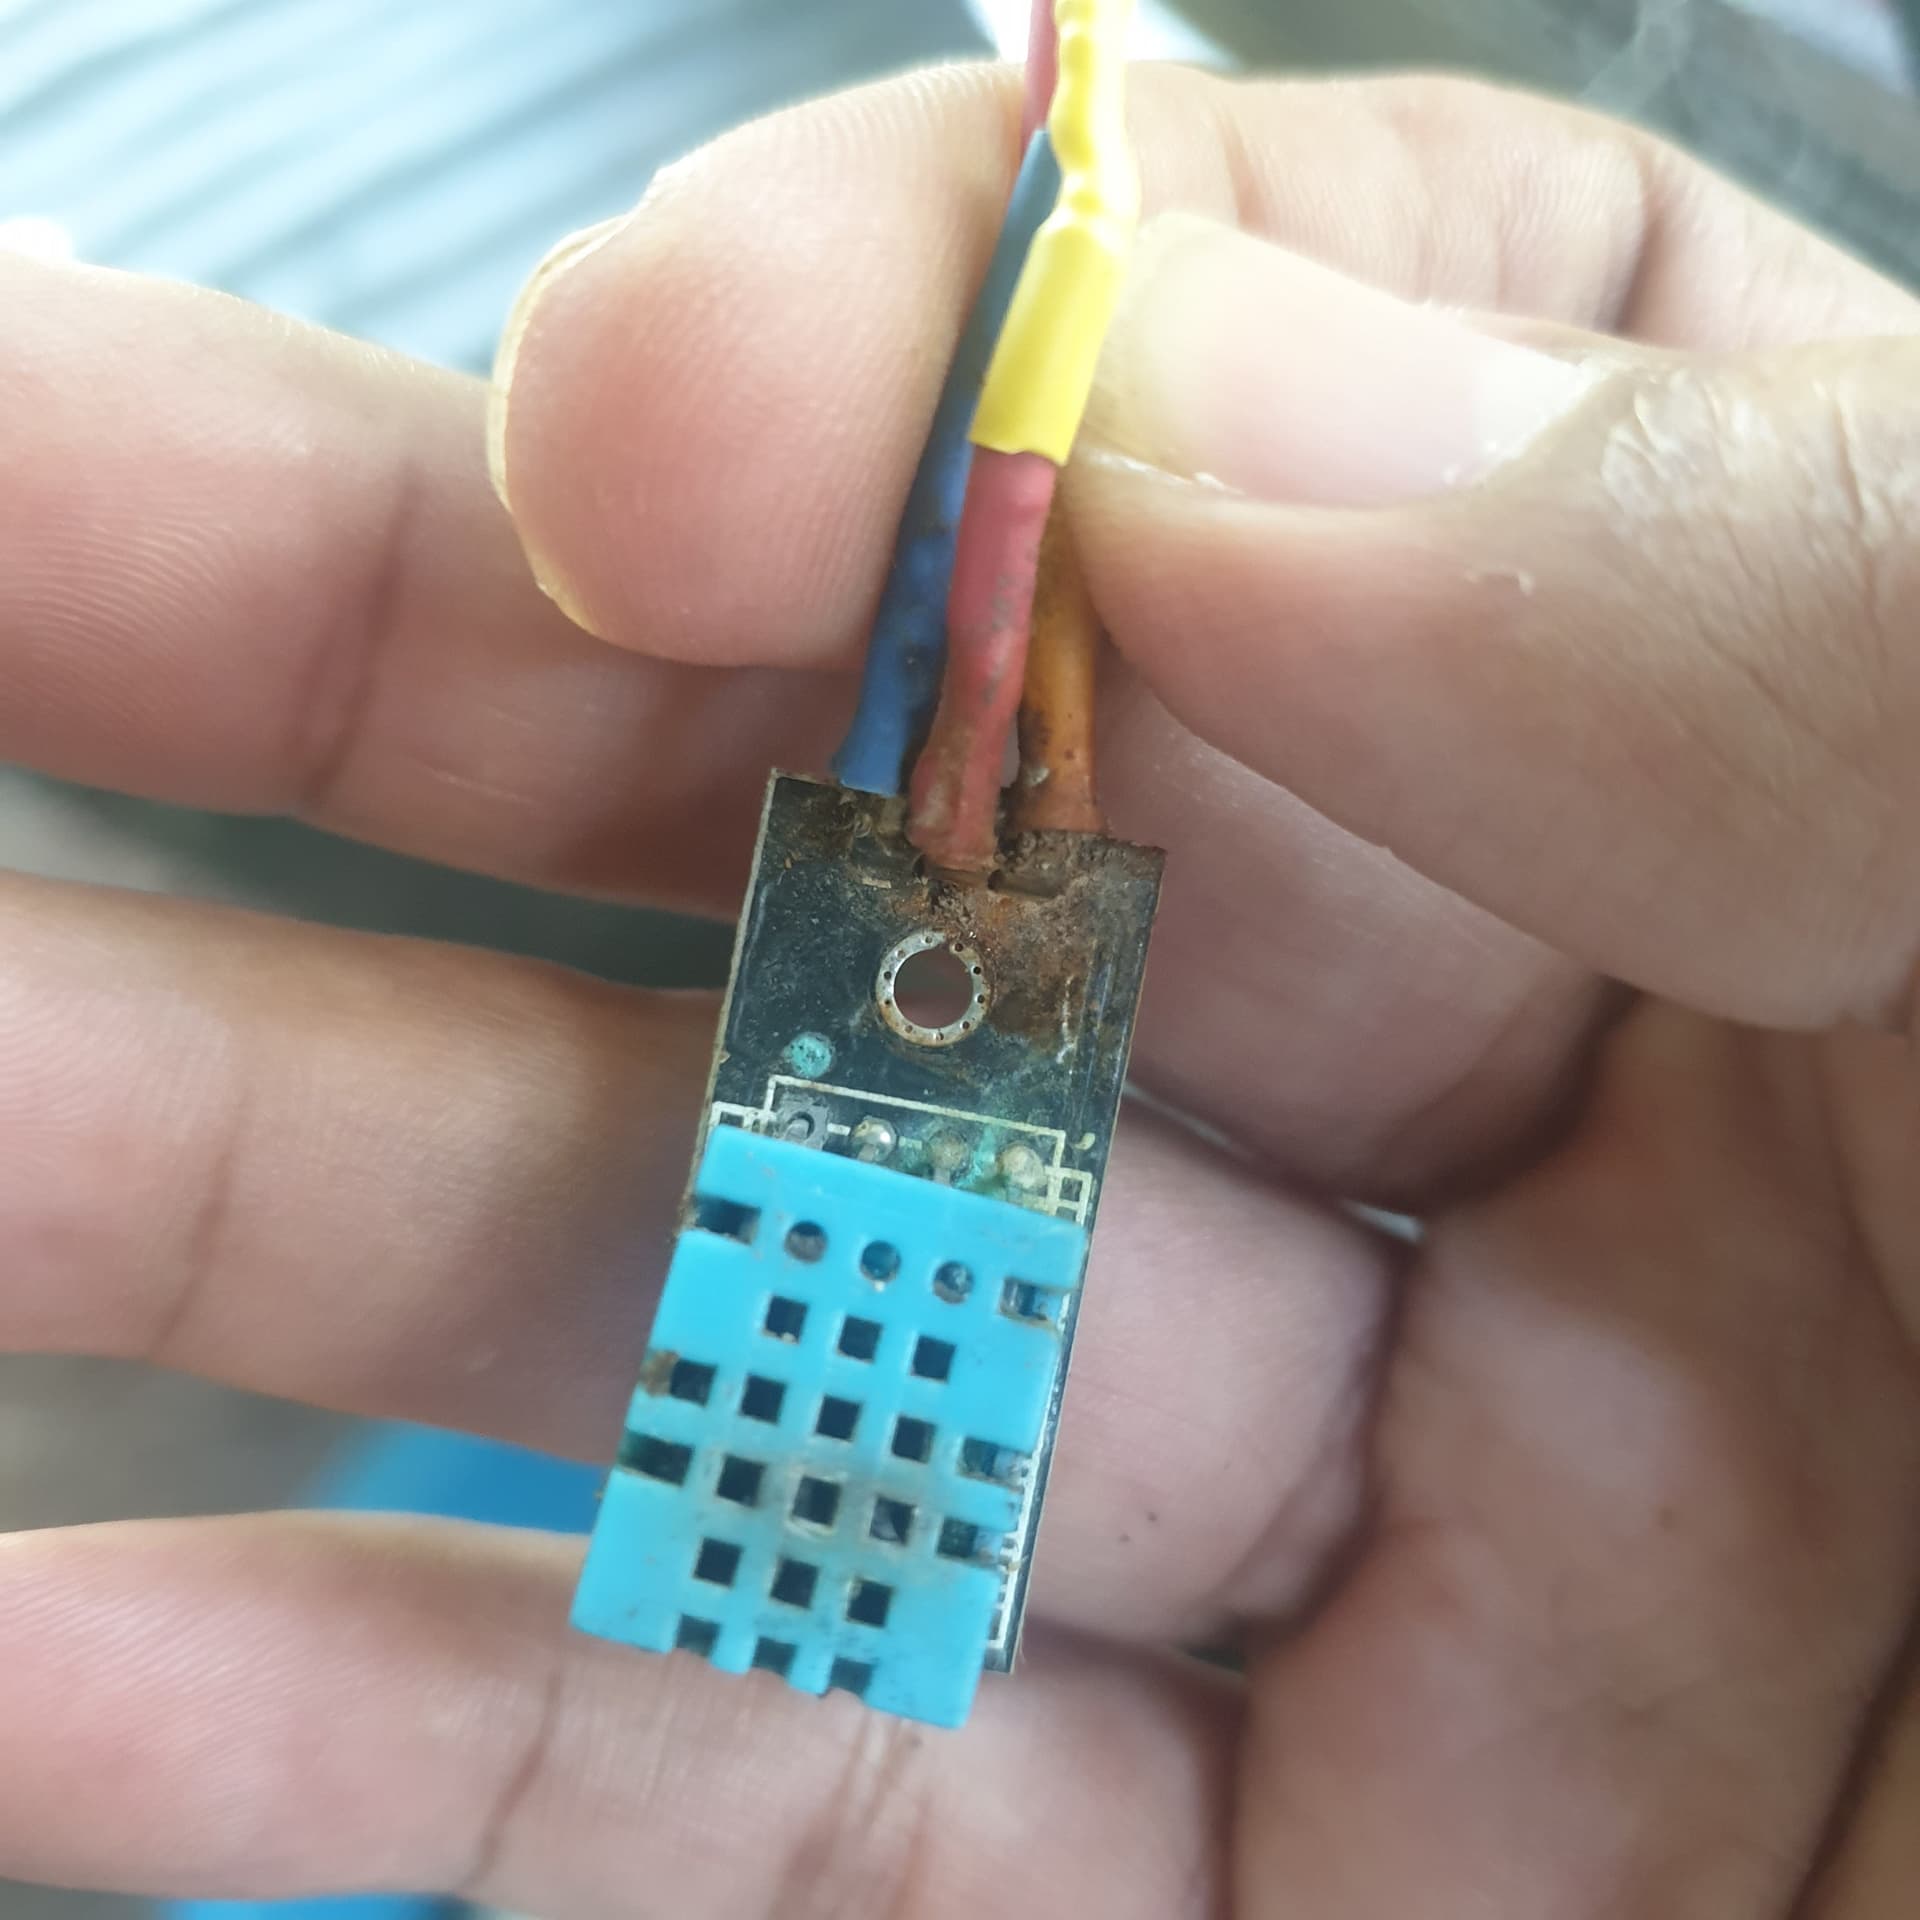
มีคำเฉลยในตัว555
โดนฝนจากหลังคารั่ว
10สค65
หลังจากเอาโค้ด espnow มายำกับโค้ดเดิมที่ติดต่อblynk ทั้งฝั่งesp8266 และesp32 ซึ่งทั้งการติดต่อblynkอยู่แล้ว
ผลปรากฏว่า ทั้งคู่ไม่สามารถต่อblynk serverได้, แต่ทำงานแบบออฟไลน์ได้
ไม่ทราบว่าเพื่อนๆเจอปัญหาแบบนี้ไหมครับ
ผมลองเสิร์ชในเน็ต คนอื่นมีปัญหาแบบนี้เหมือนกัน คือไม่สามารถ ใช้espnow พร้อมๆกับblynk ในเวลาเดียวกัน ![]()
น่าเสียดายจริงๆ เรานี้ฝันสลายเลย
สุดท้าย ณ ตอนนี้ ถ้าอยากใช้blynk ต้องไม่ใช้espnow แปลว่า ทำงานแบบ stand alone ถ้าpinไม่พอ ต้องเพิ่มnodemcuและ แยกโปรเจ็คblynkของใครของมัน
ใครมีคำแนะนำบ้างไหมครับ
อัพเดต
เจอบางคนแนะนำให้เซ็ตเราเตอร์ให้อยู่channal 1, ไม่ใช่auto
11สค65
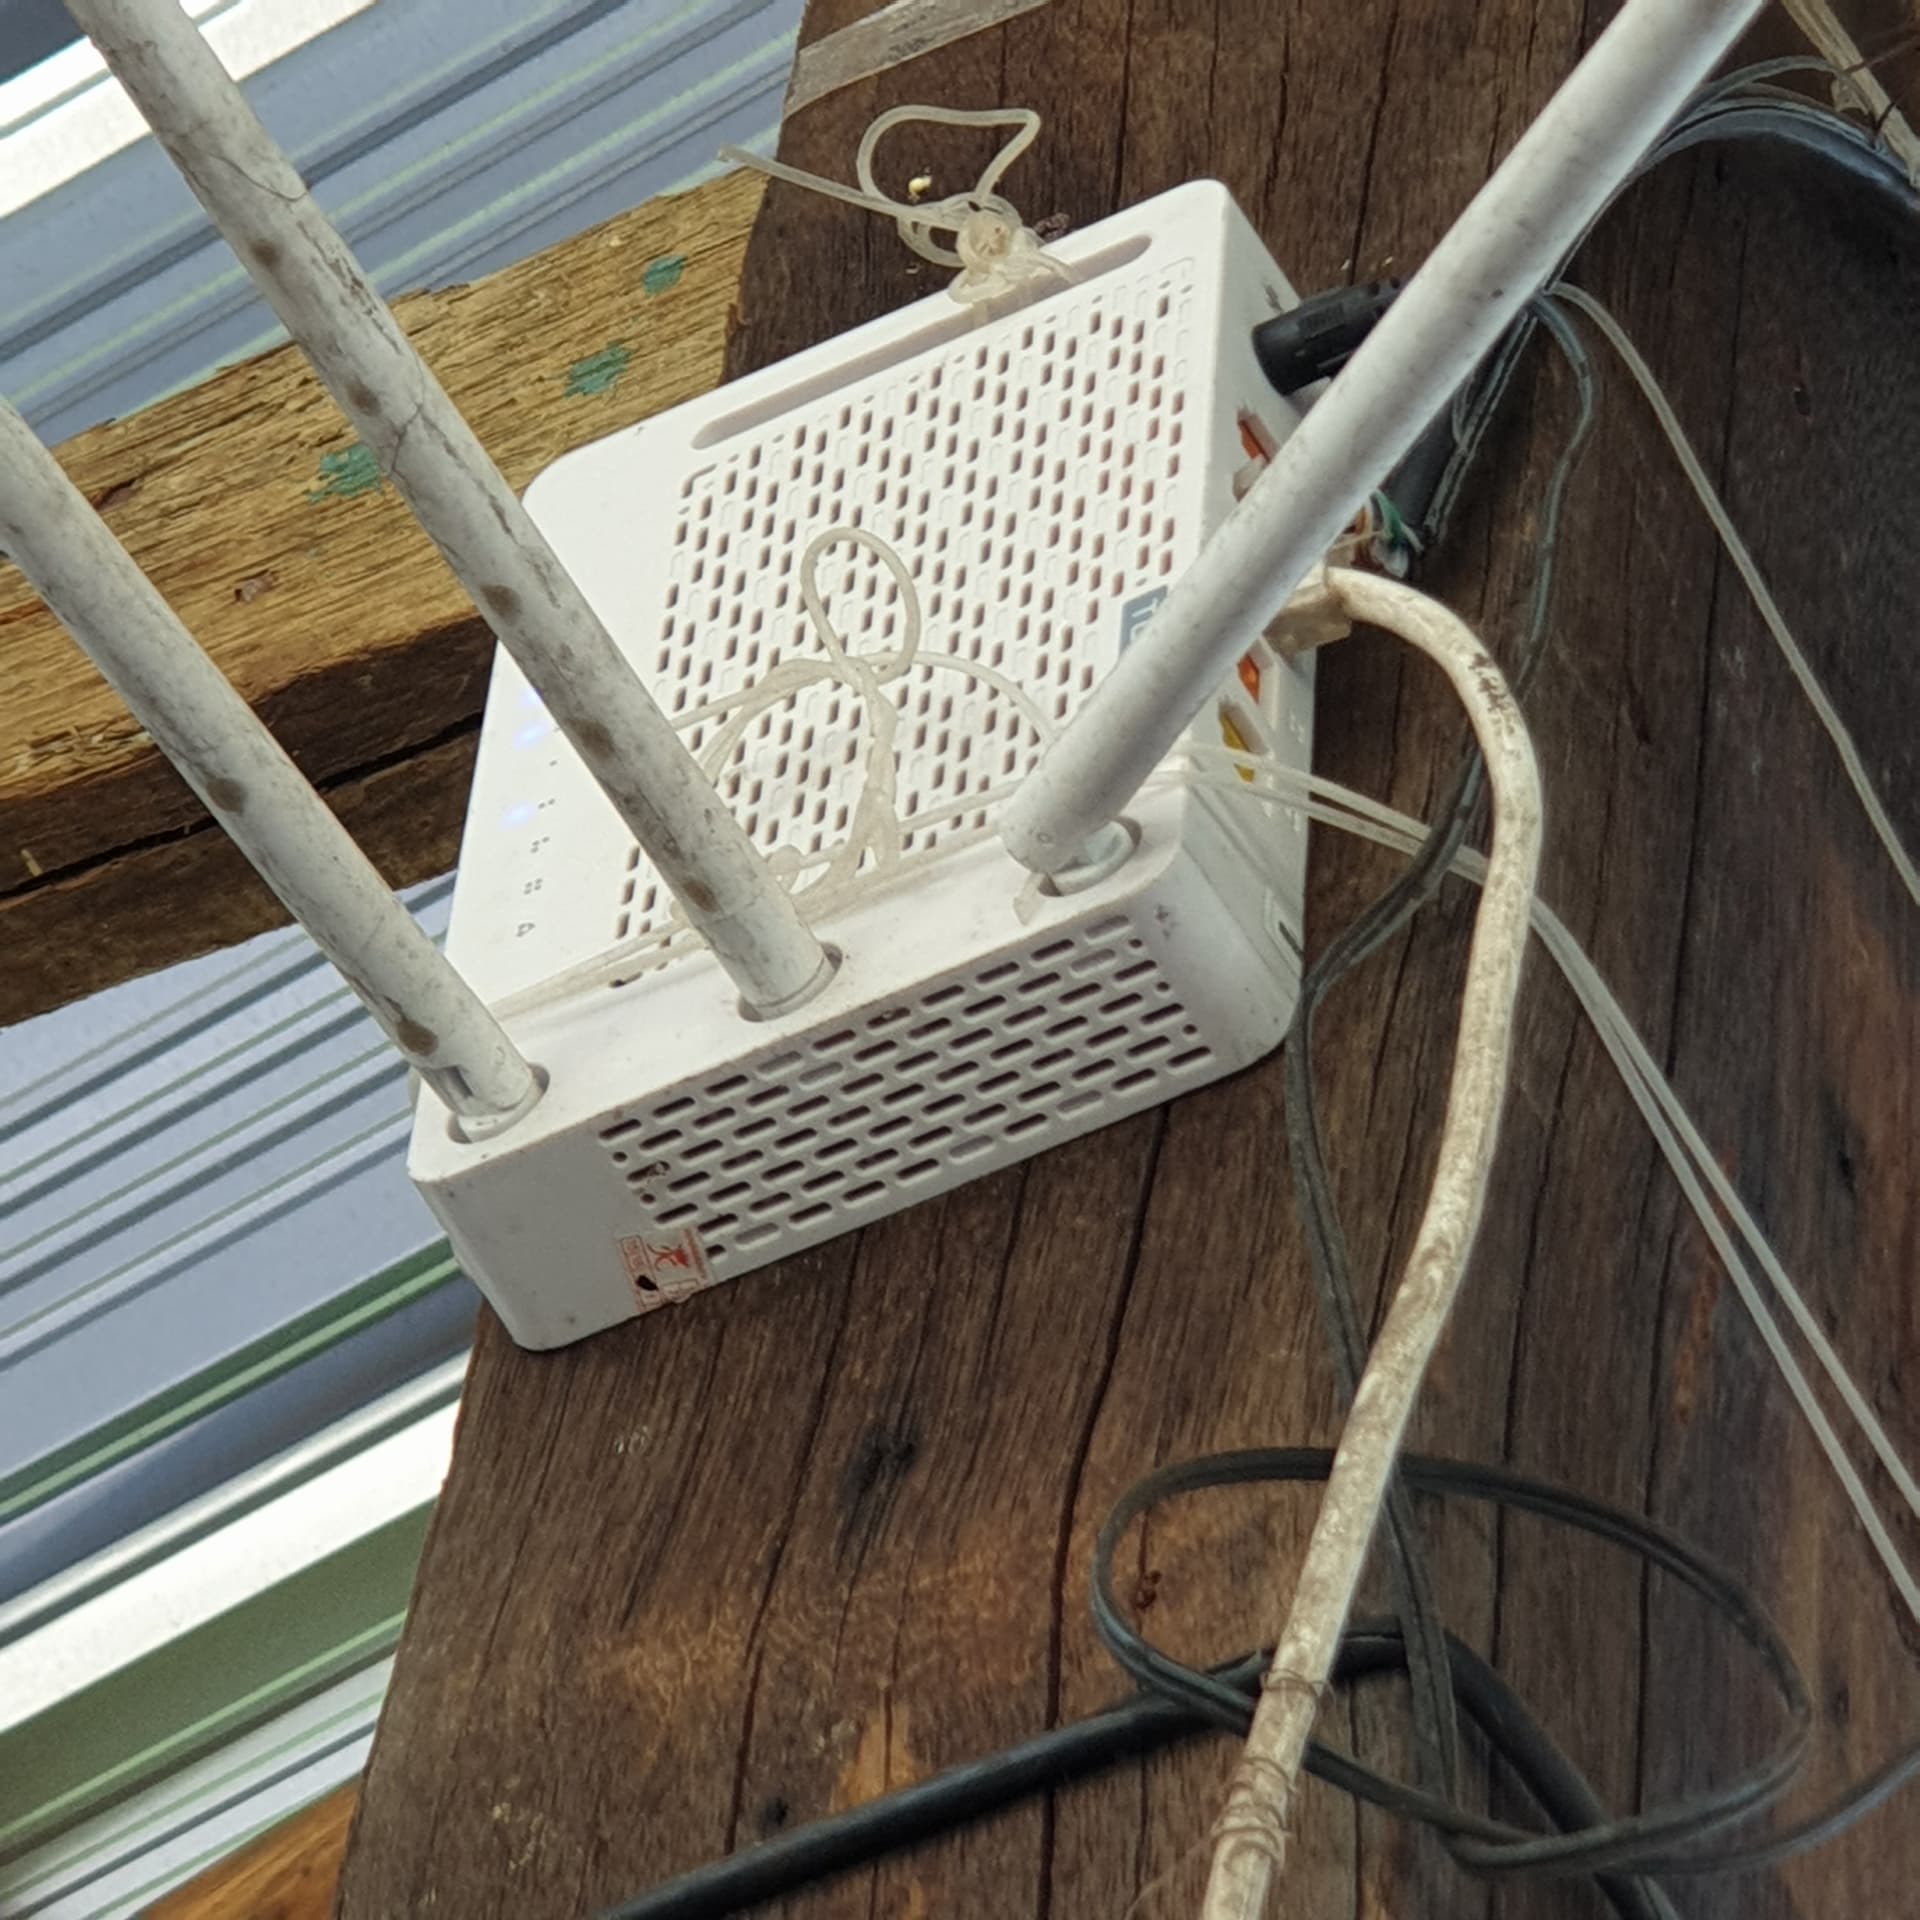
จะลองsetup channel ในเราเตอร์ดู

-ใส่user, passให้เรียบร้อย
-ไปหัวข้อwifi
-เลือก channel width = 20 mhz

-เลือก channel number =1
-reboot
16สค65
หลังจากได้ลองใช้ esp now และพ่วง blynkไปด้วย ผมยังยำโค้ดได้ไม่ดี
เท่าที่ดูโค้ด และได้ลองทำแล้ว ผมว่า มันเป็นกันสลับmode station กับ ap_sta ซึ่งมีการตัดต่อ wifi ตลอดเวลา และแน่นอน
blynk server ก็มีการตัดต่อตามไปด้วย ทำให้ ถ้าเราดูใน blynk มันรำคาญที่เด๊๋ยวตัด เดี๋ยวต่อ ทำให้ค่าต่างใน blynk
ไม่realtime(ไม่ทันอัพเดต ) และต่อมา มันจะออฟไลน์จากblynk ตลอดเลย อันนี้แย่สุดเลย
จนกว่าเราจะมารีเซ็ตที่หน้างาน 555
อีกอย่างเป็นการเพิ่มภาระให้กับ blynk server เปล่าๆ…
ผมตอนนี้ ขอถอยใช้แบบเดิมๆ คือ 1 nodemcu ต่อ 1 blynk authentication ครับ…ดูใน blynk แล้วสบายใจกว่ามาก
เดี๋ยว เรื่อง esp now ค่อยๆ ศึกษาไป และลองไปเรื่อยๆ…ขอบคุณครับ
ไม่ทราบว่าเพื่อนๆเจอปัญหาแบบนี้ไหมครับ
ผมลองเสิร์ชในเน็ต คนอื่นมีปัญหาแบบนี้เหมือนกัน คือไม่สามารถ ใช้espnow พร้อมๆกับblynk ในเวลาเดียวกัน
น่าเสียดายจริงๆ เรานี้ฝันสลายเลย
จริงๆ มันไม่น่าเกี่ยวกันเลยนะครับ potocal มันก็ไปคนละทาง รึมันใช้คำสั่งอะไรที่มันไปซ้ำกัน เลยมีปัญหา ต้องมาเทียบกัน by code basic ก่อน
ผมทำได้แล้วนะครับ ลองเข้าไปศึกษาจากในนี้เลยครับ ผมเองก็ไม่มีพื้นฐานการเขียนเลย ไม่รู้จะอธิบายอย่างไรครับ อาศัยก็อปแล้วประยุกต์ในส่วนที่ตัวเองพอเข้าใจ เบื้องต้น ต้องใช้ 3 บอร์ดครับ
บอร์ดส่ง ESP NOW >>> บอร์ดรับ ESP NOW แล้วแปลงส่งออกผ่าน RX,TX >> บอร์ดรับ RX,TX แล้วส่งออก Blynk ครับ ประมาณนี้ครับ ผิดถูกต้องขออภัยครับ

1 Likes
เยี่ยมครับจริงๆ แยก 2 บอร์ดทำได้แน่ๆ แต่จะมีปัญหาการส่งข้อมูลที่ยุ่งยากขึ้น แต่ถ้าไม่ได้จริงๆ คงต้องใช่วิธีนี้
ขอบคุณครับ
ผมติดตรงนี้ ไปต่อไม่ได้
Arduino: 1.8.19 (Windows Store 1.8.57.0) (Windows 10), Board: "NodeMCU-32S, 80MHz, 921600, None"


In file included from C:\abee_esp32\BLYNK-ESP\BLYNK-ESP.ino:24:

C:\abee_esp32\BLYNK-ESP\BlynkEdgent.h:3:12: fatal error: user_interface.h: No such file or directory

   #include "user_interface.h"

            ^~~~~~~~~~~~~~~~~~

compilation terminated.

exit status 1

Error compiling for board NodeMCU-32S.


This report would have more information with
"Show verbose output during compilation"
option enabled in File -> Preferences.
ขอดูโค้ดของพี่หน่อยว่า เป็นแบบไหน
ไม่ทราบ ว่า ใช้ blynk legacy หรือ blynk.io ครับ
เพราะจากคลิป ตย. เป็น blynk.io
ของผมเป็น blynk lrgacy (เก่า)
